I love delegated authentication. I strongly feel that this is one of the priorities that the ASP.NET Core team got right by "forcing" or better coercing developers and companies to use an external service to manage user authentication and authorisation. The right route. Why? Only a couple of days T-Mobile Austria made the news (and Twitter news) for claiming that they have "Amazingly Good Security" while storing users' passwords in clear text! You can read all about it [here](https://motherboard.vice.com/en_us/article/7xdeby/t-mobile-stores-part-of-customers-passwords-in-plaintext-says-it-has-amazingly-good-security" target="_).
However, we're not here to lament on other peoples' bad security. There are too many things wrong with this example but at least I feel warm and happy inside because ASP.NET Core is trying to promote best-practices through the use of 3rd party authentication services.
Delegated authentication would solves many of the problems with the example above and so many other scenarios around authentication and authorisation. It's no surprise then that for me it's the de-facto and recommended way to manage users for any system. There are plenty of options to choose from:
- Azure AD
- Active Directory (on-prem or in the cloud)
- Identity Server
- Auth0
I blogged about how to [secure .NET Core apps with Auth0](GHOST_URL/net-core-authentication-and-authorisation-using-auth0/" target="_blank) a couple of weeks ago.
Today we'll examine how to implement SAML authentication against Azure Active Directory. It could also be any other Identity Provider (IDP) that supports SAML2. There are many scenarios that you may want/need to use SAML so hopefully this post will explain how to achieve this.
FYI, in case you're interested, full, native support for SAML2 was added to .NET Core only recently (requires 2.0) so if you're starting now you're in the good position to have everything in place.
Azure AD Configuration for SAML
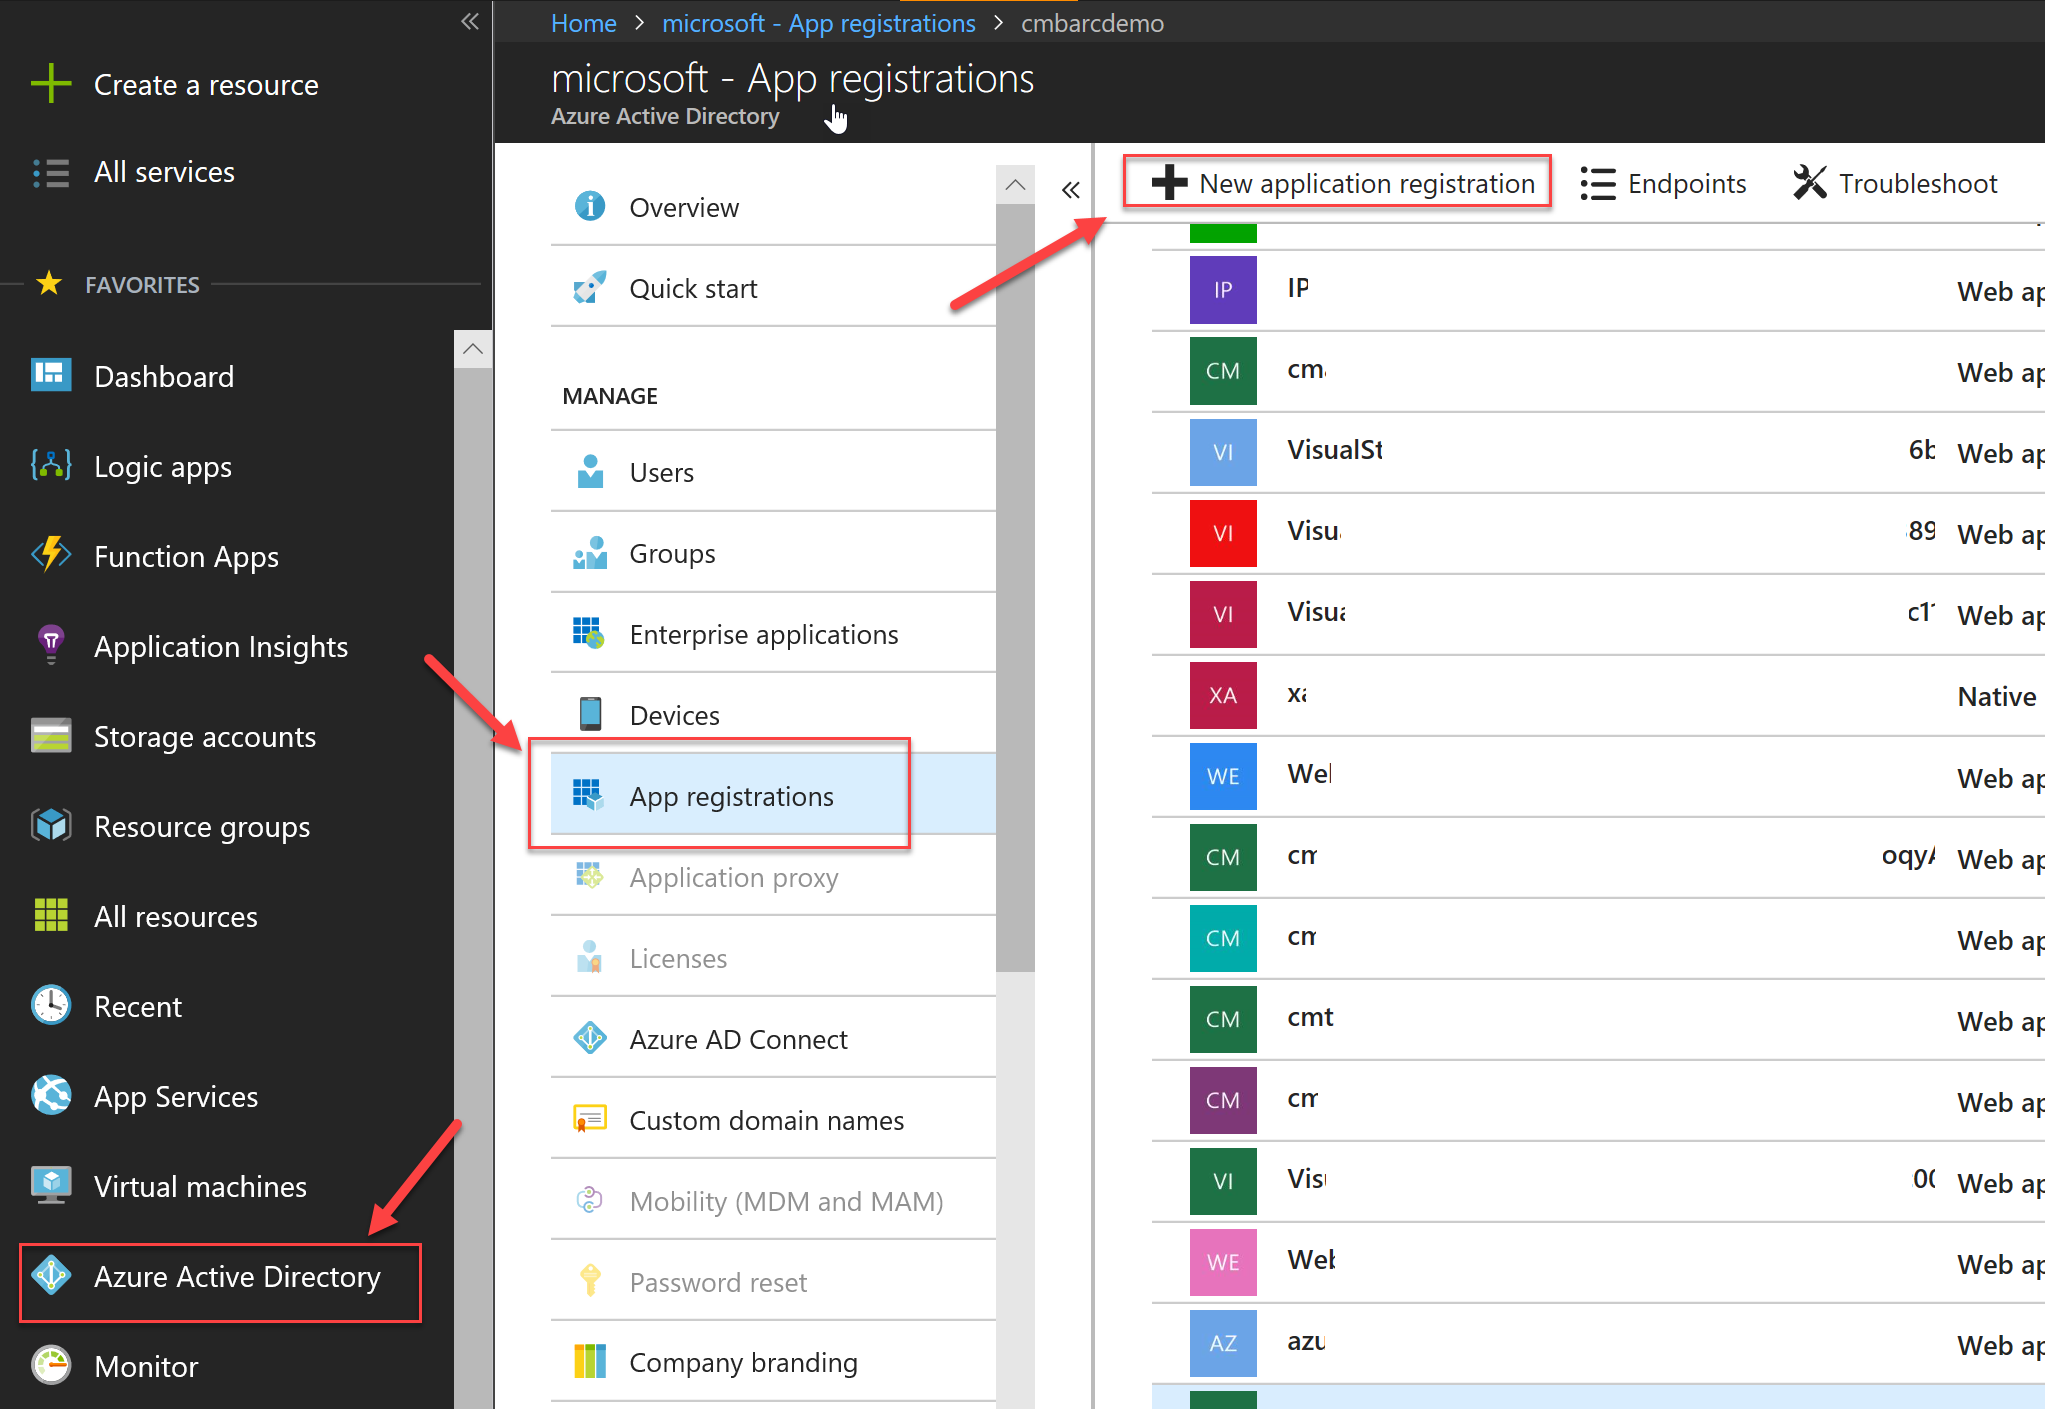
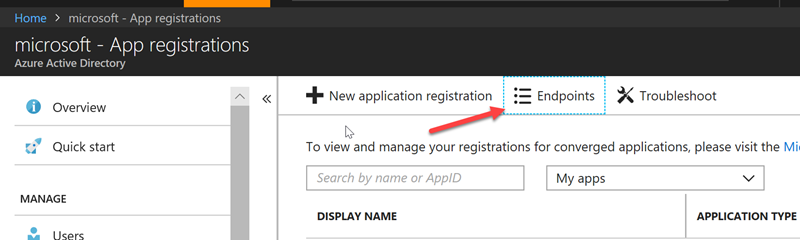
In order to be able to authenticate against our Azure AD tenant, we need to create an AD Application. Go to the Azure Portal and navigate to Active Directory. Next select App Registrations and press the New Application Registration
Enter a name to uniquely identify your application and then enter the URL under which your application is/will be running. This is an important step so if you already have a project that you want to add authentication you can grab the existing HTTPS endpoint URL+Port combo. If you're planning on creating a solution/project after this step, then feel free to use a (valid) port of choice.
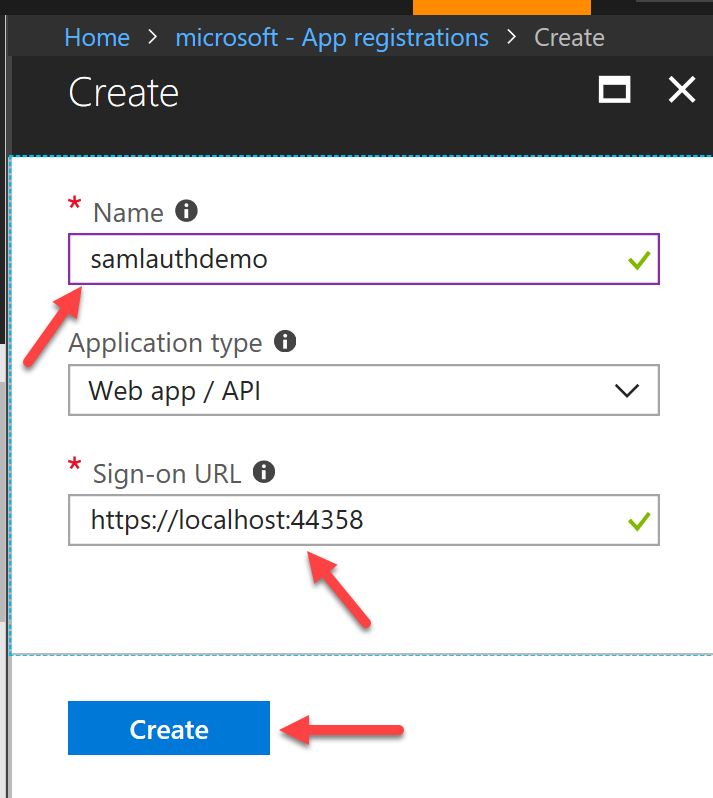
IMPORTANT: you need to ensure that your site runs over HTTPS or otherwise WS-Federated authentication (i.e SAML) will fail. A valid URL should look like this: https://localhost:
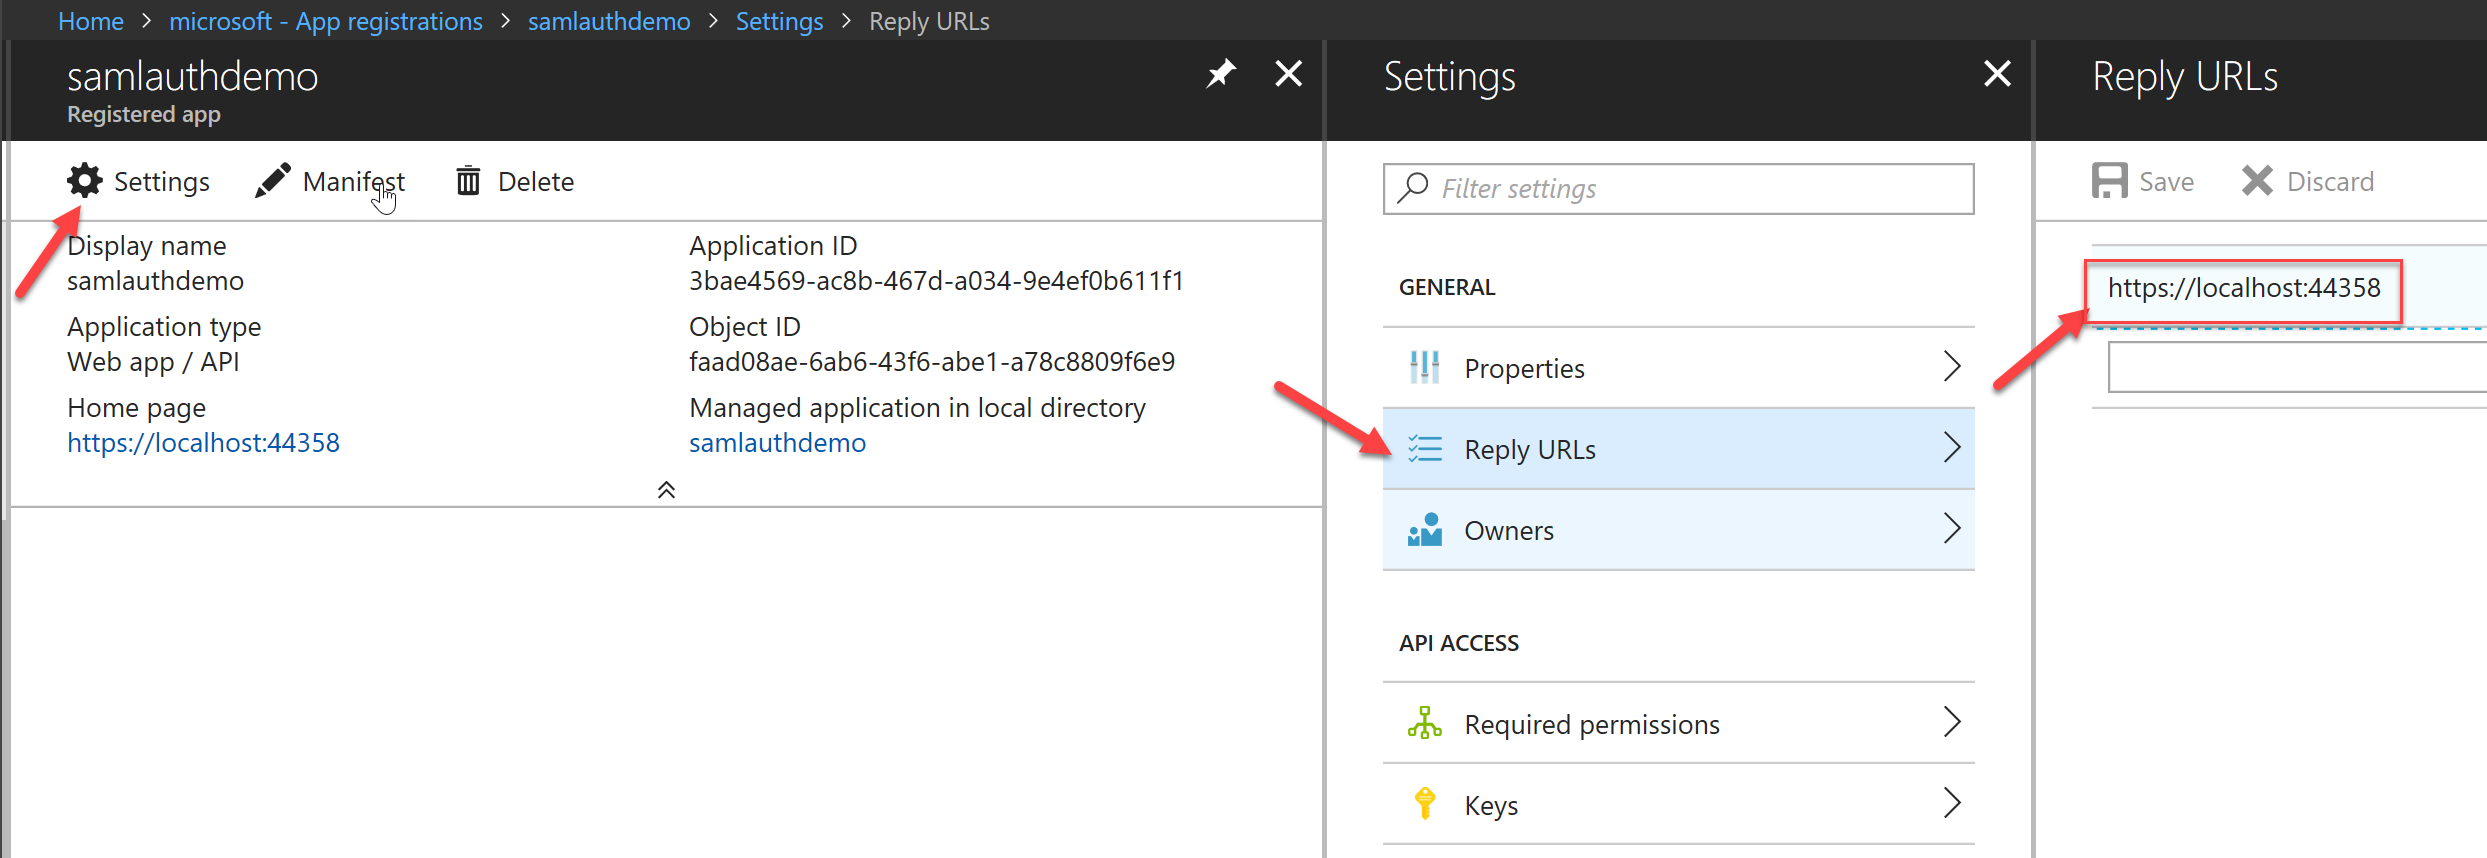
Next, we need to ensure that the Reply URLs have been set up correctly. You can have multiple URLs per app and that's absolutely OK if you wish to reuse the same Application in development for authentication. When you create the Azure AD application the first time, it will automatically set the Reply URLs but it's always prudent to check anyway.
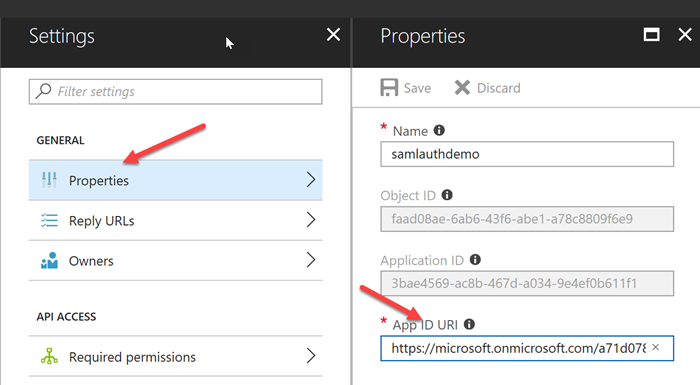
Finally, we need to grab 2 pieces of information that will be used in our code to communicate with Azure AD during authentication. The first is the App ID URI. Within the Application in Azure AD, navigate to Settings -> Properties -> App ID URI and copy the value
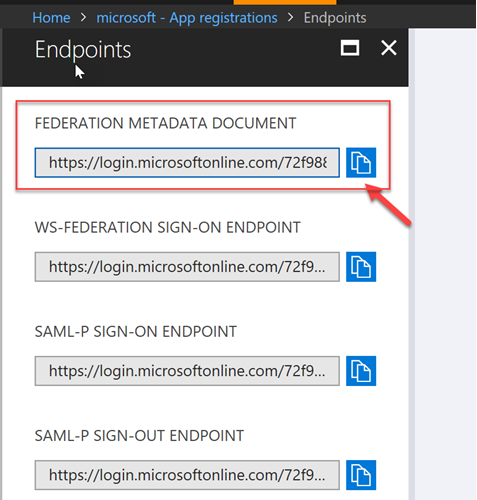
The second value we need is the Federation Metadata Document. This can be found under the App Registrations blade, in the Endpoints section. Select Endpoints and then the Federation Metadata Document as per the screenshots below.
Add WS Federated (SAML) authentication to .NET Core
When working with WS-Federation in .NET Core, we have the choice to
- Add WS-Fed as an external login provider for ASP.NET Core Identity
- Use WS-Fed without ASP.NET Core's Identity.
The first choice does a lot for us out-of-the-box while the second requires that the developer implements certain bits him/herself. If you want to use Option 1 then there's a great post that explains how to do it [here](https://docs.microsoft.com/en-us/aspnet/core/security/authentication/ws-federation#add-ws-federation-as-an-external-login-provider-for-aspnet-core-identity" target="_blank). With Option 1 you work directly with [ASP.NET Core Identity](https://docs.microsoft.com/en-us/aspnet/core/security/authentication/identity?tabs=visual-studio%2Caspnetcore2x" target="_blank) with all the pros and cons that come with it.
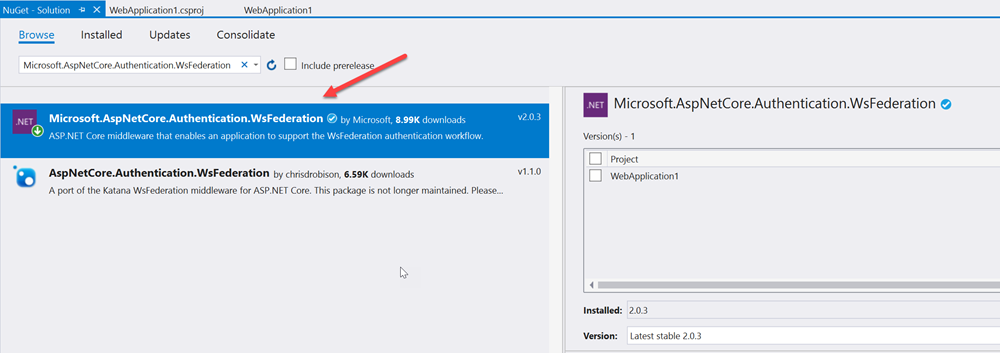
In this post, we'll use the WS-Fed library directly for SAML authentication. In our ASP.NET Core project we need to add the appropriate WS-Fed NuGet package:
Microsoft.AspNetCore.Authentication.WsFederation
Next we need to add a self-signed certificate and configure that for Kestrel, if you're not running under IIS/IIS Express. You can follow this [quick blog post](GHOST_URL/enforcing-https-only-traffic-with-asp-net-core-and-kestrel/" target="_blank) that explains how to set up HTTPS end-to-end for an ASP.NET Core application.
As long as the port used in the Kestrel configuration and the one defined in the project settings for IIS are consistent and match with the port defined in the Azure AD application, then we're good to go
Open up the Startup.cs class and add the following code in the ConfigureServices() method to wire up the SAML authentication
public void ConfigureServices(IServiceCollection services)
{
        services.AddAuthentication(sharedOptions =>
        {
             sharedOptions.DefaultScheme = CookieAuthenticationDefaults.AuthenticationScheme;
             sharedOptions.DefaultSignInScheme = CookieAuthenticationDefaults.AuthenticationScheme;
             sharedOptions.DefaultChallengeScheme = WsFederationDefaults.AuthenticationScheme;
       })
       .AddWsFederation(options =>
       {
	  // this is where your AppID URI goes
             options.Wtrealm = "https://microsoft.onmicrosoft.com/5b60c247-398e-4c00-9ba4-a8xxxxxxxx4d1";
             options.MetadataAddress = "https://login.microsoftonline.com/72f988bf-xxxx-41af-91ab-xxxxxxxxxxdb47/federationmetadata/2007-06/federationmetadata.xml";
       })
       .AddCookie();

       services.AddMvc();
}
We also need to instruct the ASP.NET Core to use our Authentication middleware, so inside the Configure() method, add the following line of code
public void Configure(IApplicationBuilder app, IHostingEnvironment env)
{
     //… omitted for clarity

     app.UseAuthentication();

    // … omitted for clarity
}
At this point, that's all we need to do in terms of configuration. Our ASP.NET Core code is ready and wired up to Azure AD to authenticate over SAML. However, we need a way to help users interact with our login/logout workflow. Open the Views -> Shared -> _Layout.cshtml View and add the following HTML/Razor code in the Navigation bar section:
<div class="navbar-collapse collapse">
    <ul class="nav navbar-nav">
          <li><a asp-area="" asp-controller="Home" asp-action="Index">Home</a></li>
          <li><a asp-area="" asp-controller="Home" asp-action="About">About</a></li>
          <li><a asp-area="" asp-controller="Home" asp-action="Contact">Contact</a></li>
    </ul>
    <ul class="nav navbar-nav navbar-right">
         @if (User.Identity.IsAuthenticated)
         {
             <li><a asp-controller="Home" asp-action="Index">Welcome @User.Identity.Name!</a></li>
             <li><a asp-controller="Account" asp-action="Logout">Logout</a></li>
         }
         else
         {
              <li><a asp-controller="Account" asp-action="Login">Login</a></li>
         }
     </ul>
</div>
This codes adds a Login link or a Hello <name> | Logout section on the right-hand side of the navigation bar. You don't have to use this, obviously, but it's usually the norm to place login related items in the navigation bar near the top. You may have noticed that we also need an Account controller to handle to login and logout actions. Let's go and create it.
We now need to add the code for the corresponding controller actions. The following code contains all we need for managing the login/logout workflows. Make sure you change the namespace if you're pasting the code to your own project.
To test that everything's working as expected, we can start up our site and try to login.
Code repository
I've included a [fully implemented ASP.NET Core with SAML](https://github.com/cmatskas/aspnetcoresaml" target="_blank) sample project on GitHub - as usual.
Summary
ASP.NET Core can be used with SAML authentication. The code necessary to implement this is fairly small (less than 20 lines altogether) but the setup is a little bit more complex. However, I hope that I've included everything you need to go from 0 to full implementation, end-to-end. Feel free to let me know in the comment if you have any questions as you set it up for your solution or any problems at all.