As I spend more time in my role as a PM for Microsoft Identity, the more I realize there is a whole world I don't know about. And as many of the developers out there, I make sure I spend as much time as I can learning new things. Today's learning? Integrating MS Graph into an existing ASP.NET Core 3.1 app. It may sound straightforward, but getting it to work proved a little bit more challenging because our developer story is so new. In addition, I wanted to experience what it would take to add MS Graph to an existing ASP.NET Core app and not start with a sample or pre-canned project.
Let's get started
1. The ASP.NET Core app
Although not a true representation of a real life app, I created a standard ASP.NET Core with Azure AD Authentication. This is pretty common when developers create ASP.NET Core that consumes Azure AD for authentication. There are a few ways to do this. The easiest by far is to use Visual Studio 2019 to create the new ASP.NET Core app and also register a new application in Azure AD.
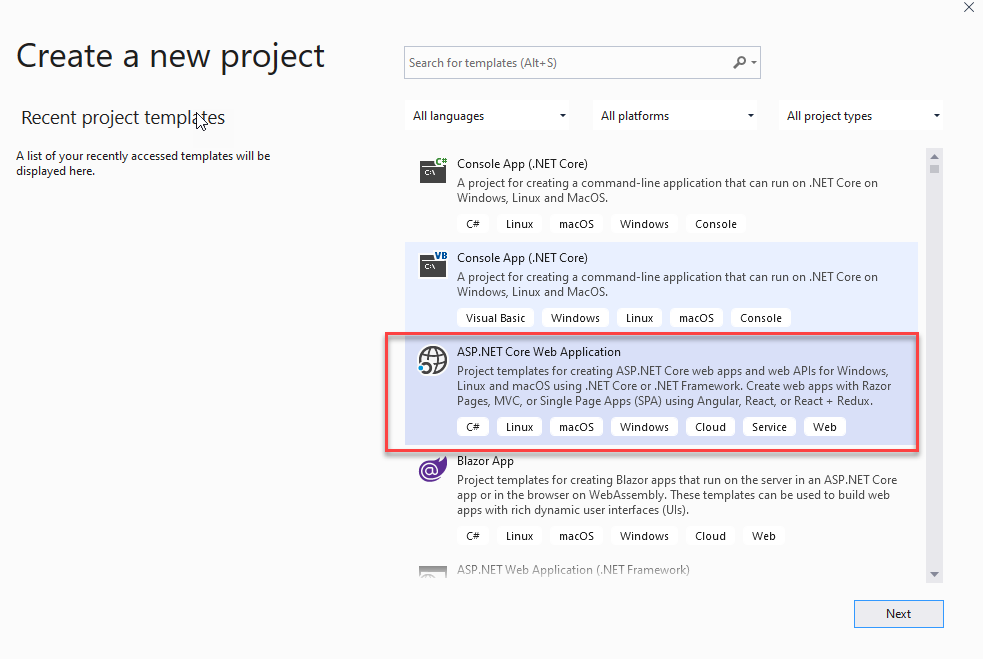
- Open Visual Studio 2019 and choose Create New Project
- On the next screen, select ASP.NET Core Web Application and press Next.
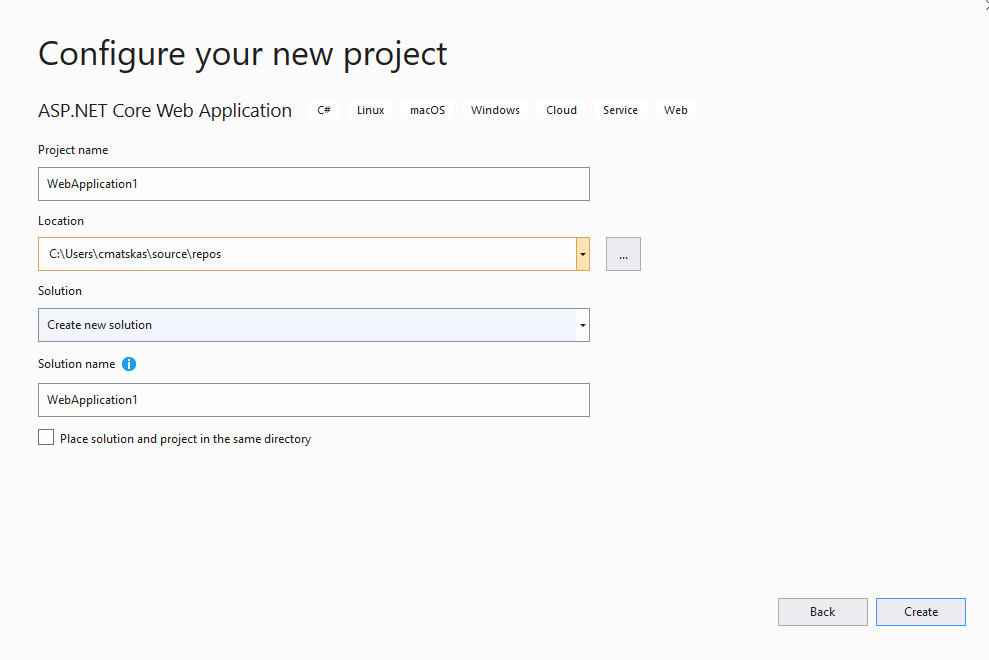
- Choose a meaningful name for your app and press Create
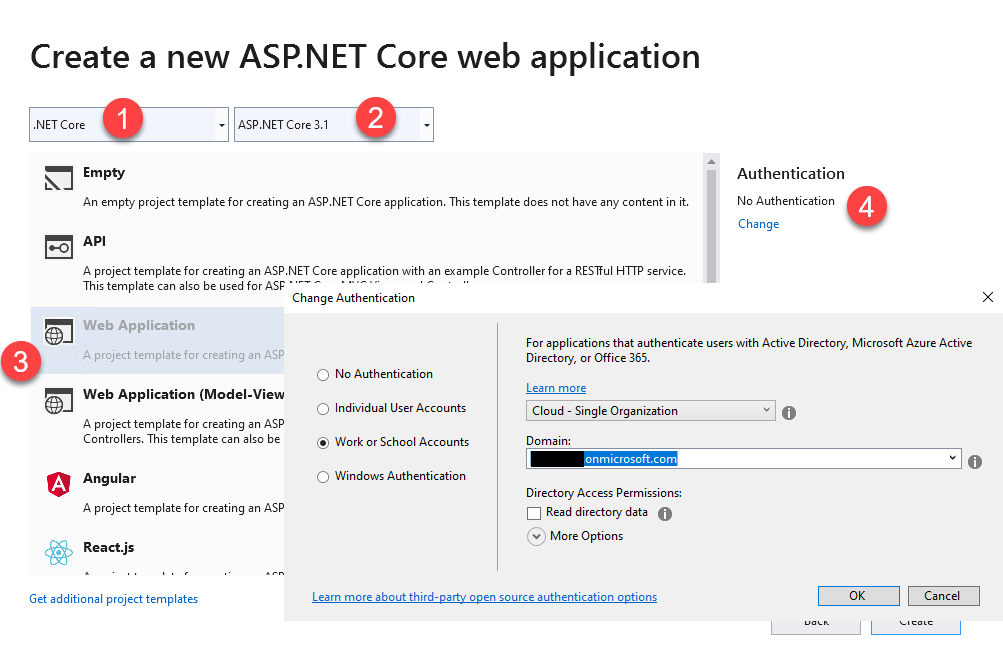
- On the final screen, we need to ensure we have the right framework and app type selected before configuring the Authentication
- Ensure you're using .NET Core
- Check that you're targeting ASP.NET Core 3.1
- Select Web Application (Razor Pages)
- Click on Authentication on the right hand corner
- Select "Work or School Accounts"
The last step will enumerate all the Azure AD directories you have access to. Once you've made your selection, press Create. Visual Studio will do two things next:
- It will create an Application Registration inside the Azure AD tenant you chose on the last step
- It will create the ASP.NET Core app and configure it to use the new Azure AD app to authenticate, include the appropriate endpoints.
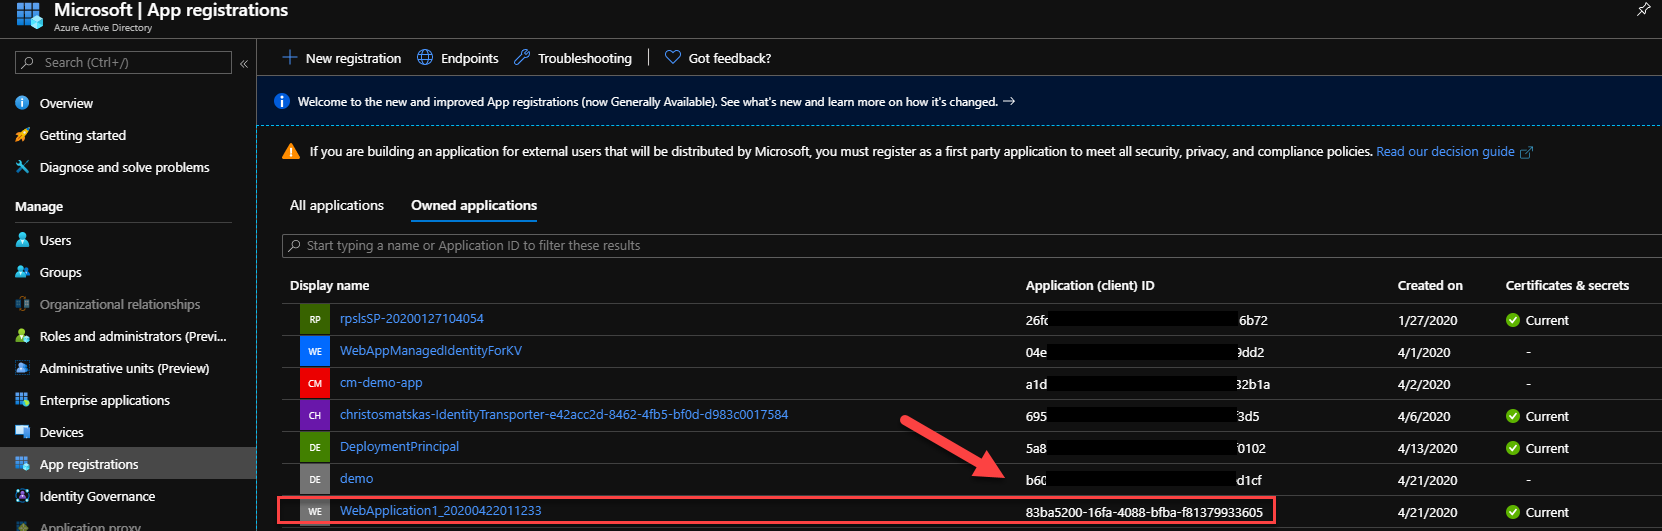
To confirm this you can go to the Azure Portal and then select your Azure AD tenant and navigate to App Registrations. There, you should see an auto-registered app that looks similar to this:
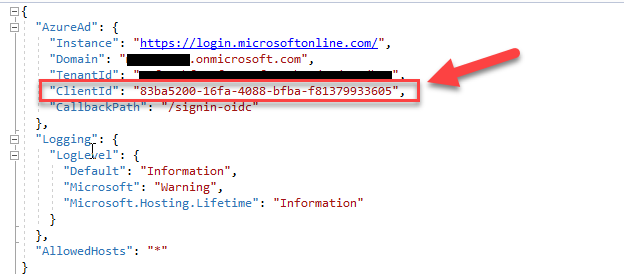
And if you open the appsettings.json in the VS Solution Explorer, you can find the populated fields necessary to perform the authentication. Pay close attention to the ClientId which should be identical in the Azure portal and the code.
We can test the authentication by running the application. You'll notice that we get prompted for a login straight away. Make sure to use an account that has access to the configured Azure AD tenant to login :)
while testing things I like to not have to authenticate for the home page as there may be issues with the code and I want to eliminate authentication as one of the moving parts. If you're like me, you can add the
[AllowAnonymous]attribute to the Index() method in the Home controller to make things smoother at startup
2. Adding MS Graph to our ASP.NET Core 3.1 app
As we look into how we can integrate MS Graph to our app, it's useful to take a step back to understand what's happening here. The important thing is that the current app is not configured to use MSAL to authenticate against Azure AD. As such, we don't have the appropriate token that we can use to call MS Graph. To fix this, we need to add a couple of NuGet packages that can be used to do the appropriate authentication, acquire the necessary token and pass it to the Graph API calls. We also need to update our App registration in Azure AD to give us access to the MS Graph data.
2.1 Update the App Registration
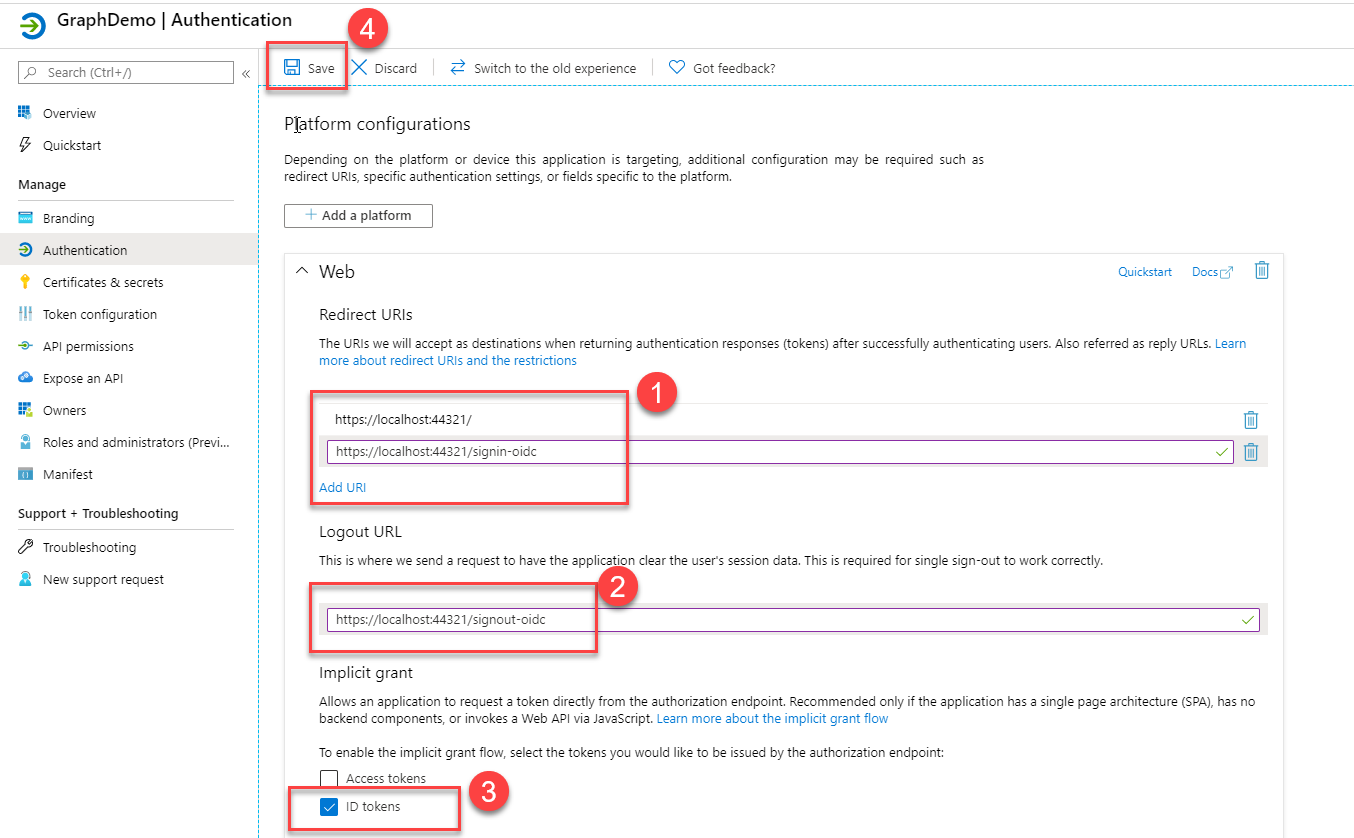
Before we update our code, we need to do a few changes in the App that Visual Studio kindly created for us to ensure that it can be used by our updated (not yet) authentication code. Go to your app registration in the Azure portal and navigate to the Authentication blade. Update the following and press Save:
- Redirect URLs (they should match your app urls, i.e localhost:portnumber)
- Logout URLs (they should match our asp.net core URLs)
- Implicit Grant / ID Tokens (check)
Then, navigate to the API Permissions blade to ensure that the Microsoft.Graph > User.Read permission has been granted:
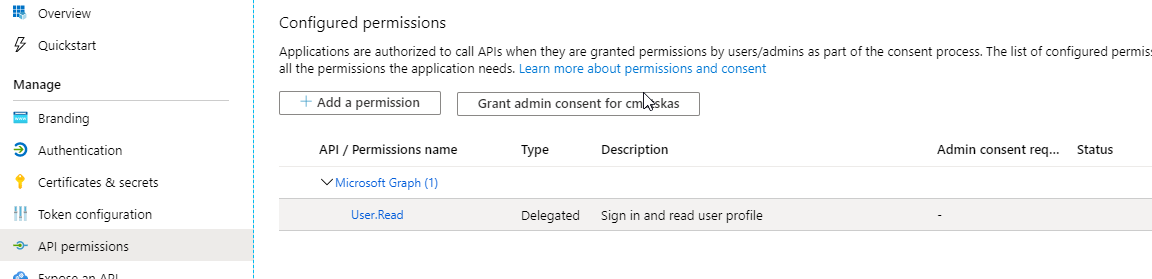
Unless you need to pull more information than the standard user profile (which we will be doing for this example) you don't need to add any more permissions.
Finally, we need a create a new secret that our application will use to speak to Azure AD. Navigate to Certificates && secrets blade and create a new client secret:
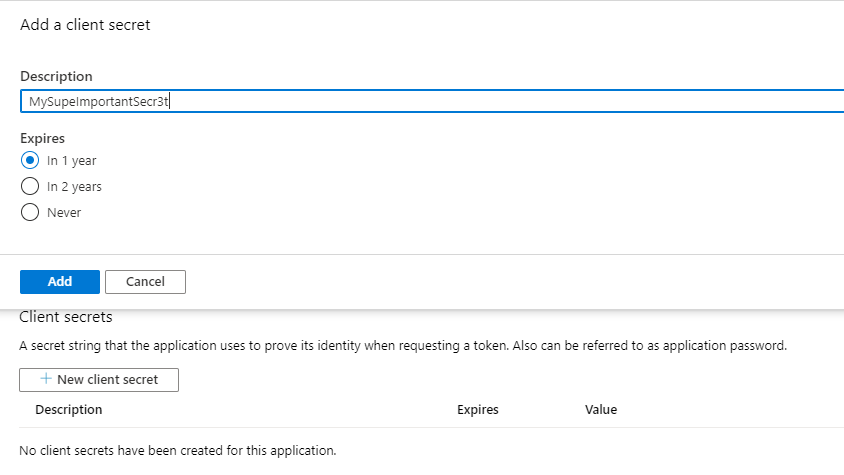

Make sure to copy the secret value as you will not be able to access it ever again. However, if you lose it, you can easily create a new secret and delete the old one (as soon as you're confident that no one else is using it).
3. Update the ASP.NET Core code
To take our existing ASP.NET Core app and add code to authenticate and call MS Graph we need to do quite a few, subtle changes.
Let's start with the NuGet packages. For MS Graph of course, you can always write code to call the API using REST but where's the fun in that? I love using SDKs as they tend to hide away certain complexities and provide a straight path to what I want to achieve. Let's add the necessary packages. Open the NuGet Package Manager in VS2019 and run the following:
Install-Package Microsoft.Identity.Web -Version 0.1.0-preview
Install-Package Microsoft.Identity.Web.UI -Version 0.1.0-preview
Install-Package Microsoft.Graph -Version 3.3.0
Uninstall-Package Microsoft.AspNetCore.Authentication.AzureAD.UI
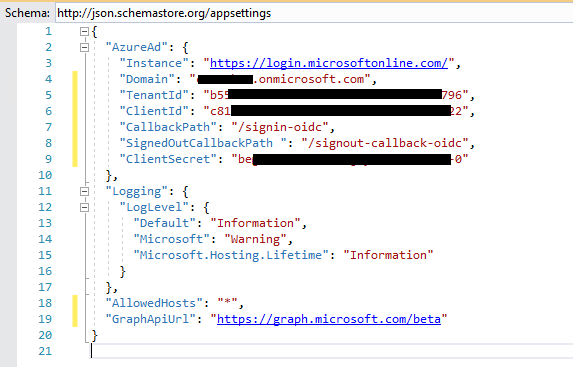
Next, we need to update our appsettings.json file with a couple of new entries:
"SignedOutCallbackPath ": "/signout-callback-oidc",
"ClientSecret": "<your App client secret>"
"GraphApiUrl": "https://graph.microsoft.com/beta"
In the end, your appsettings.json file should look like this:
To call graph, we need some new classes that will allow us to register the Graph Client (a wrapper class around the Graph SDK to give us a client to work with) as well as a helper class authenticate our calls.
GraphServiceClientFactory
GraphSettings
GraphServiceRegistration
We then move on to the Startup.cs where the bulk of the changes need to take place:
The most notable change is how configure the authentication and registering the Graph Client, especially lines 26-39.
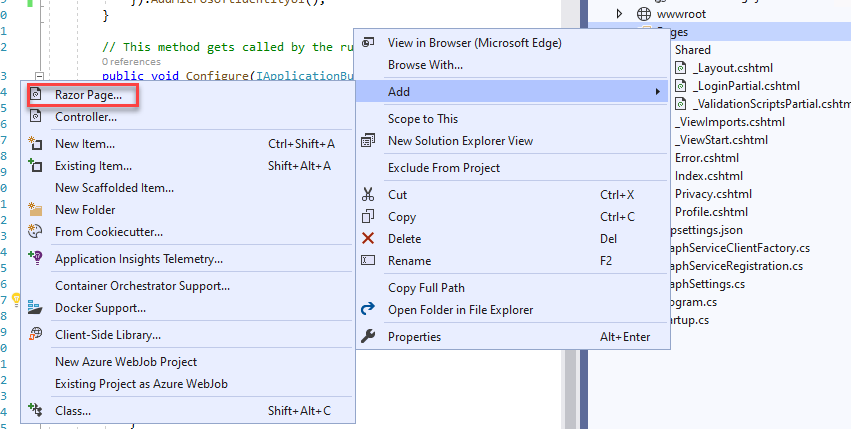
Finally, we want to add a new Profile page where we can display the data we pull from MS Graph. In Visual Studio, right click to your project/Pages and add a new Razor Page -> Profile.cshtml
Change the code-behind to make the call to MS Graph and populate the ViewData[me] and ViewData[Photo] object with the results:
Disclosure: I admit that this is a bit of a hacky approach as I choose to dump all the data to the page instead of filtering it and creating a nice(r) UI to display it. Feel free to mess about with the UI once you get everything working.
Let's add the necessary HTML/Razor code to the view to render the data:
And a couple of finishing touches. Firstly, I want to make sure that I can navigate to the new page from the UI so we need to update the _Layout.cshtml code in the Pages/Shared folder and add a new entry in the nav bar.
<li class="nav-item">
   <a class="nav-link text-dark" asp-area="" asp-page="/Profile">Profile</a>
</li>
Finally, we need to fix the logout logic as right now this will be broken since it's not using the MicrosoftIdentityUI code. Open the _LoginPartial.cshtml page in Pages/Shared folder and change asp-area="AzureAD" to asp-area="MicrosoftIdentity". The full code shown below:
Running the app and navigating to my Profile page I get the following:
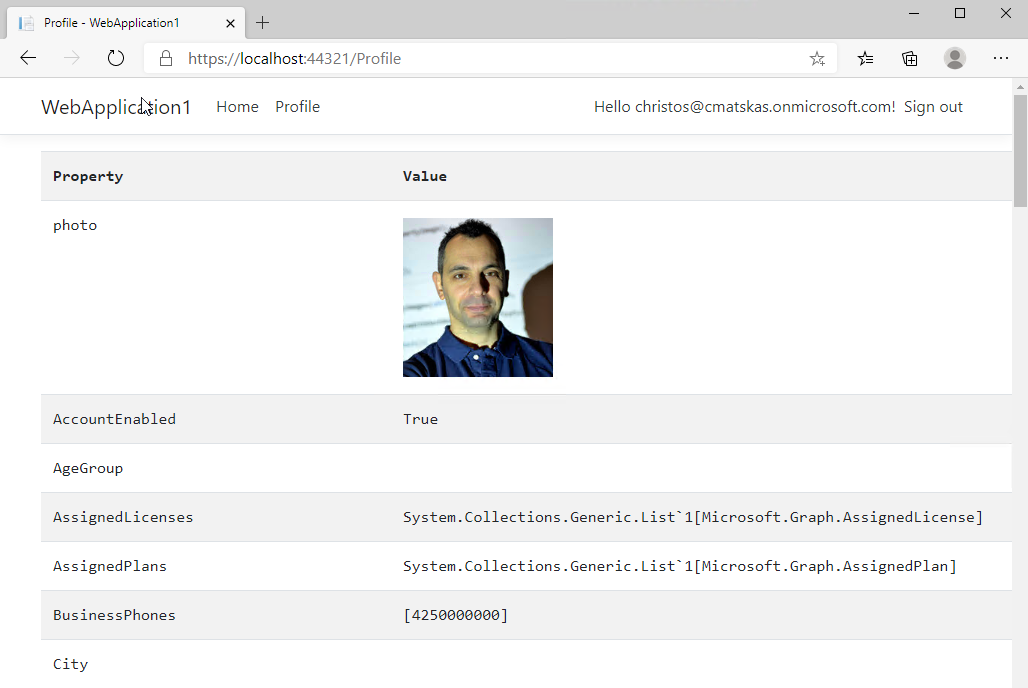
Awesome!!!
If you want to see this project in action, you can clone the GitHub repo, configure the appsettings.json with your app details and off you go.
4. Some thoughts
This blog post walks us through the steps necessary to integrate MS Graph into an existing ASP.NET Core app using the MS Graph SDK. The end result works as expected but there are a few things that need full disclosure.
- The
Microsoft.Identity.WebandMicrosoft.Identity.Web.UIare Preview NuGet package and some APIs could potentially change before hitting GA. Therefore, you should be aware that the code in this post is cutting edge tech and only got released as a package a few days ago. - The way we inject and consume the Graph Client comes with a bit of code smell as we are exposing things that we shouldn't, see
ITokenAcquisitioninjection in theProfile.cshtml.cscontructor.
We are working on fixing these to provide a much smoother experience for developers that wish to consume MS Graph in their ASP.NET Core 3.1 app.
Next time I will be writing about how to add MS Graph to a WebForms app because not everyone is on the bleeding edge of .NET :)
Give this a go and let me know how you get on....