First off, if you don't have an Azure account, go get one! You get 10 websites for free plus a whole lot of goodies for free.
I recently deployed a new site and I wanted to point a custom domain to it. However, the available documentation wasn't particularly clear. There are two ways to have a custom domain pointing to an Azure website, using A Records and CName records, but I wasn't sure if I needed both or just one etc and I wanted to use A records.
This had me looking for a bit but thanks to a post I found on StackOverflow I was able to get my custom domain name sorted in a matter of seconds!
Before you start you need to ensure that your Azure website is on Shared or Standard mode. You can change this through the Scale tab in the Azure dashboard.
Once you have completed this, go back to the Dashboard tab and find the Manage Domain button at the bottom of the page as per below:

This will present you with a new window where you can configure your custom domains.
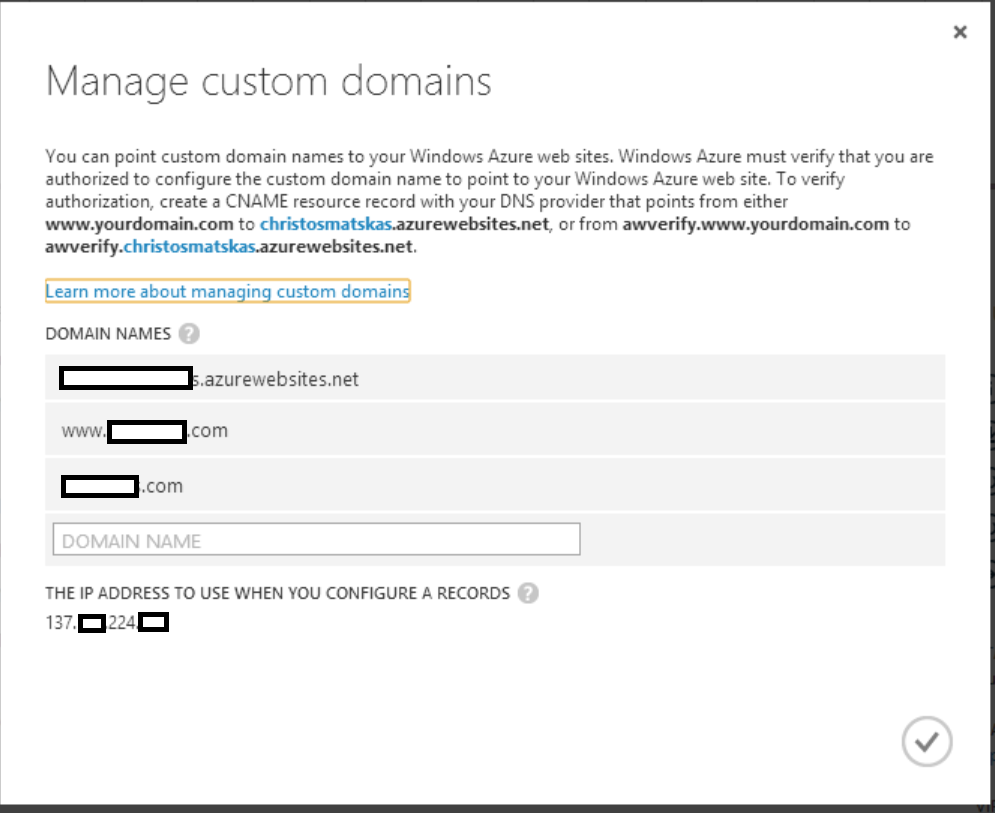
You will need to copy the IP address provided at the bottom of the window and then head out to your Domain Name provider to redirect your domain name to your azure website. Don't close this window as you will need it very soon.
Once you find your way around the dashboard, there should be a place where you can add or change A and CNAME records
These are the steps you need to follow:
- Add a new record to point to the IP provided by Azure
- Create a NEW CNAME
- (HOST => awverify)
- (Points to => awverify.YourAzureDomainName.azurewebsites.net)
- Edit CNAME
- (HOST => www)
- (Points to => AZUREaccountNAME.azurewebsites.net)
Once you have successfully completed and saved the changes, you can immediately go back to Azure and get to the popup window to manage your domain. Now you can add the new domain name(s) to your azure site. You will need to add two URLS as per the example below:
www.yourRegisteredDomainName.com
yourRegisteredDomainName.com - without the 'www'
Job done! Open a browser and navigate to your site and see the whole thing working instantly!
Happy coding...