Microsoft's Azure Functions are pretty amazing for automating workloads using the power of the Cloud. Unlike their predecessor, WebJobs, Functions are an extremely simple yet powerful tool at your disposal. In addition, unlike WebJobs, they don't share the workload with anything else, so you can push them to the limit. They are also extremely scalable and run concurrently, making them ideal for all your back-end processing.
I recently used Azure Functions to copy blob storage data from one subscription to another. If you intend to copy data within the same subscription, then your task is even simpler and you can easily do it with Logic Apps or Functions. However, in this scenario, we are moving data between subscriptions so there's a bit of code involved in the process.
Disclaimer: Moving data between subscriptions will incur egress traffic costs.
Creating the function
There are many ways to copy data across, but the beauty of Functions is that they can be run on a schedule or as a response to an event. In this case, the event triggering the transfer is a blob upload. As soon as the blob's uploaded to one account, I want to back it up to another account and this should definitely be automated. If I didn't want to respond to an event or schedule it to run on set intervals, I would have chosen a different way to do it such as:
- AzCopy (an awesome command line tool optimised for copying Azure Storage data) or
- the .NET Azure SDK if I needed to write some more complex code.
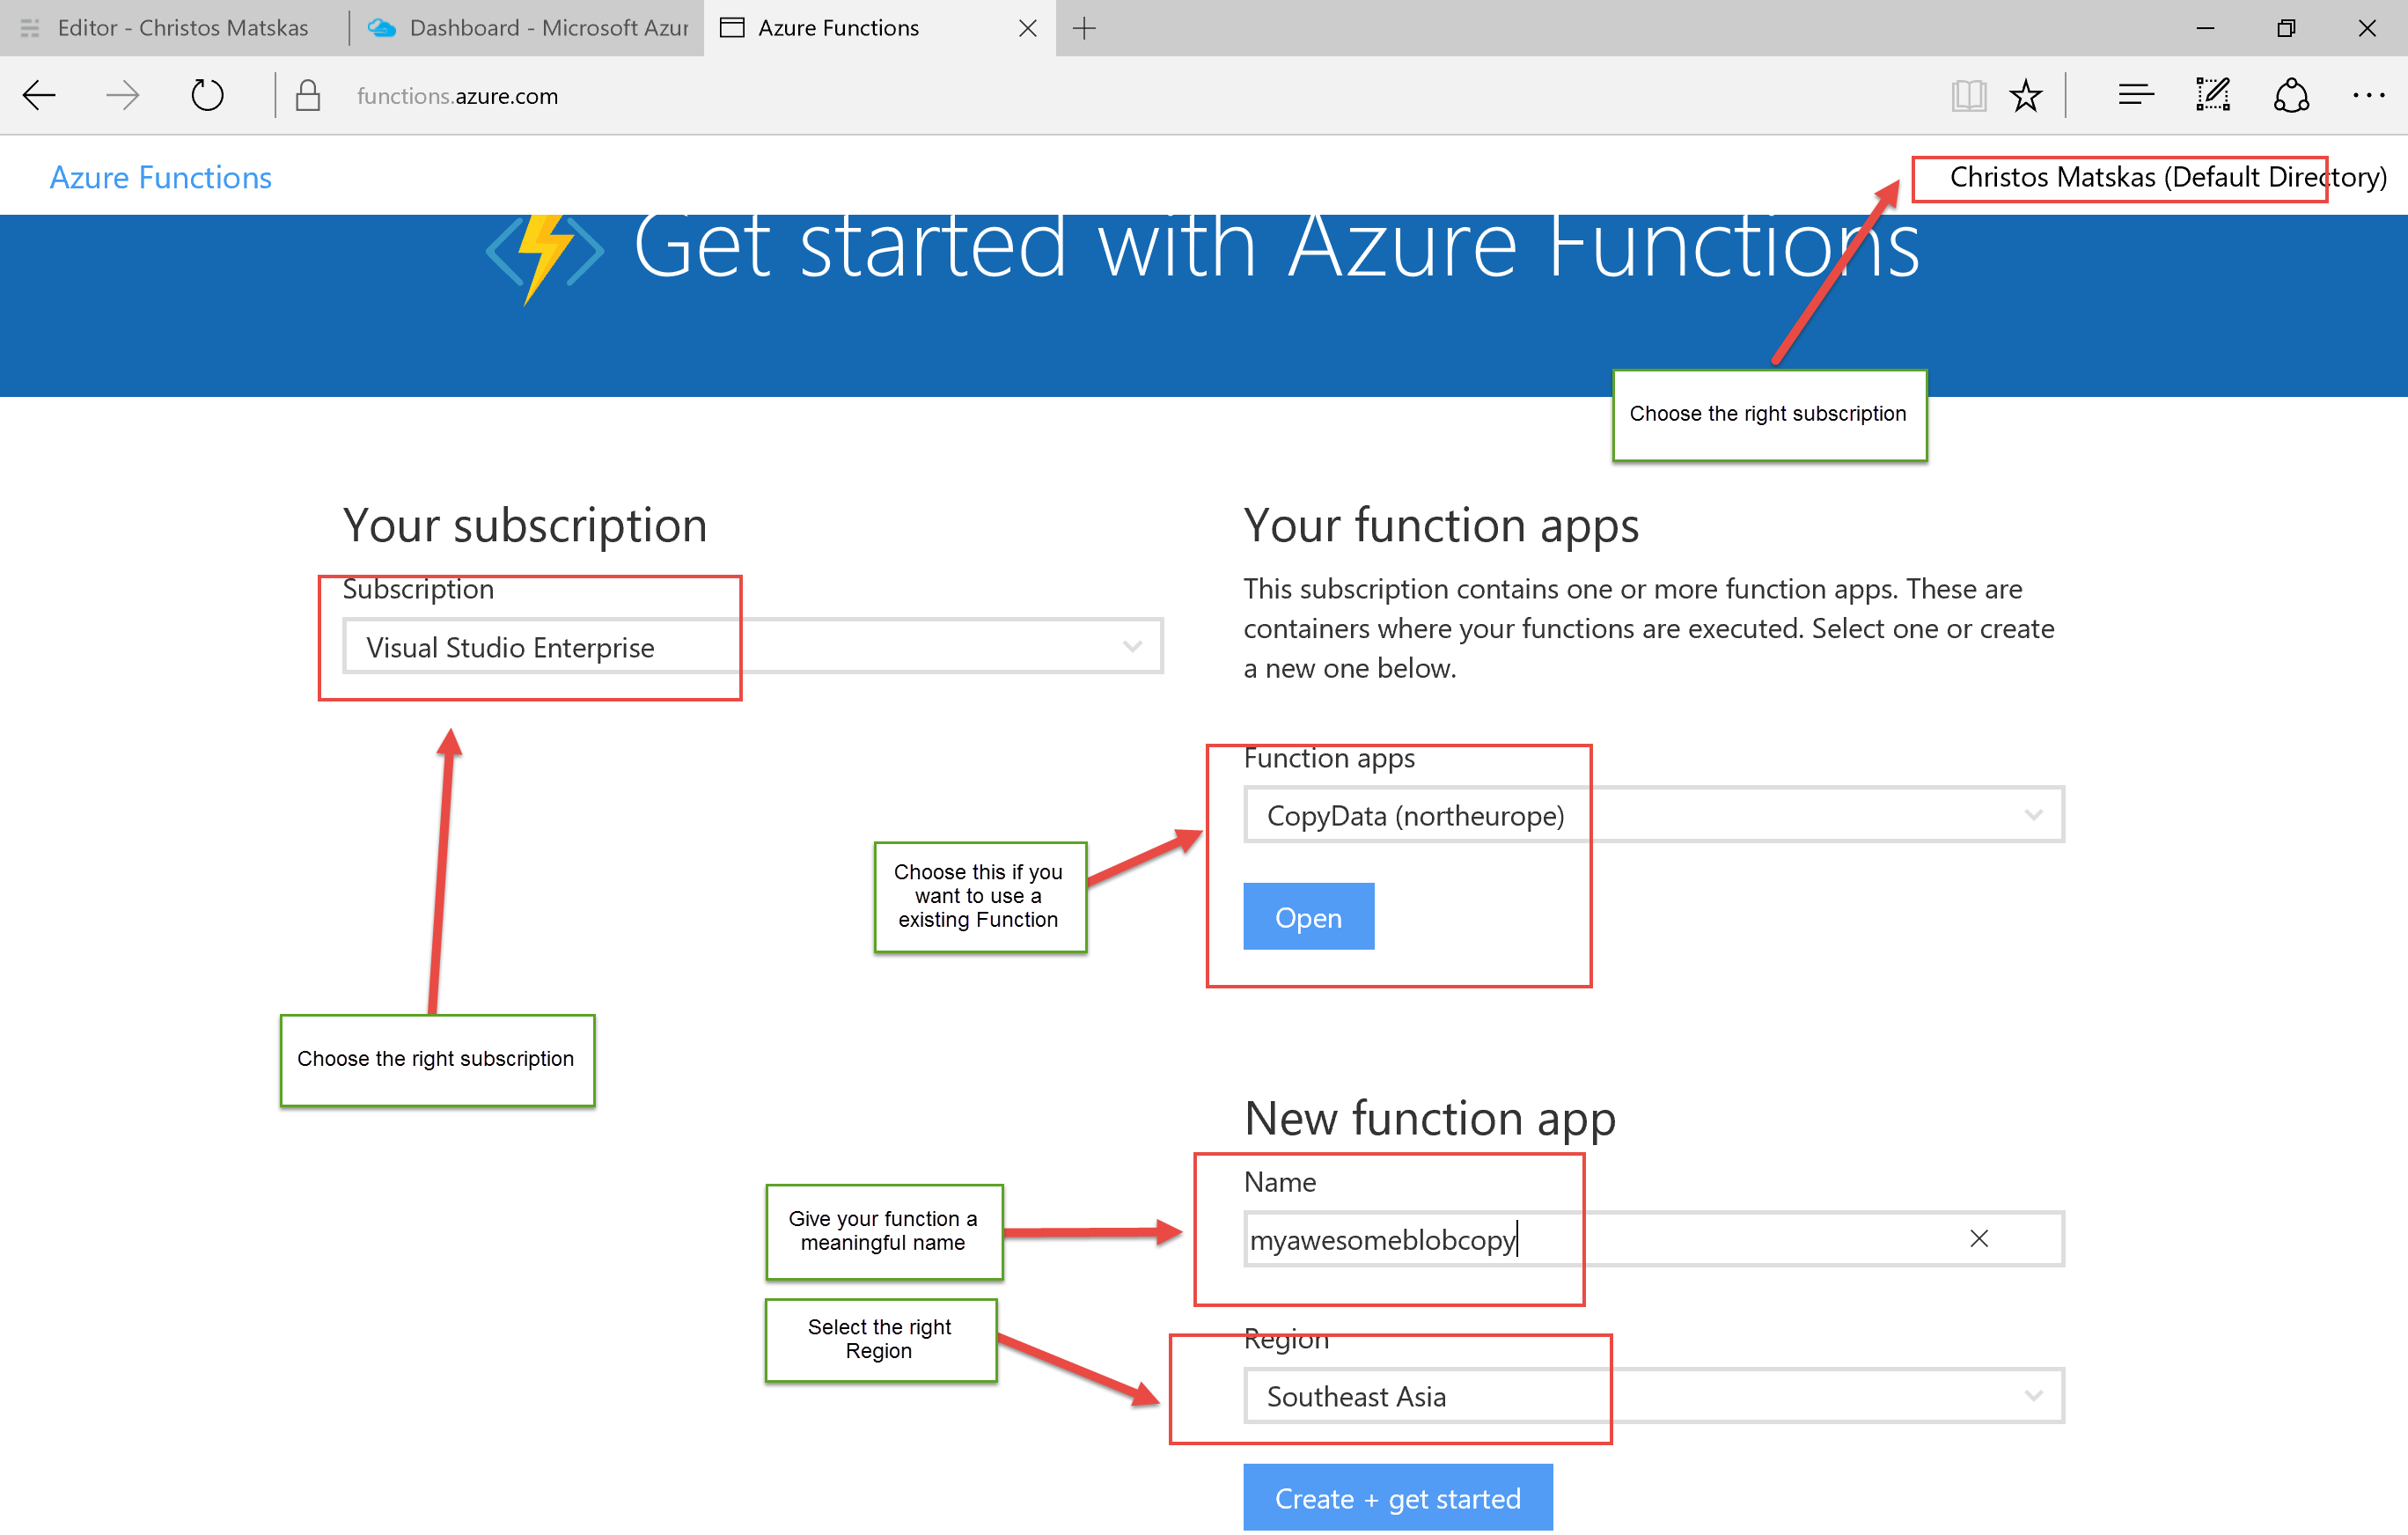
In this case, we want to respond to an event so let's go and create our Function. Open a browser and head to the Functions Portal. Once there, enter the appropriate information as shown below. Make sure you select the right subscription and accounts.
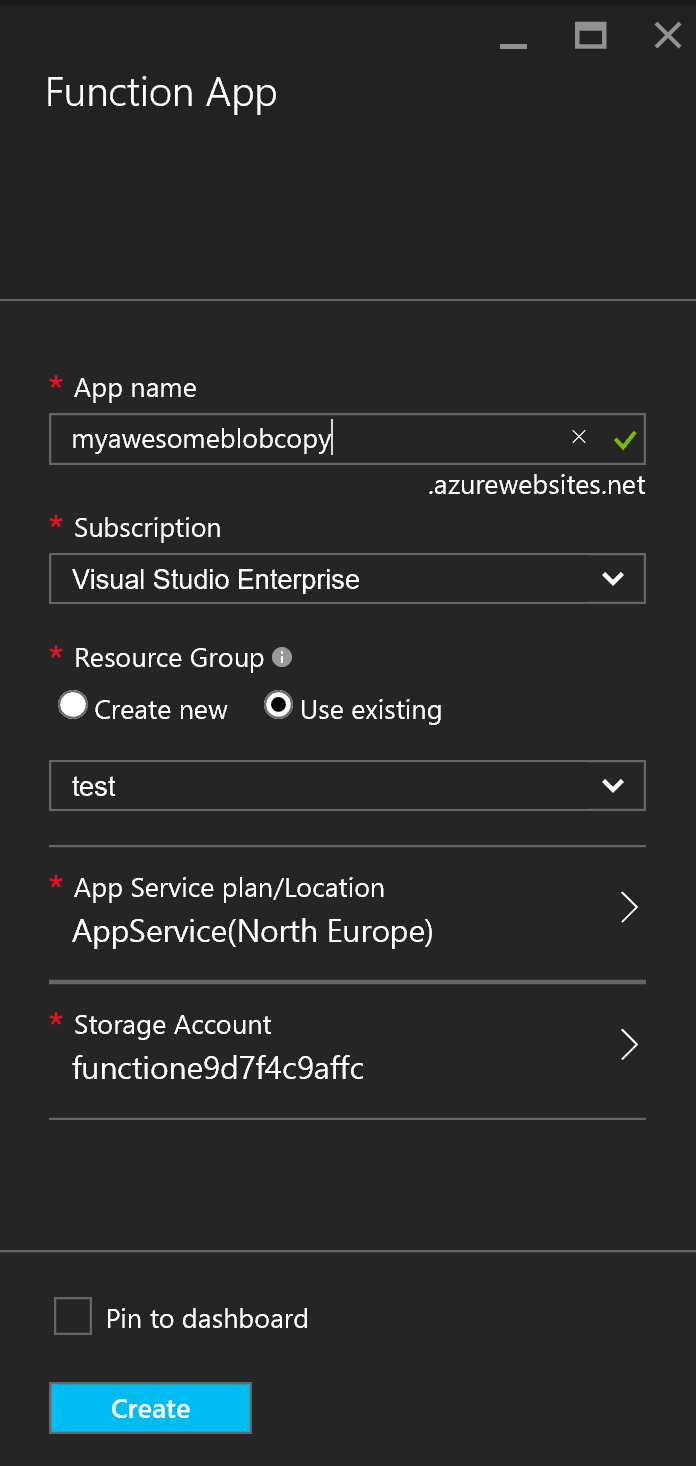
Once you're ready, hit the Create + Get Started button at the bottom of the page. This should take you to the main Azure Portal (preview) where you can edit your function. Alternatively, you can go straight to the Azure Portal and select New > Web + Mobile > Function App. This should present you with something like this:
Click Create to get started. With your Function app in place to host your functions, we can finally begin to create functions. Generally speaking, a function can respond to 3 types of events:
- a timer
- an event raised by another service
- a web hook
For this example, we're gonna use the Data Processing scenario:
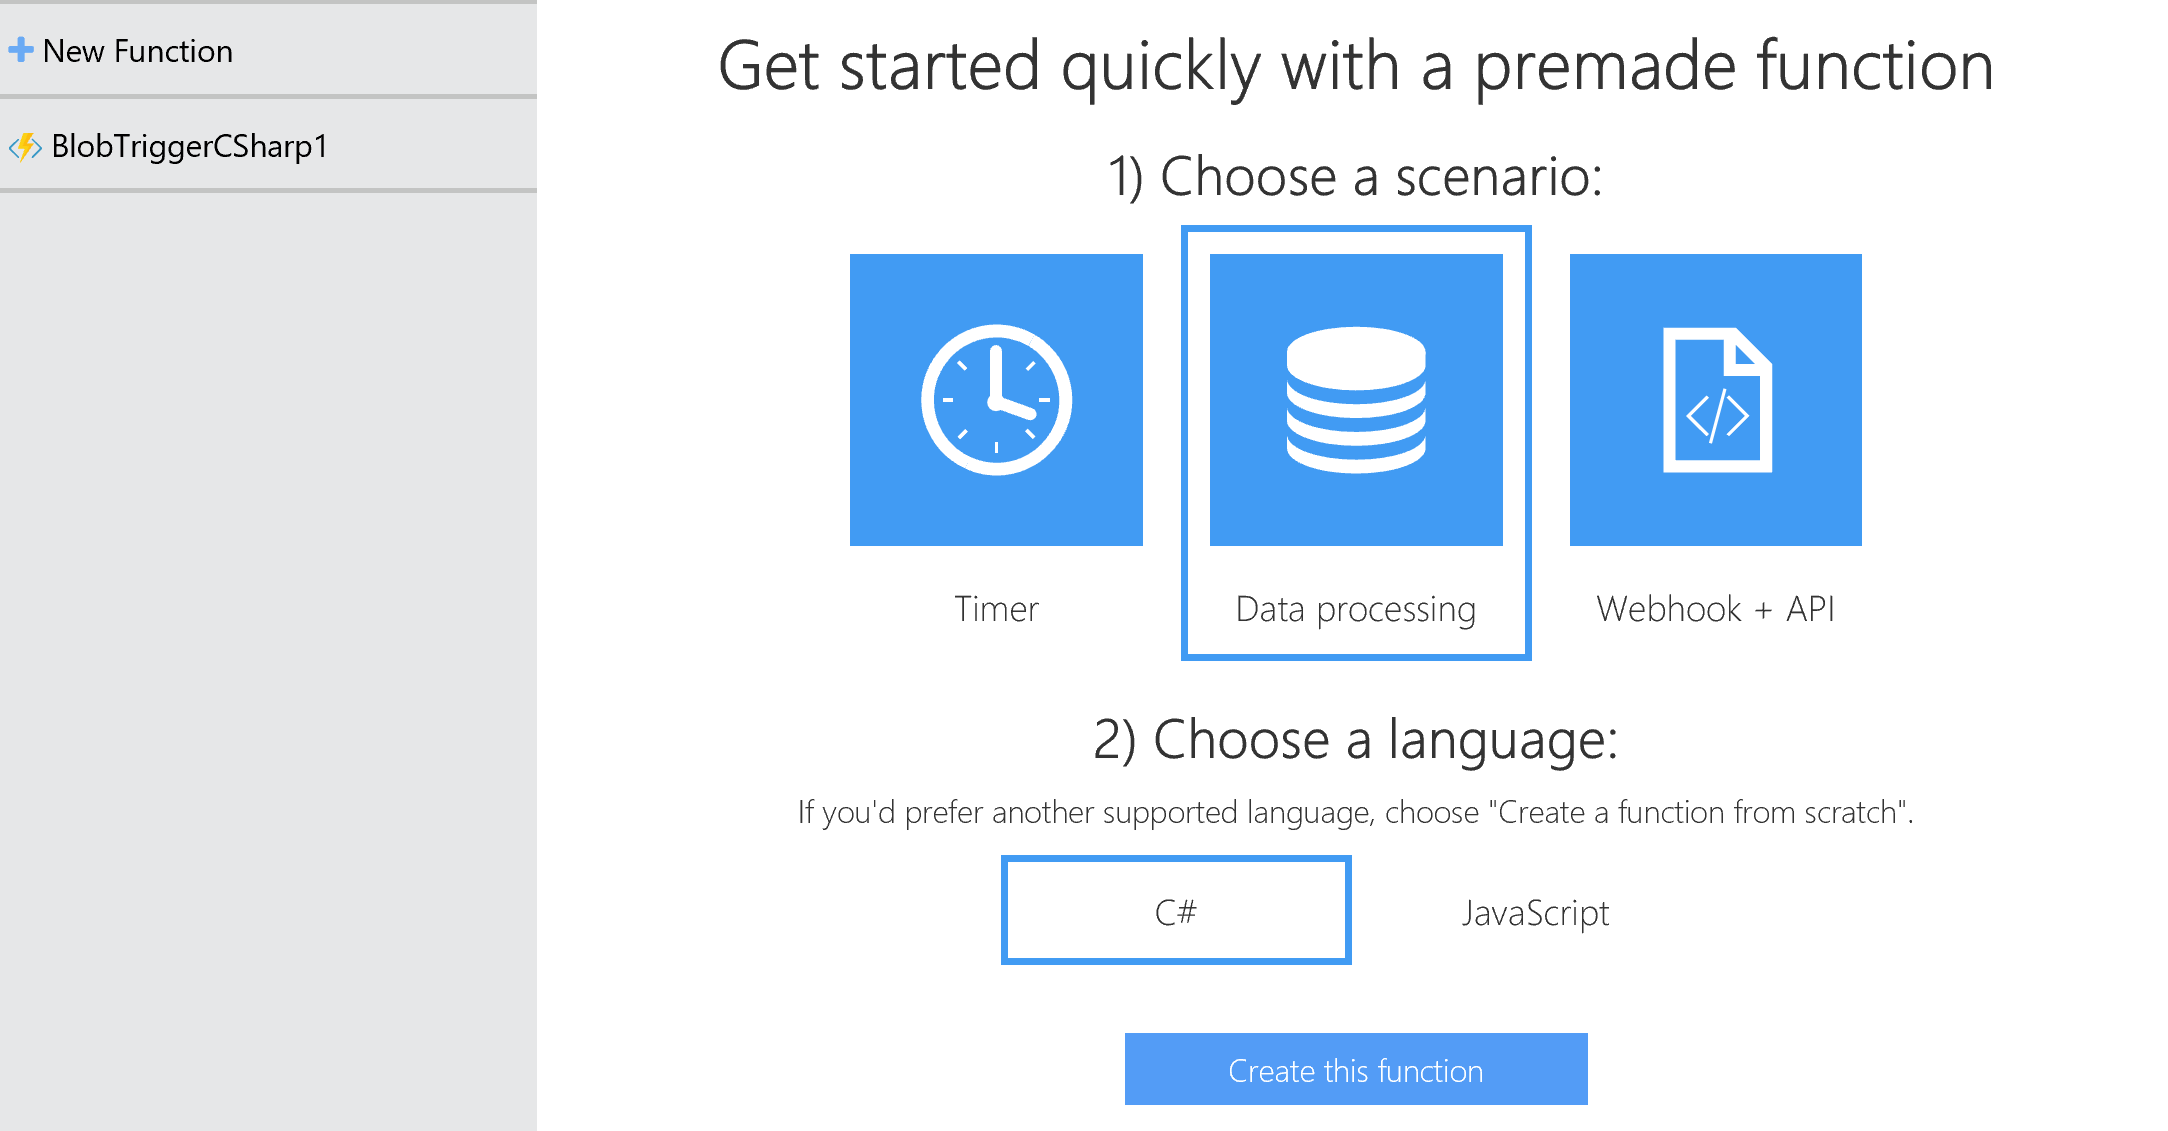
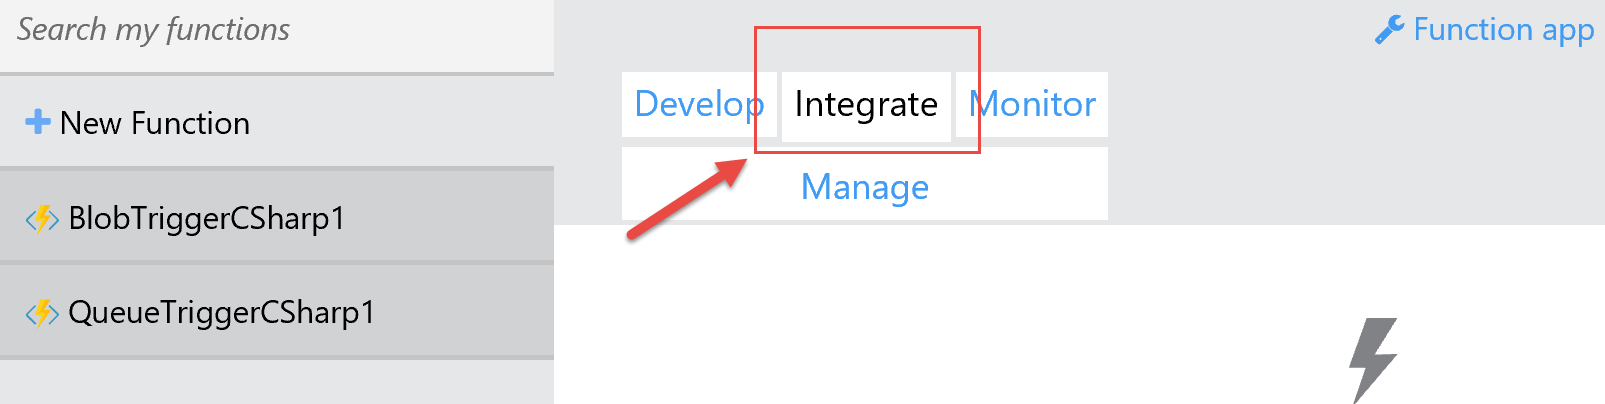
Now press Create this function. Feel free to take the tour if this is the first time you've ever accessed the portal. Next, we need to select the event our function will respond to, so change your tab to Integrate.
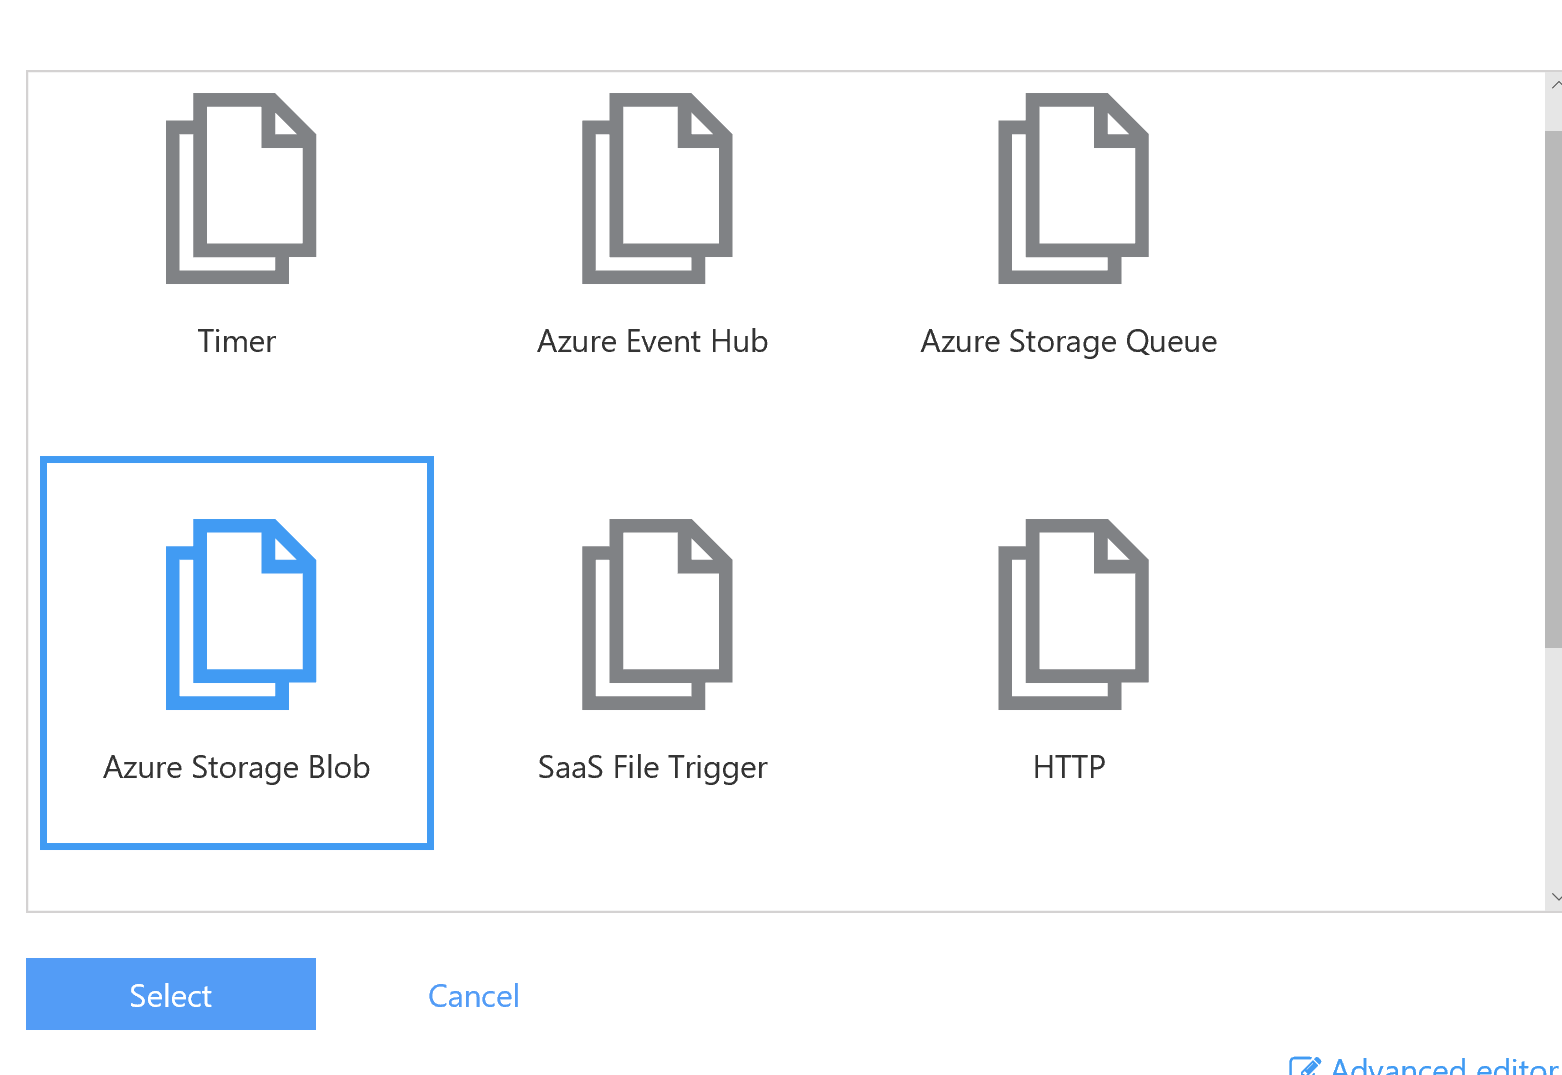
Delete any existing triggers and create a new one based on a blob as per the picture below and press Select
Edit the trigger details to match your account details as per the instructions below:
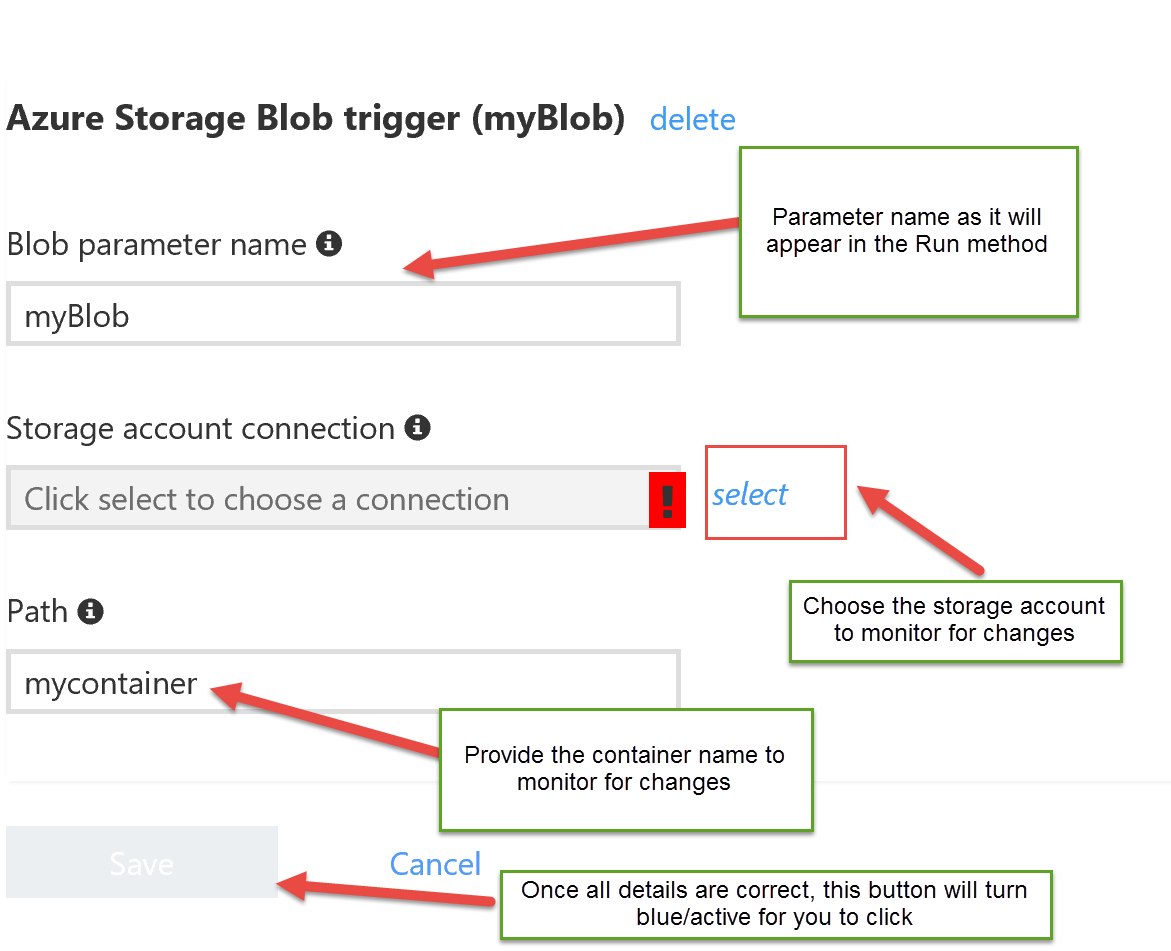
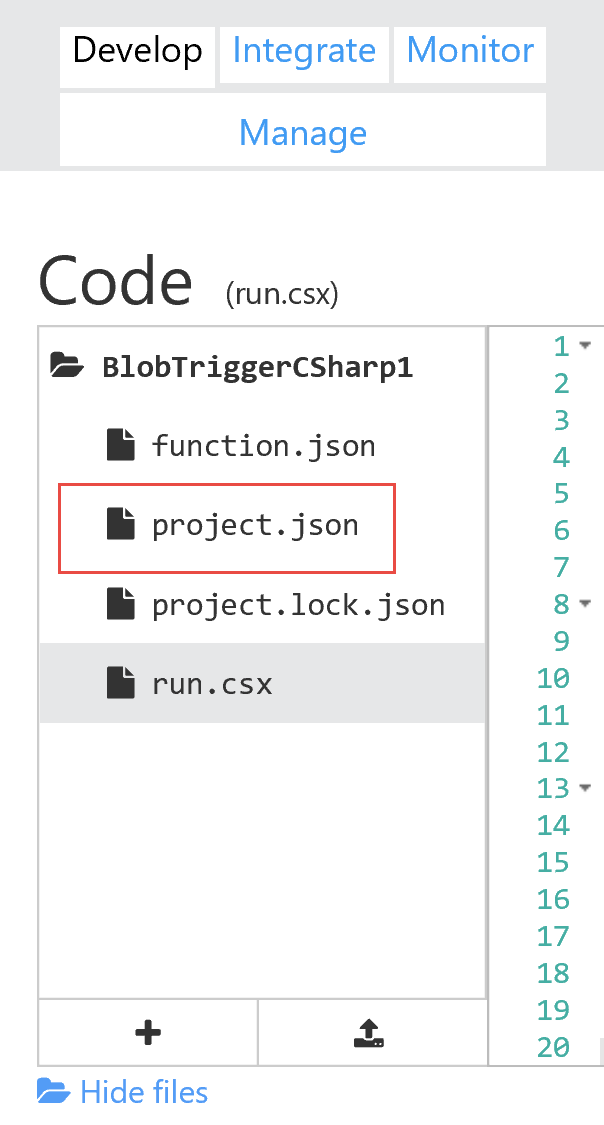
This trigger will give you access to the blob object, it's metadata and the contents. The blob parameter needs to be one of the function parameters. Go back to the Develop tab and create a new file to allow you to interact with the storage SDK in code. Name your file project.json. Functions can retrieve NuGet packages by adding them to the project.json file. (This is the same file as the one that used by ASP.NET Core 1.0 - for a little bit longer).
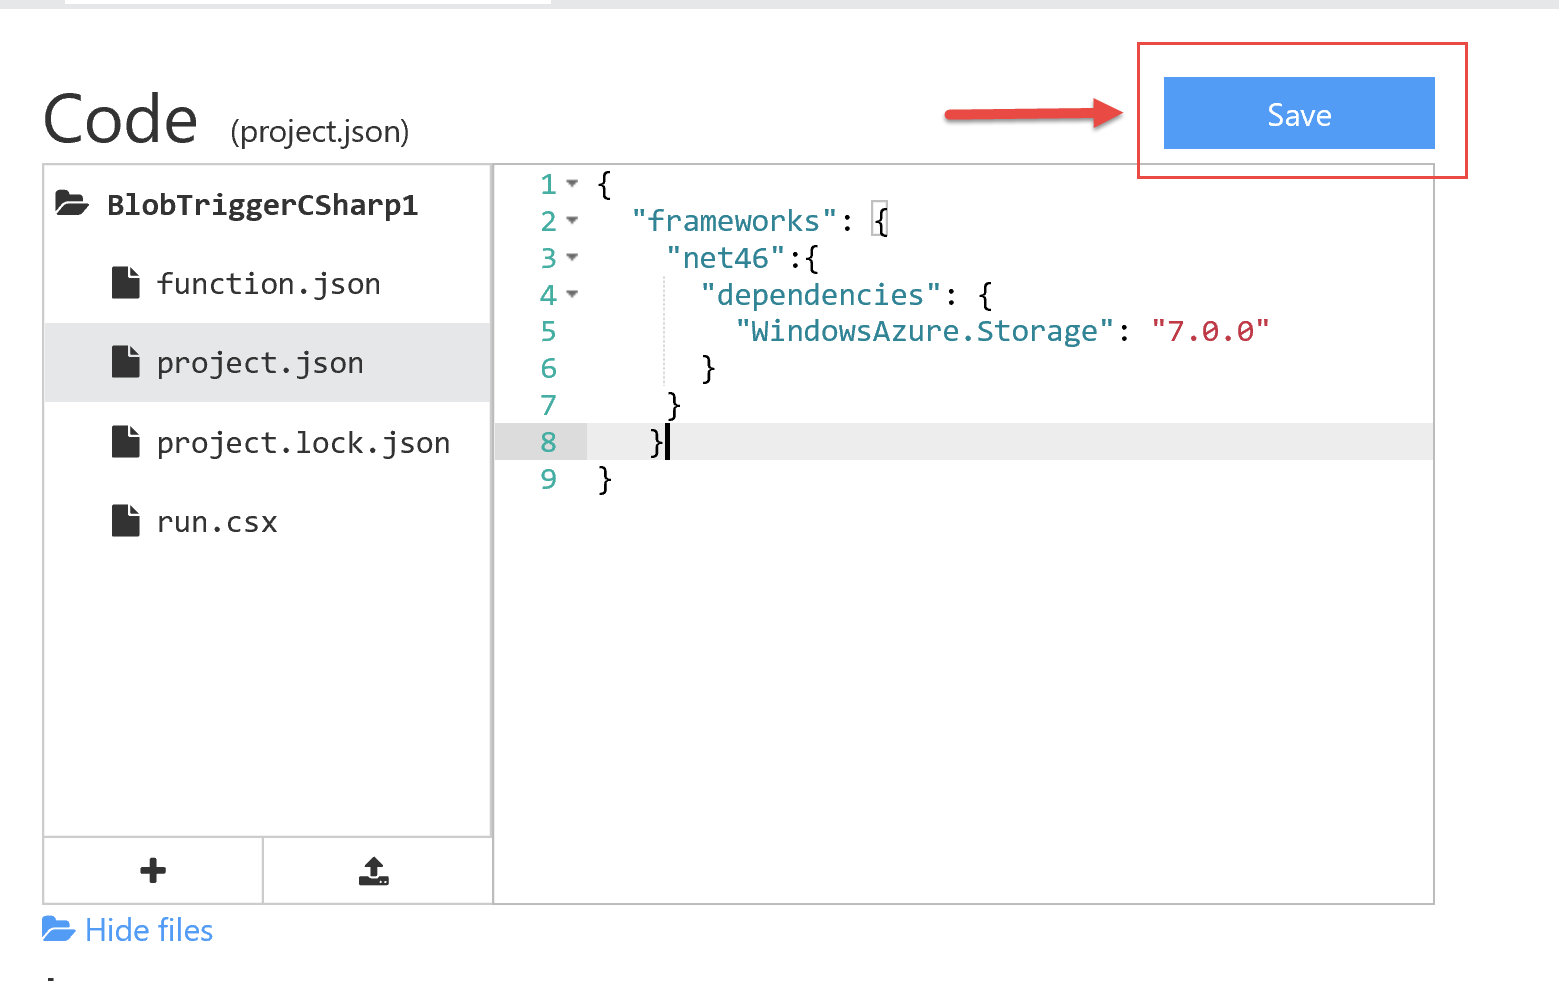
Open your project.json file and add the following code and make sure you press Save when you're done:
{
  "frameworks": {
    "net46":{
      "dependencies": {
        "WindowsAzure.Storage": "7.0.0"
      }
    }
   }
}
As soon as you save the file, you should see in the logs the NuGet packages being downloaded. The output should look similar to this:

With the appropriate references in place, we can add our code. Open run.csx (notice the .csx extension -> Script.cs anyone?) and paste the following code.
The code is simple enough but I'll break it down here for completeness.
The first part of the helper method connects to the storage account on a different subscription and creates the container (if it doesn't exist) where we'll copy our blob data.
The second part within the try...catch performs the actual copy. I provided 2 methods for copying the data. Feel free to choose whichever one makes sense.
Testing the Function
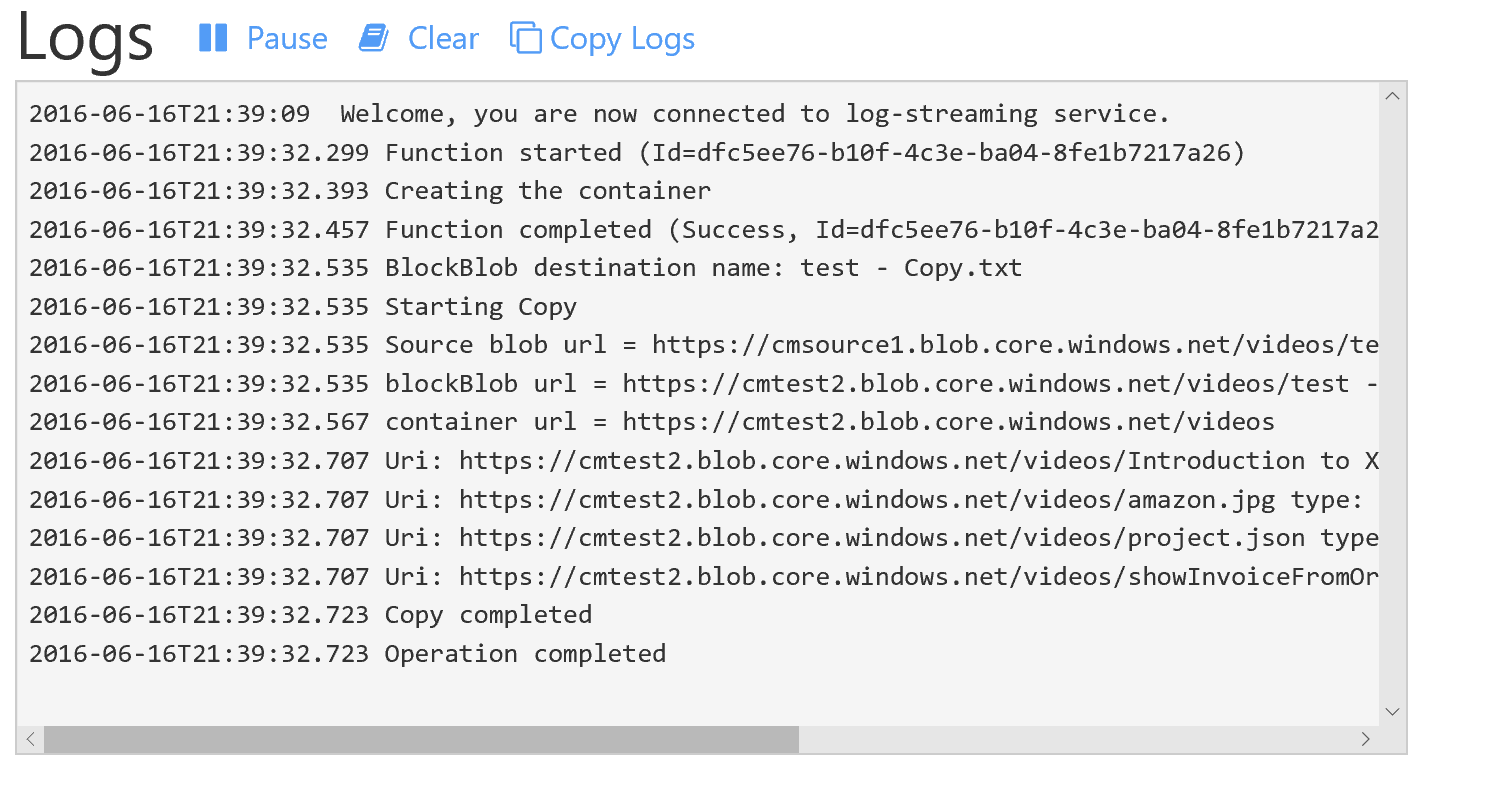
To test the function, you'll need to upload data at the source container (the one monitored by our trigger). As soon as the blob is fully uploaded, the function should be called and you should see the appropriate log messages displayed in the Logs window as per the example below:
Conclusion
I love Azure Functions because, under the hood, they hide a beast waiting to be tamed. Functions use the power of .NET and the full framework to write elaborate routines. There will also be support for more languages outside C# and JavaScript so don't be discouraged if you prefer Java or Python. Functions are still in their inception and it's still early days, however, it's easy to see the full potential. Nonetheless, I have to admit that the documentation is not completed and it takes a bit of a trial and error to figure out how to do things. Or I'm a bit slow.
I would urge you to give them a go and, as always, feel free to let me know in the comments below if you have any questions or problems around Azure Functions.