It was about time to try a new hosting option for my blog. For the past few years I was running my blog on Azure WebApps Container service. It was OK but the setup was pretty complex and once it was deployed I totally forgot how to replicate the setup - maybe I should have blogged about it.
Since I moved to AWS I've been looking into the various services and Lightsail seemed very promising for my needs. Lightsail is a lightweight, low cost (pun intended) but truly capable service for hosting web apps. It comes with a number of integrations, called blueprints and supports both Linux and Windows OS with Windows being slightly more expensive. One of the Blueprints supported is Ghost, albeit still on version 4.4.x at the time of writing this blog .
Create a Ghost Instance
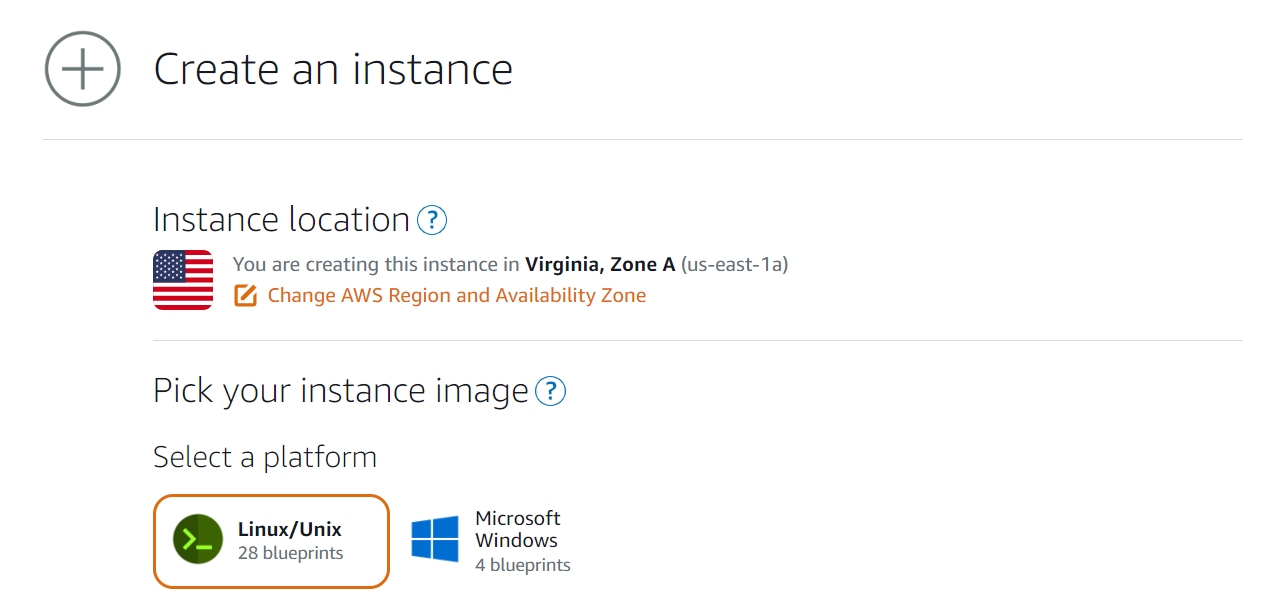
Let's see what it takes to spin up an instance to run a Ghost blog! In the AWS Console, select Lightsail. This will actually open a new tab on your browser. We need to follow 4 basic steps to spin up our instance:
- Select the OS flavor
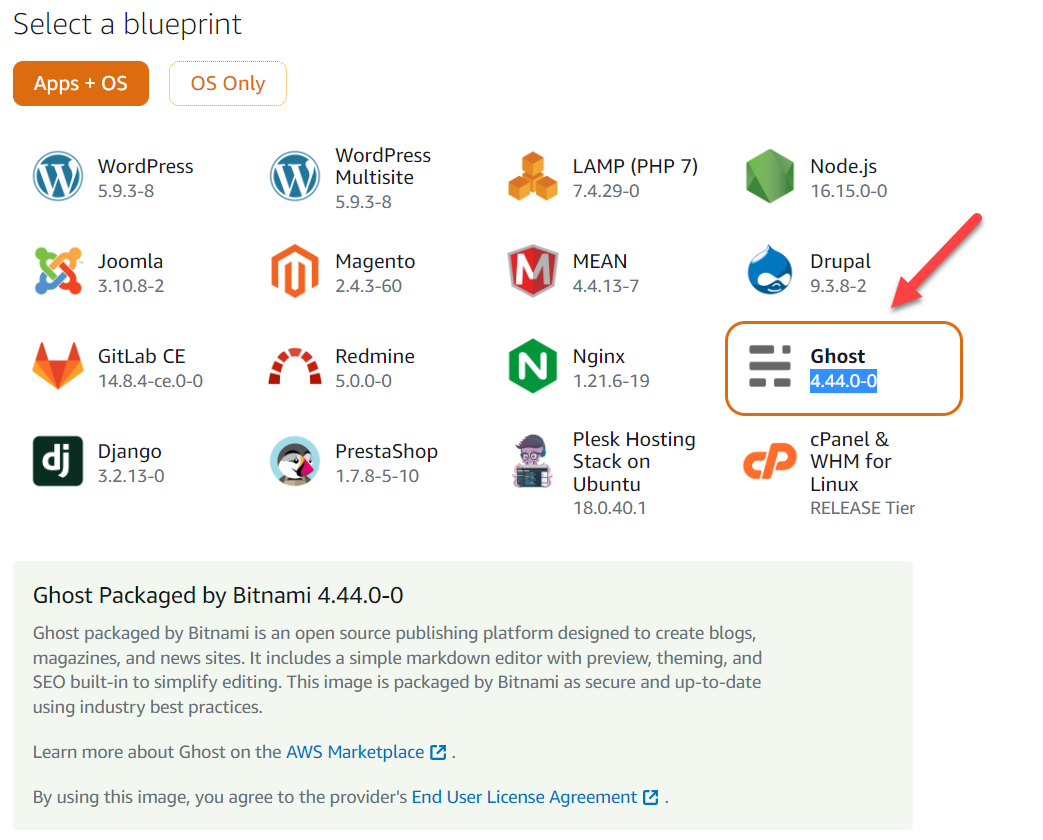
2. Select the Blueprint you want - in this instance Ghost
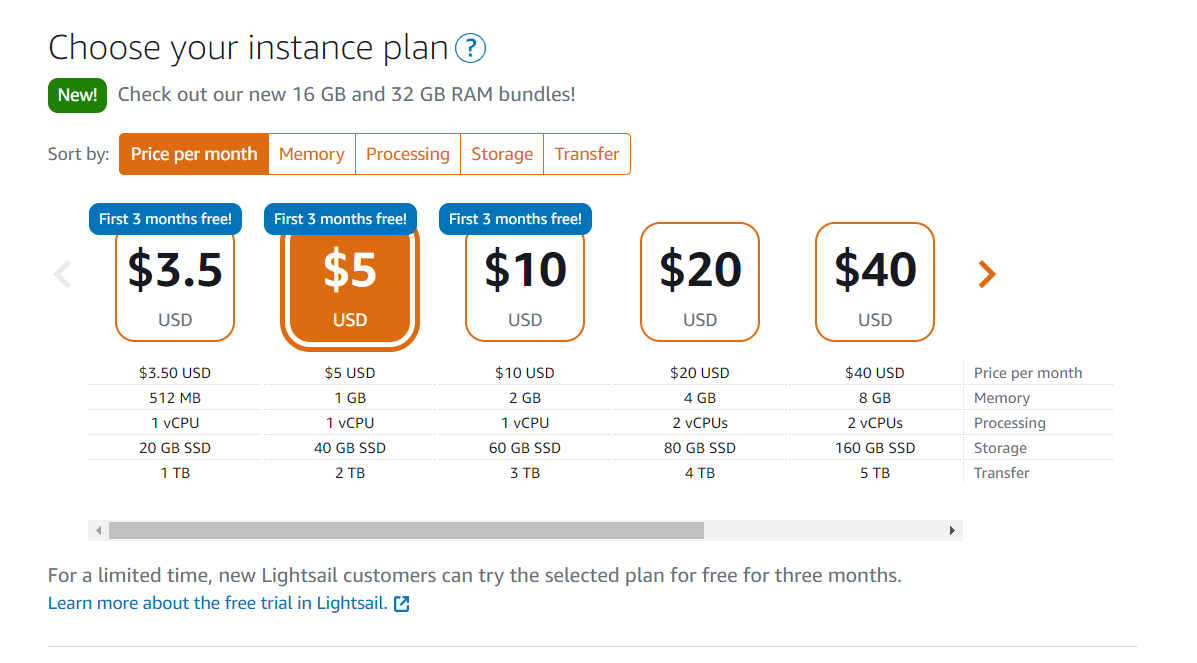
3. Choose the instance size - it's an EC2 instance under the hood anyway
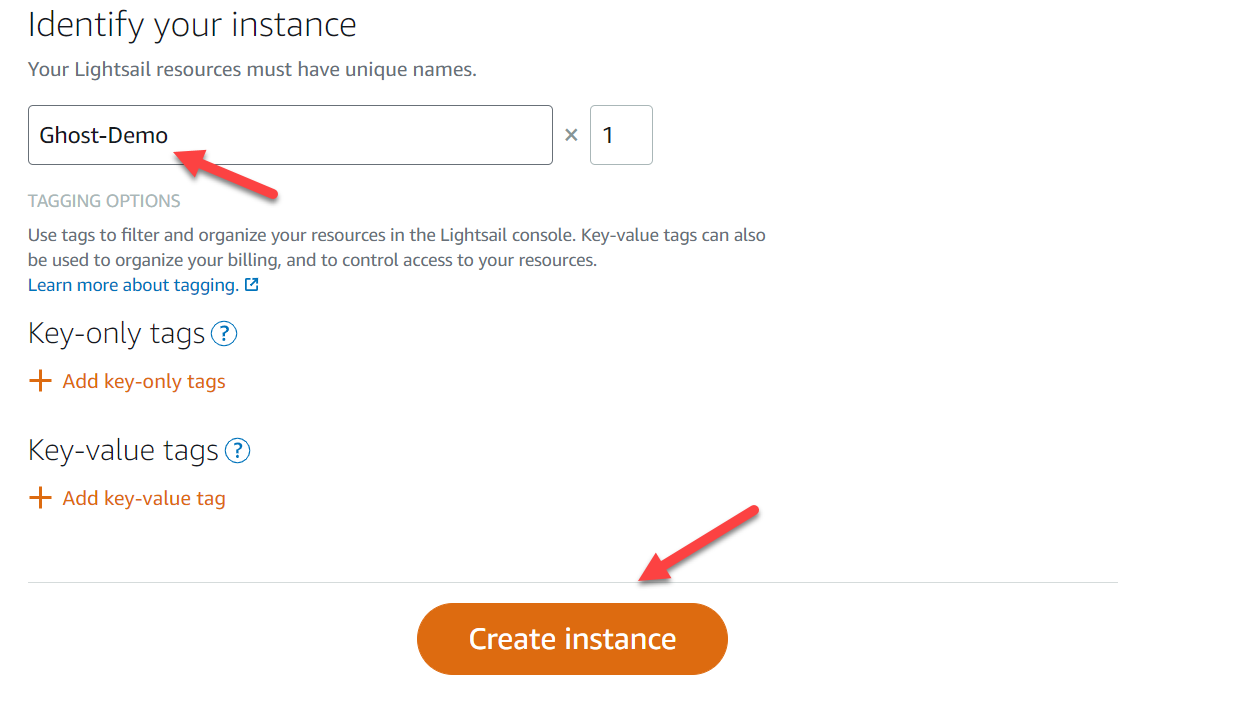
4. Give it a meaningful name
Wait for a few minutes and you should have your Ghost instance up and running.
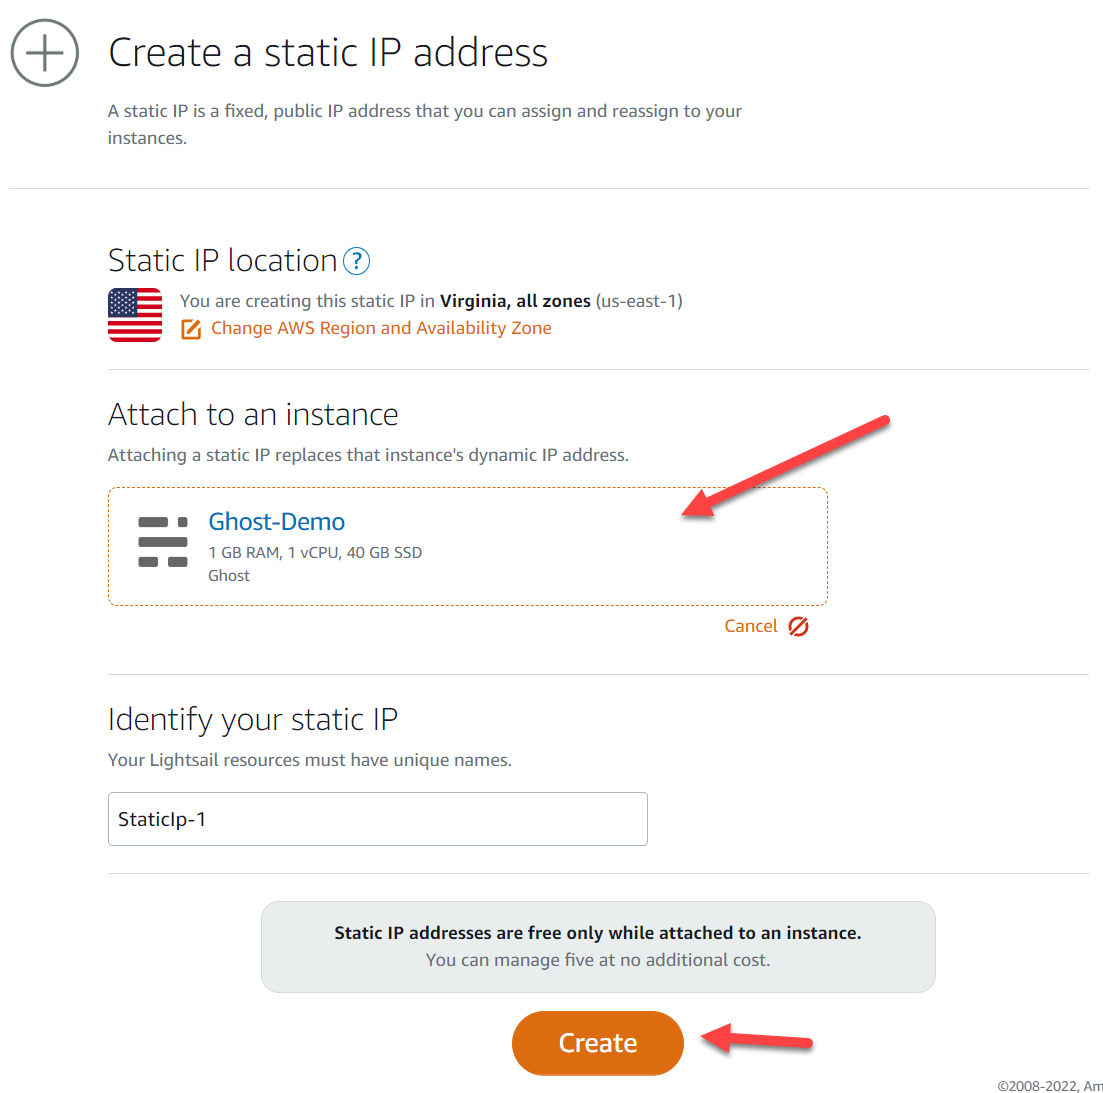
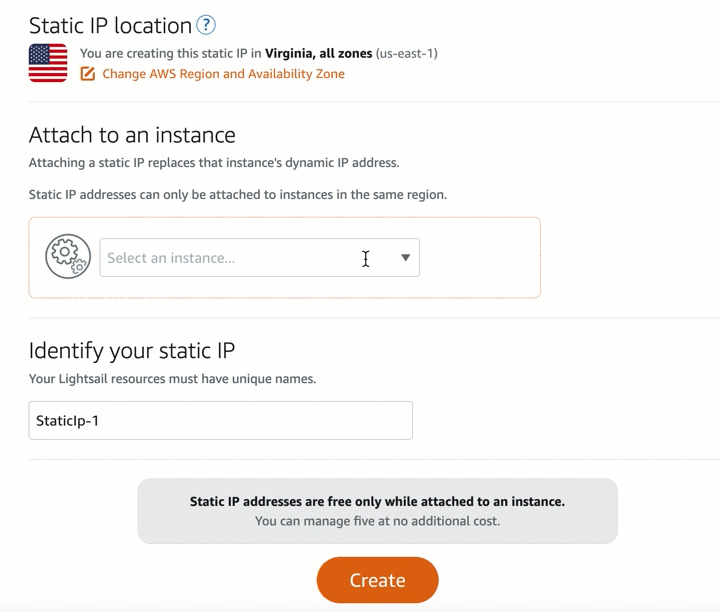
Add a static IP address
Once your instance is available, you'll need to add a static IP address to make it available to internal or external DNS providers. My DNS service is Cloudflare and I already own a domain, so a static IP address is needed to map my domain to my blog running in Lightsail.
Back at the Lightsail home, select the Networking and press the Create Static IP button
See it in action below:
Weird things I had to do
Since this was a migration and not a straight up new blog site, I was imported my content, via the old exported json file, to the new blog just fine. However, I had over 10 years worth of images that couldn't be uploaded via the Ghost admin portal.
For that, I had to use SFT with SSH. Filezila connected fine to the remote instance but the bitnami account lacked the appropriate permissions to create folders and upload files.
I had to spin up an SSH session and use the following commands to give the bitnami account the write permissions to the images folder:
sudo chown bitnami <your folder name>
sudo chmod +w <your folder name>
Note that the username is bitnami and the SSH private key you can acquire
The second issue I encountered is that all the image URLs were resolving to http://localhost/..... I knew that this was a configuration issue somewhere. First I looked for any weird hardcoded values, since I was editing and developing the blog locally prior to uploading the updated template. However, I quickly ruled out the hardcoded values and I worked out that the images where using the https://cmatskas.com variable which gets populated from the config.production.json file.
Back in my SSH session, this is what I had to do:
- Open the file in VI with:
sudo vi config.production.json - Update the URL with the right domain name, i.e
https://cmatskas.com- note that the old value was the original public IP address of the Lightsail instance which didn't resolve to anything since I configured a static IP address - Restart both Ghost and Apache with the following commands:
sudo /opt/bitnami/ctlscript.sh restart ghost
sudo /opt/bitnami/ctlscript.sh restart apache
Custom domain
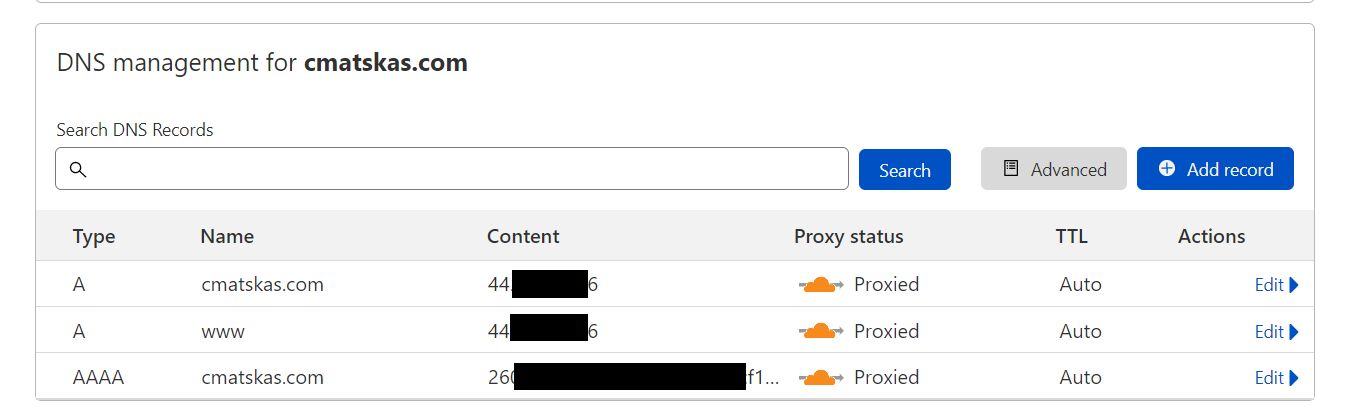
Configuring a custom domain is really straightforward. I use Cloudflare both for SSL termination and for domain name management. Since cmatskas.com is already registered with Cloudflare, what I needed to do was remove the old DNS mappings, some A and CNAME records and add two new A records to point to my Lighsail instance.
In Cloudflare, navigate to your DNS section and add an A Record for the root and www versions of your website that point to the static IP address configured on your Lightsail instance. This is what mine looks like:
Job done....
Lingering issues
I still need to work out why http requests to my domain don't resolve properly and end up in 127.0.0.1. If you're a DNS wizard and can help out with that, please do let me know what I've done wrong, because as we all know... IT'S ALWAYS DNS!!!