This approach is by far my preferred and favourite. Ok, it's not perfect but I believe that it provides the most open source, versatile and flexible way to deploy your functions using any tool and any platform.
This one does not require you to install any special tools other than the Azure CLI on your build server.
In this step, rather than trying to do everything from one file, i.e. the ARM template, I decided to go with the 2 step approach:
- Deploy the ARM template with the Application Service and Function(s) structure
- Deploy the Function(s) code.
Let's break it down
Step 1 - deploy the ARM template
This is where the Azure CLI comes handy. Once your code is built successfully and you're happy with the state of you build, you can kick of a deployment through your favourite tool to deploy the ARM template.
I'll use a generic step to call the Azure CLI to deploy my ARM template. Remember that you need a [Service Principal](GHOST_URL/service-principals-in-microsoft-azure/" target="_blank) and optionally, but highly recommended, an [Azure KeyVault](GHOST_URL/azure-key-vault-the-new-security-service-from-microsoft/" target="_blank) to help you with the ARM template deployment. The Key Vault is only optional and can be used for passing sensitive parameter values to your ARM template. I blogged about this feature here.
The CLI command to deploy your ARM template should look like this:
azure group create -n examplegroup -l "West US"
azure group deployment create -f "c:\MyTemplates\example.json" -e "c:\MyTemplates\example.params.json" -g examplegroup -n exampledeployment
The ARM template should be deployed incrementally to ensure that we don't get any failures and we can safely repeat the process through our CI/CD pipeline.
Once this step has completed successfully, we're ready to execute step 2, i.e. the actual code deployment.
Step 2 - Compressing (zip) the Azure Function code
Before pushing the code to azure we need to
- compress it into a zip file
- place the zip file in an accessible location within our build server.
Most CI/CD tools have built-in tasks for compressing artefacts. Find that step in your tool and configure it to zip all the necessary files and then to place the zip in the designated location. This location is usually accessible by subsequent tasks as an environmental variable.
Step 3 - Deploy the Function code
We're gonna be clever about this and use a powerful, yet little known, tool called Kudu. Kudu is the engine behind many AppService features such as Git deployments etc, but it also provides powerful tooling for developers to manage and troubleshoot AppServices. There are quite few [videos](https://channel9.msdn.com/Search?term=kudu#ch9Search&lang-en=en" target="_blank) and conference talks that go over Kudu if you wish to know more about this awesome tool.
In this instance and for the purpose of this task, we're gonna use the [Kudu REST API](https://github.com/projectkudu/kudu/wiki/REST-API" target="_blank) to deploy our Functions' code. The API exposes a /zip/site/wwwroot/ endpoint with can be used to either retrieve the currently deployed code as a zip file using GET or upload a new version of your code, in a zip format using PUT. Requests to the Kudu endpoint need to be authenticated (obviously) so I'll start with this. As you'll discover it's a bit tricky to find your deployment credentials (at first). Once you know, you know!
Retrieve your deployment credentials
There are 2 types of [deployment credentials](https://github.com/projectkudu/kudu/wiki/Deployment-credentials" target="_blank) that you can use with the Kudu REST Api or FTP (if this is how you still roll these days - perfectly acceptable).
- Site-level credentials
- User-level credentials
NOTE: these are not your Azure login credentials which should not be used for automation tasks anyway!
To get the site-level credentials, login to the Azure portal and navigate to your Function and click on Function app Settings.
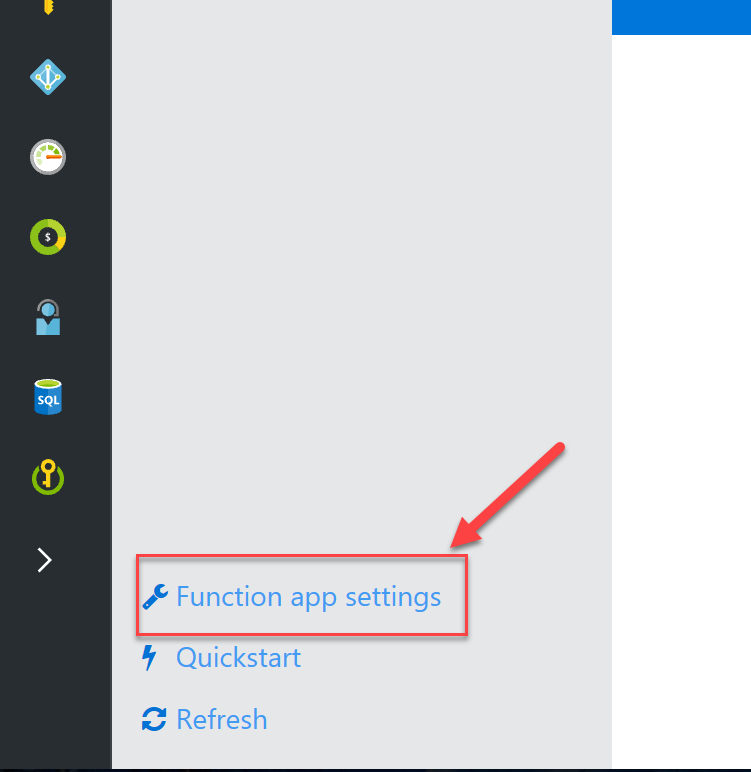
I'll assume that there's one already. Yes, this is a bit of a caveat. You need an AppService first in order to be able to deploy Function code in this manner. If you've run Step 1 (ARM deployment) above, your AppService should be there.
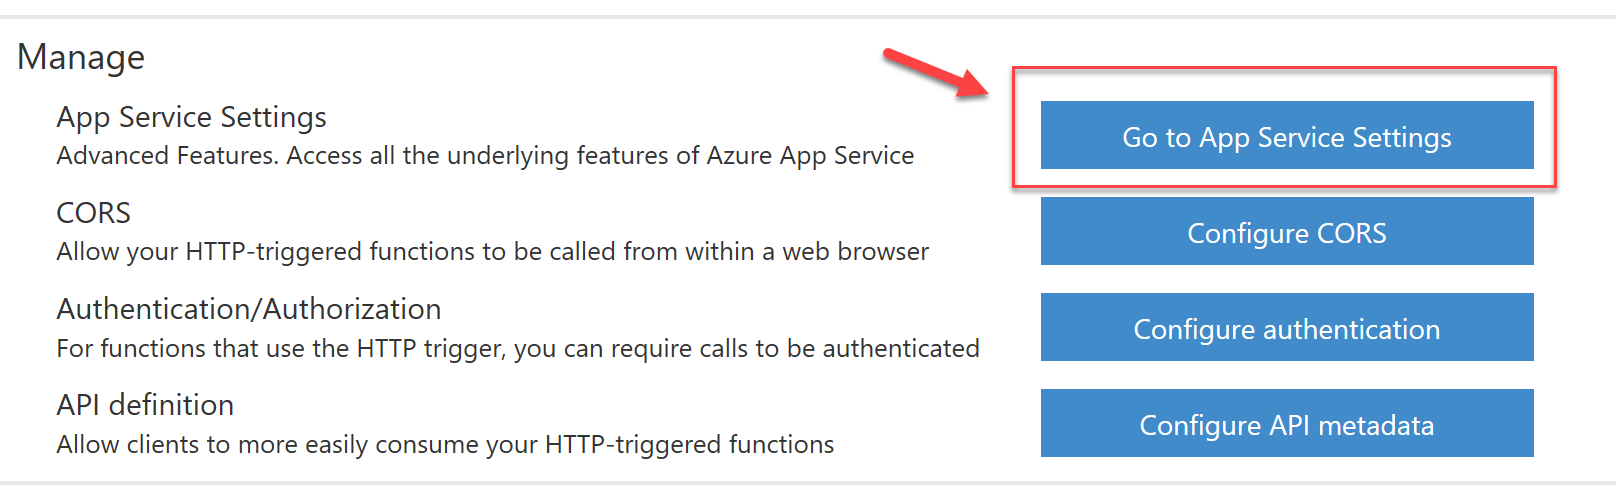
Click on Go to AppService Settings
From the new blade that's opened, click on Get Publish Profile to download the file that contains publish settings.
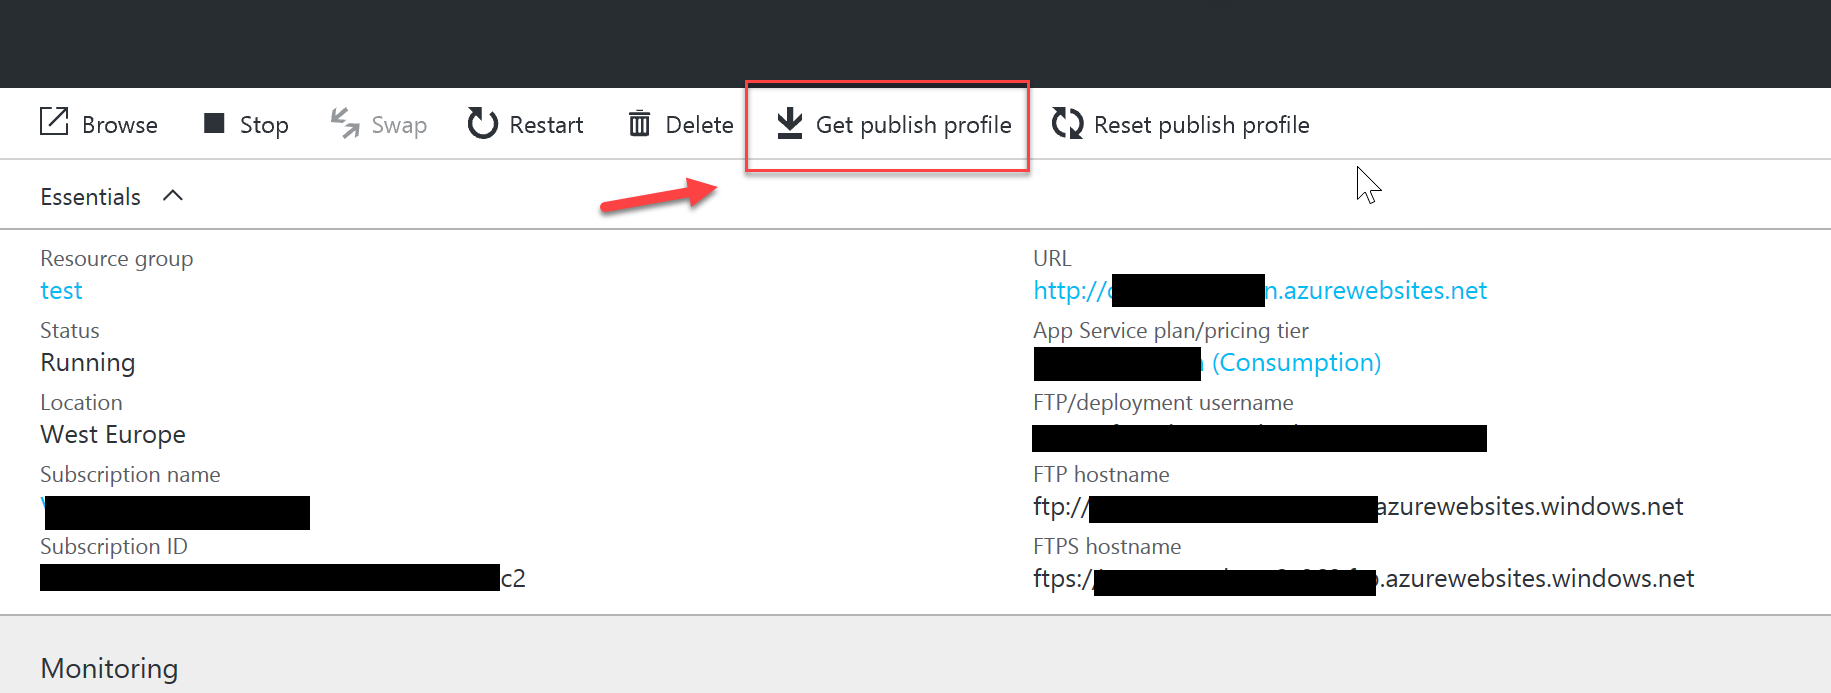
Open the <appService>.publishsettings file and copy the following values:
- userName
- userPWD
These are the deployment credentials that we will use for access to the Kudu API. This part is over so you can now discard the file as well. Don't let it lying around your machine as your credentials are in.... CLEAR TEXT!
Making the request to the Kudu API
First we will use PowerShell (PoSH) to create a script to upload the zip file through the Kudu API. This same script should be executed by the build server. Remember that PoSH is now cross-platform and runs on both Windows and Linux servers. The build task calling this PoSH script will need to pass the path to the zip file generated in step 2
It's especially important that we escape the $username. This is because your deployment username contains a $ in the beginning and PoSH treats this as a local variable instead of a literal string.
To escape the username, e.g "$myUsername" we need to add a " ` " (backtick??) in front of the $ sign eg "`$myUsername"
If PoSH is not an option, we can use [CURL](https://curl.haxx.se/" target="_blank) as an alternative. The end result will be exactly the same, just different tools to accomplish the same thing:
curl -X PUT --data-binary @foo.zip https://<yourfunction>n.scm.azurewebsites.net/api/zip/site/wwwroot/ -u <yourDeploymentUsername>:<yourDeploymentPassword>
Again, it's especially important that we escape the $ character in the username. Otherwise, CURL fails miserably with authentication errors. The username should look like this: \$myUsername
Conclusion
I like this deployment method for Azure Functions because it has no dependencies (other than the Azure CLI for obvious reasons!) and doesn't force you down a specific toolset. I obviously prefer to run these steps in Visual Studio Team Services because of it's amazing and seamless integration with Azure, but this shouldn't stop you from using your preferred tools. The scripts and tools I showed you here (CURL, PowerShell and Azure CLI) work on any platform and this is why this is my favourite option for deploying Functions to Azure.
Special thanks
I would like to thank [David Ebbo](https://twitter.com/davidebbo" target="_blank) (MS guru) and [Mattias Karlsson](https://twitter.com/devlead" target="_blank) for helping out to fix a couple of small, yet annoying issues in my scripts. We even managed to improve the Kudu documentation in the process! Open Source FTW.