Azure Policies are an amazing, albeit well-hidden, feature that allow subscription administrators to define and enforce specific rules on how Azure Resources should be deployed. [Azure Policies](https://docs.microsoft.com/en-us/azure/azure-policy/azure-policy-introduction" target="_blank) have been around for a long time, however they only became a first-class feature on Azure recently by getting a dedicated section in the portal. Therefore, when working with Azure Policies in the portal these days, you can now see all the definitions and assignments in one central place, making it easier to manage infrastructure and set explicit rules to enforce a uniform compliance
TLS options in Azure App Service
One of the latest features added to Azure App Services and, consequently Azure Functions, services is the ability to [configure a specific TLS version](https://blogs.msdn.microsoft.com/appserviceteam/2018/04/17/app-service-and-functions-hosted-apps-can-now-update-tls-versions/" target="_blank). Older versions of TLS (1.0 and 1.1) are now considered insecure so customers are advised to move to the latest TLS version 1.2
This is a great feature and I applaud all efforts to tighten security. However, even at this point, deploying a new App Service from the portal will default to TLS 1.0. Since we (and I mean everyone involved in writing or releasing products to the wild) should care about security best practices and we know that the default TLS 1.0 version is not secure, we are going to to implement an Azure Policy to deny all deployments that don't use TLS 1.2
Configuring the Azure Policy
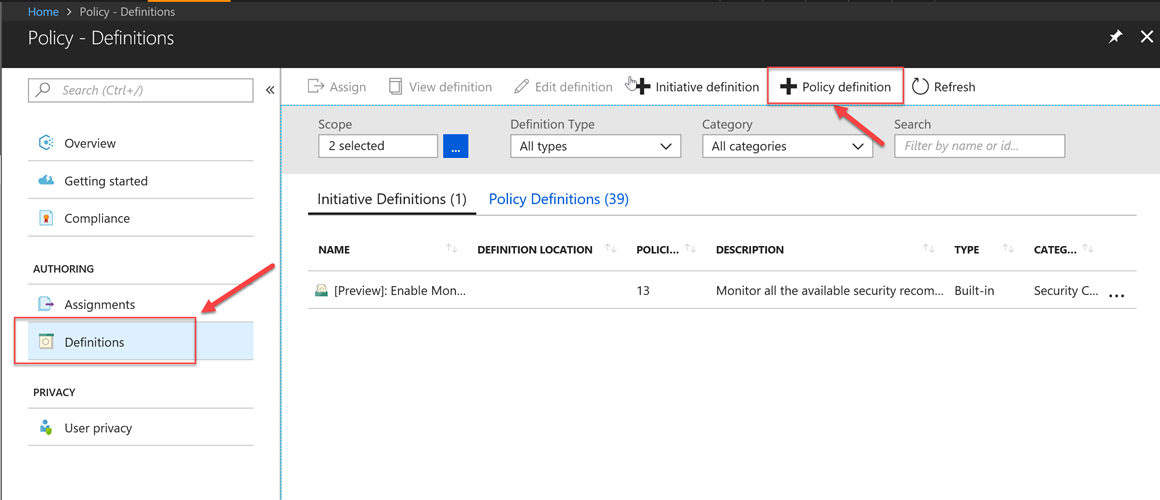
First we need to define a new Policy. Our Azure subscriptions comes with a few default policies (39 of them to be exact) but none of them do what we want to implement a new one from scratch. There are many ways to define a new policy but in this instance we'll use the Azure Portal (I'll provide the azure CLI script at the end of the post as well). Let's head over to the Azure portal and open the Policy resource blade:
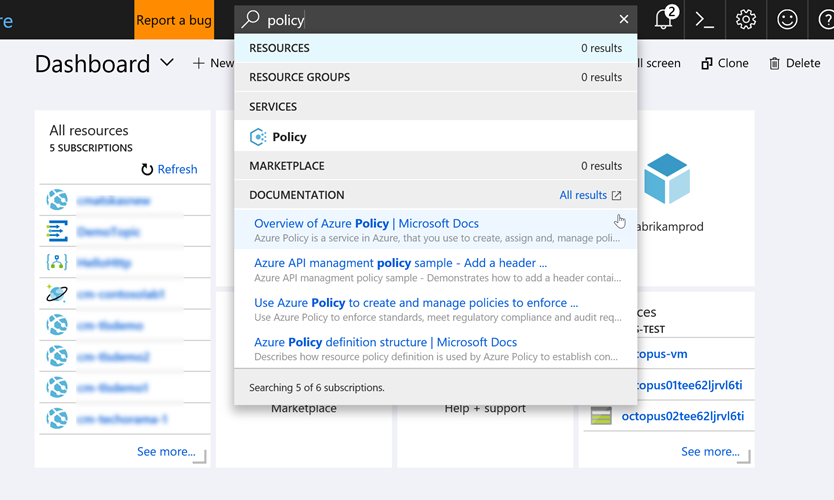
Got to definitions and press the Add Policy Definition button:
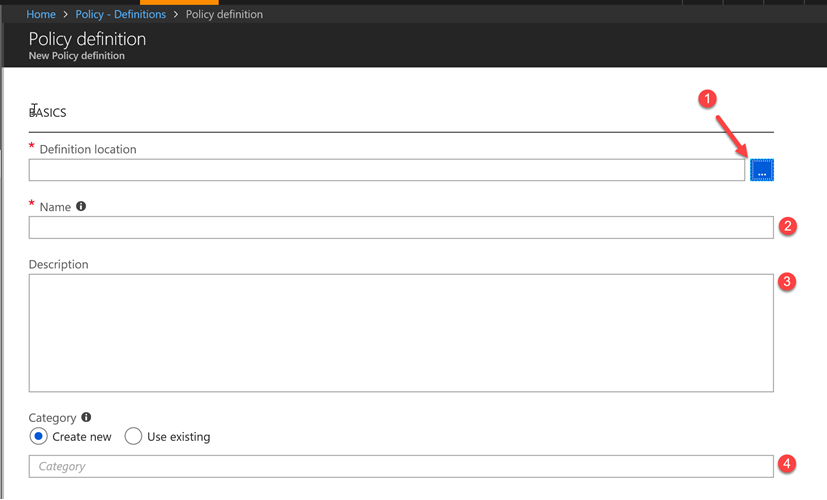
You need to provide the location (see subscription) where the Policy should be saved. I say saved because the definition doesn't take effect until it's been assigned. Make sure to give it a meaningful name, a description and a category. The category allows us to logically group similar policies together:
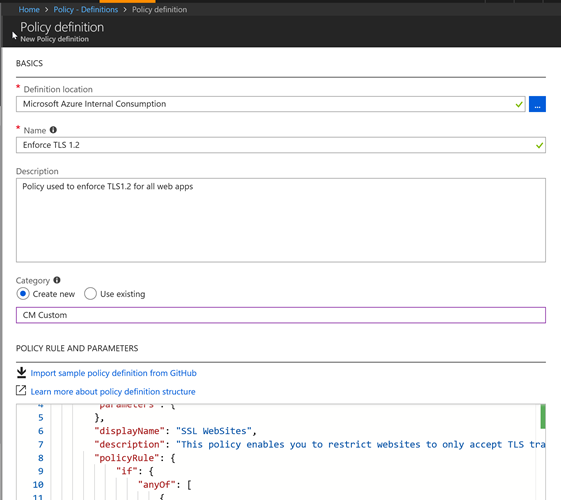
Add the following code and press Save
Before we continue, it may be useful break down the policy definition to explain what happens. All Policy definitions, as per the [documentation](https://docs.microsoft.com/en-us/azure/azure-policy/policy-definition" target="_blank) consist of 2 parts:
- The resource attribute/property we want to evaluate
- The operation/effect itself (deny, audit etc)
In this instance, we check whether HTTPS only has been set to true and if the MinTLSVersion attribute is set to 1.2. If any of these 2 evaluations fail to meet the defined criteria, i.e set to the right value, then we apply the deny effect to stop the resource manager from creating a non-compliant resource.
Note: in an ideal world, we should be able to use a Policy to set the TLS version to 1.2 instead of denying the resource creation. Unfortunately, this is not possible yet (as of June 2018) yet. The
Appendeffect fails if a property already exists with a valid value.

Policy assignment
With our policy is now configured, we can go ahead create an assignment. Assignments can be defined at different levels (Subscription or Resource Group). What we want to achieve here is an assignment that will be applied across all new App Services or Functions. If these new resources don't comply with Https-only and TLS version rules then they should fail validation. You should assign the Policies at the the level you feel appropriate based on how your team operates.
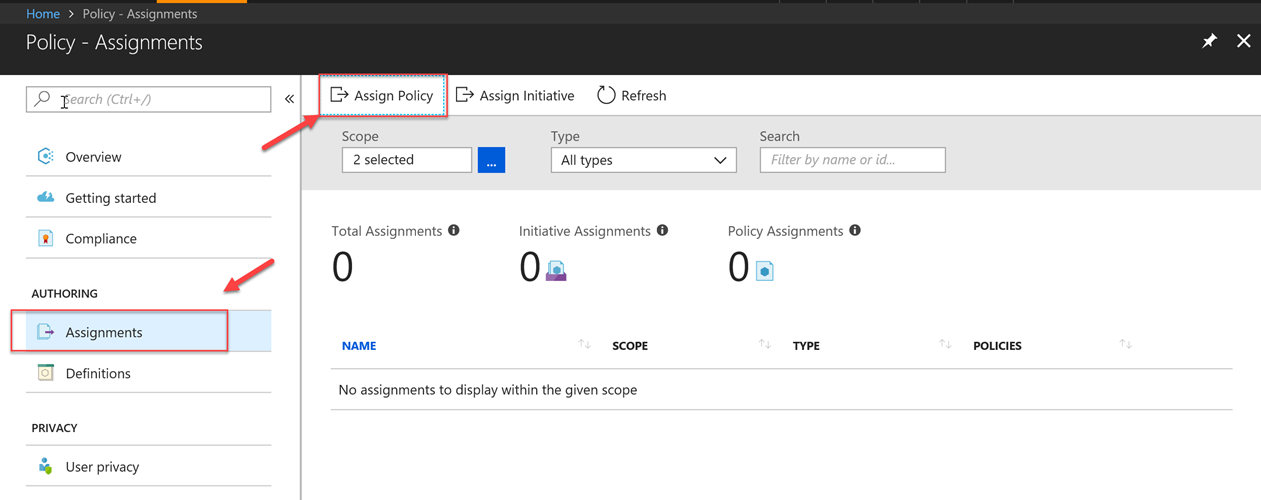
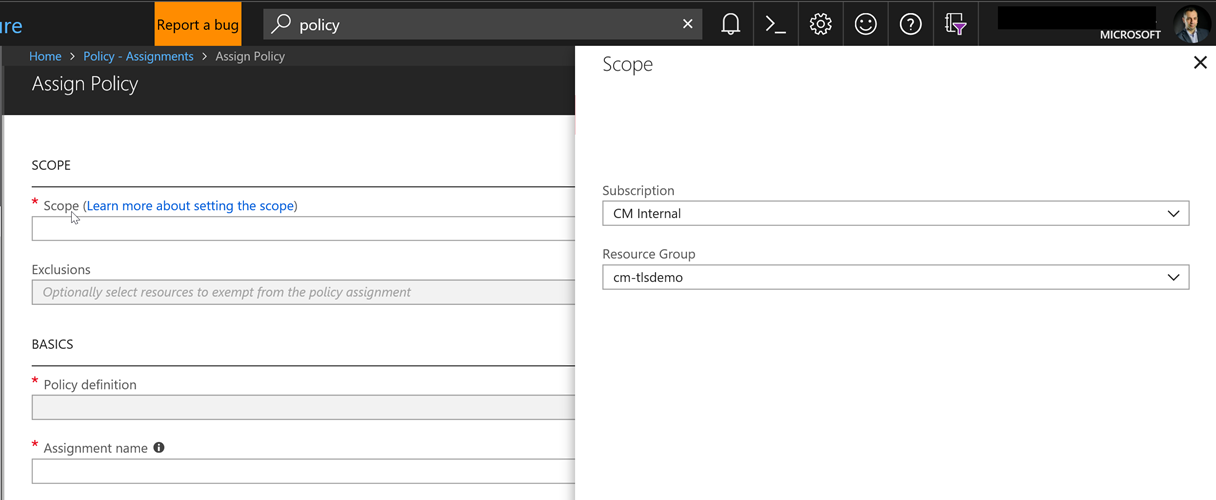
Next, in the Azure portal we need to navigate to the Policy resources and select the Assignment blade. We need to click on the Assign Policy button to associate the Policy with a subscription and or resource group:
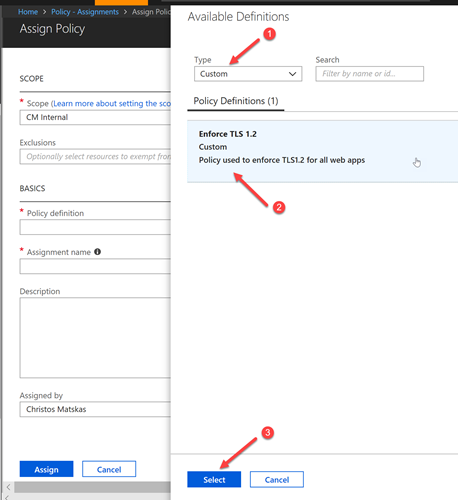
To select the appropriate Policy, we need to select the ellipsis (…) next to the Policy Definition text box and choose the one we need. Since we may have many user-defined definitions, it's easier to filter by type or search by name, as per the image below:
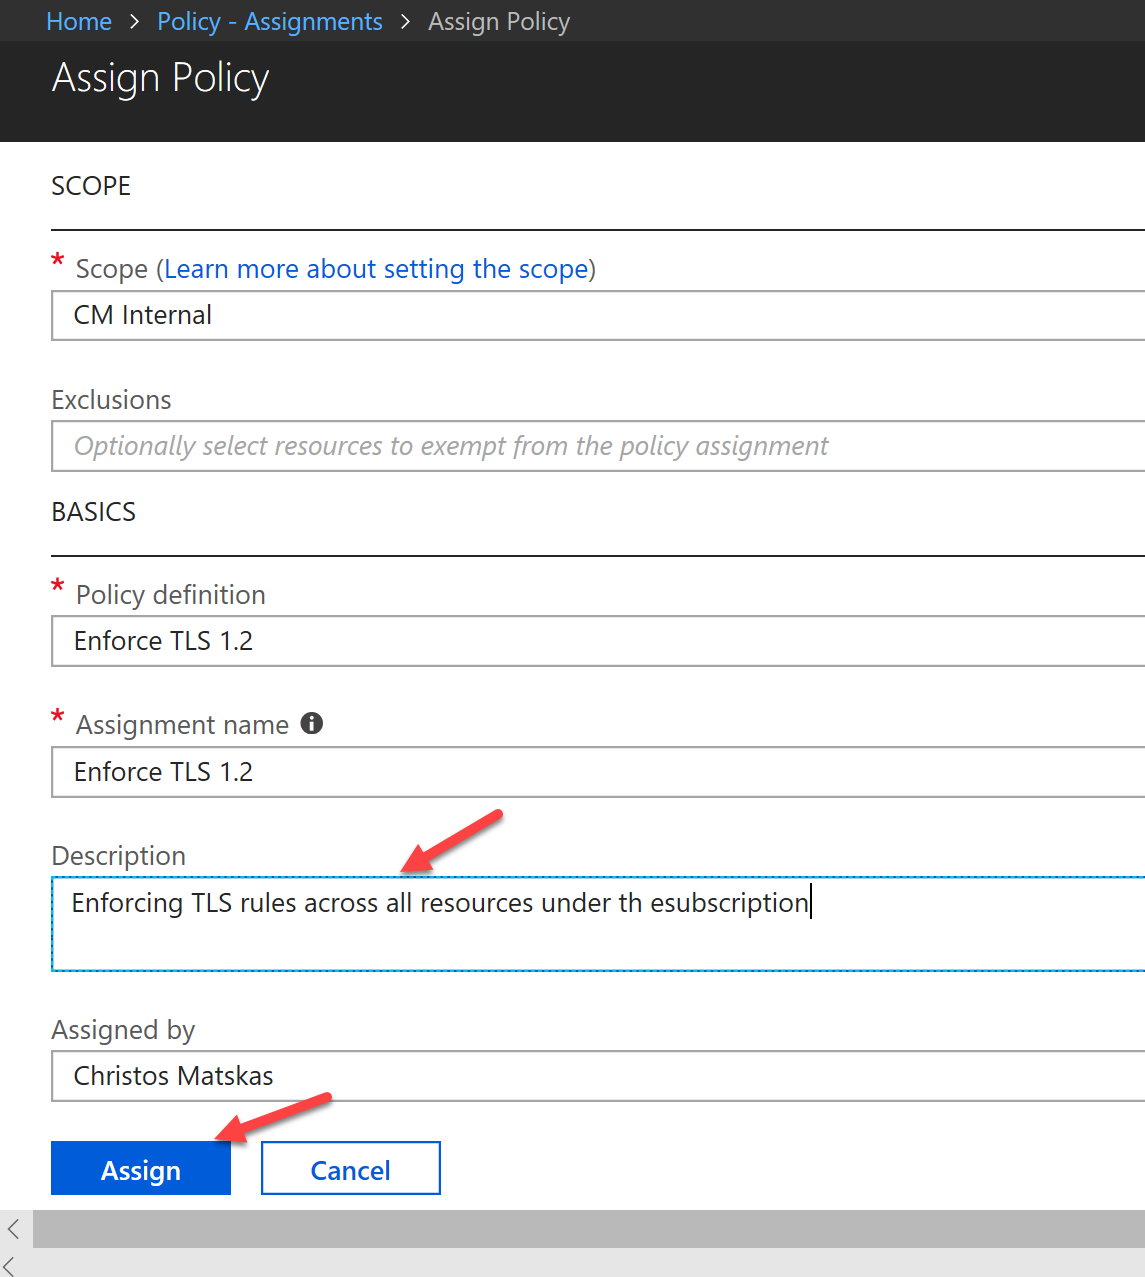
Finally, we need to press the Assign button to complete the process.
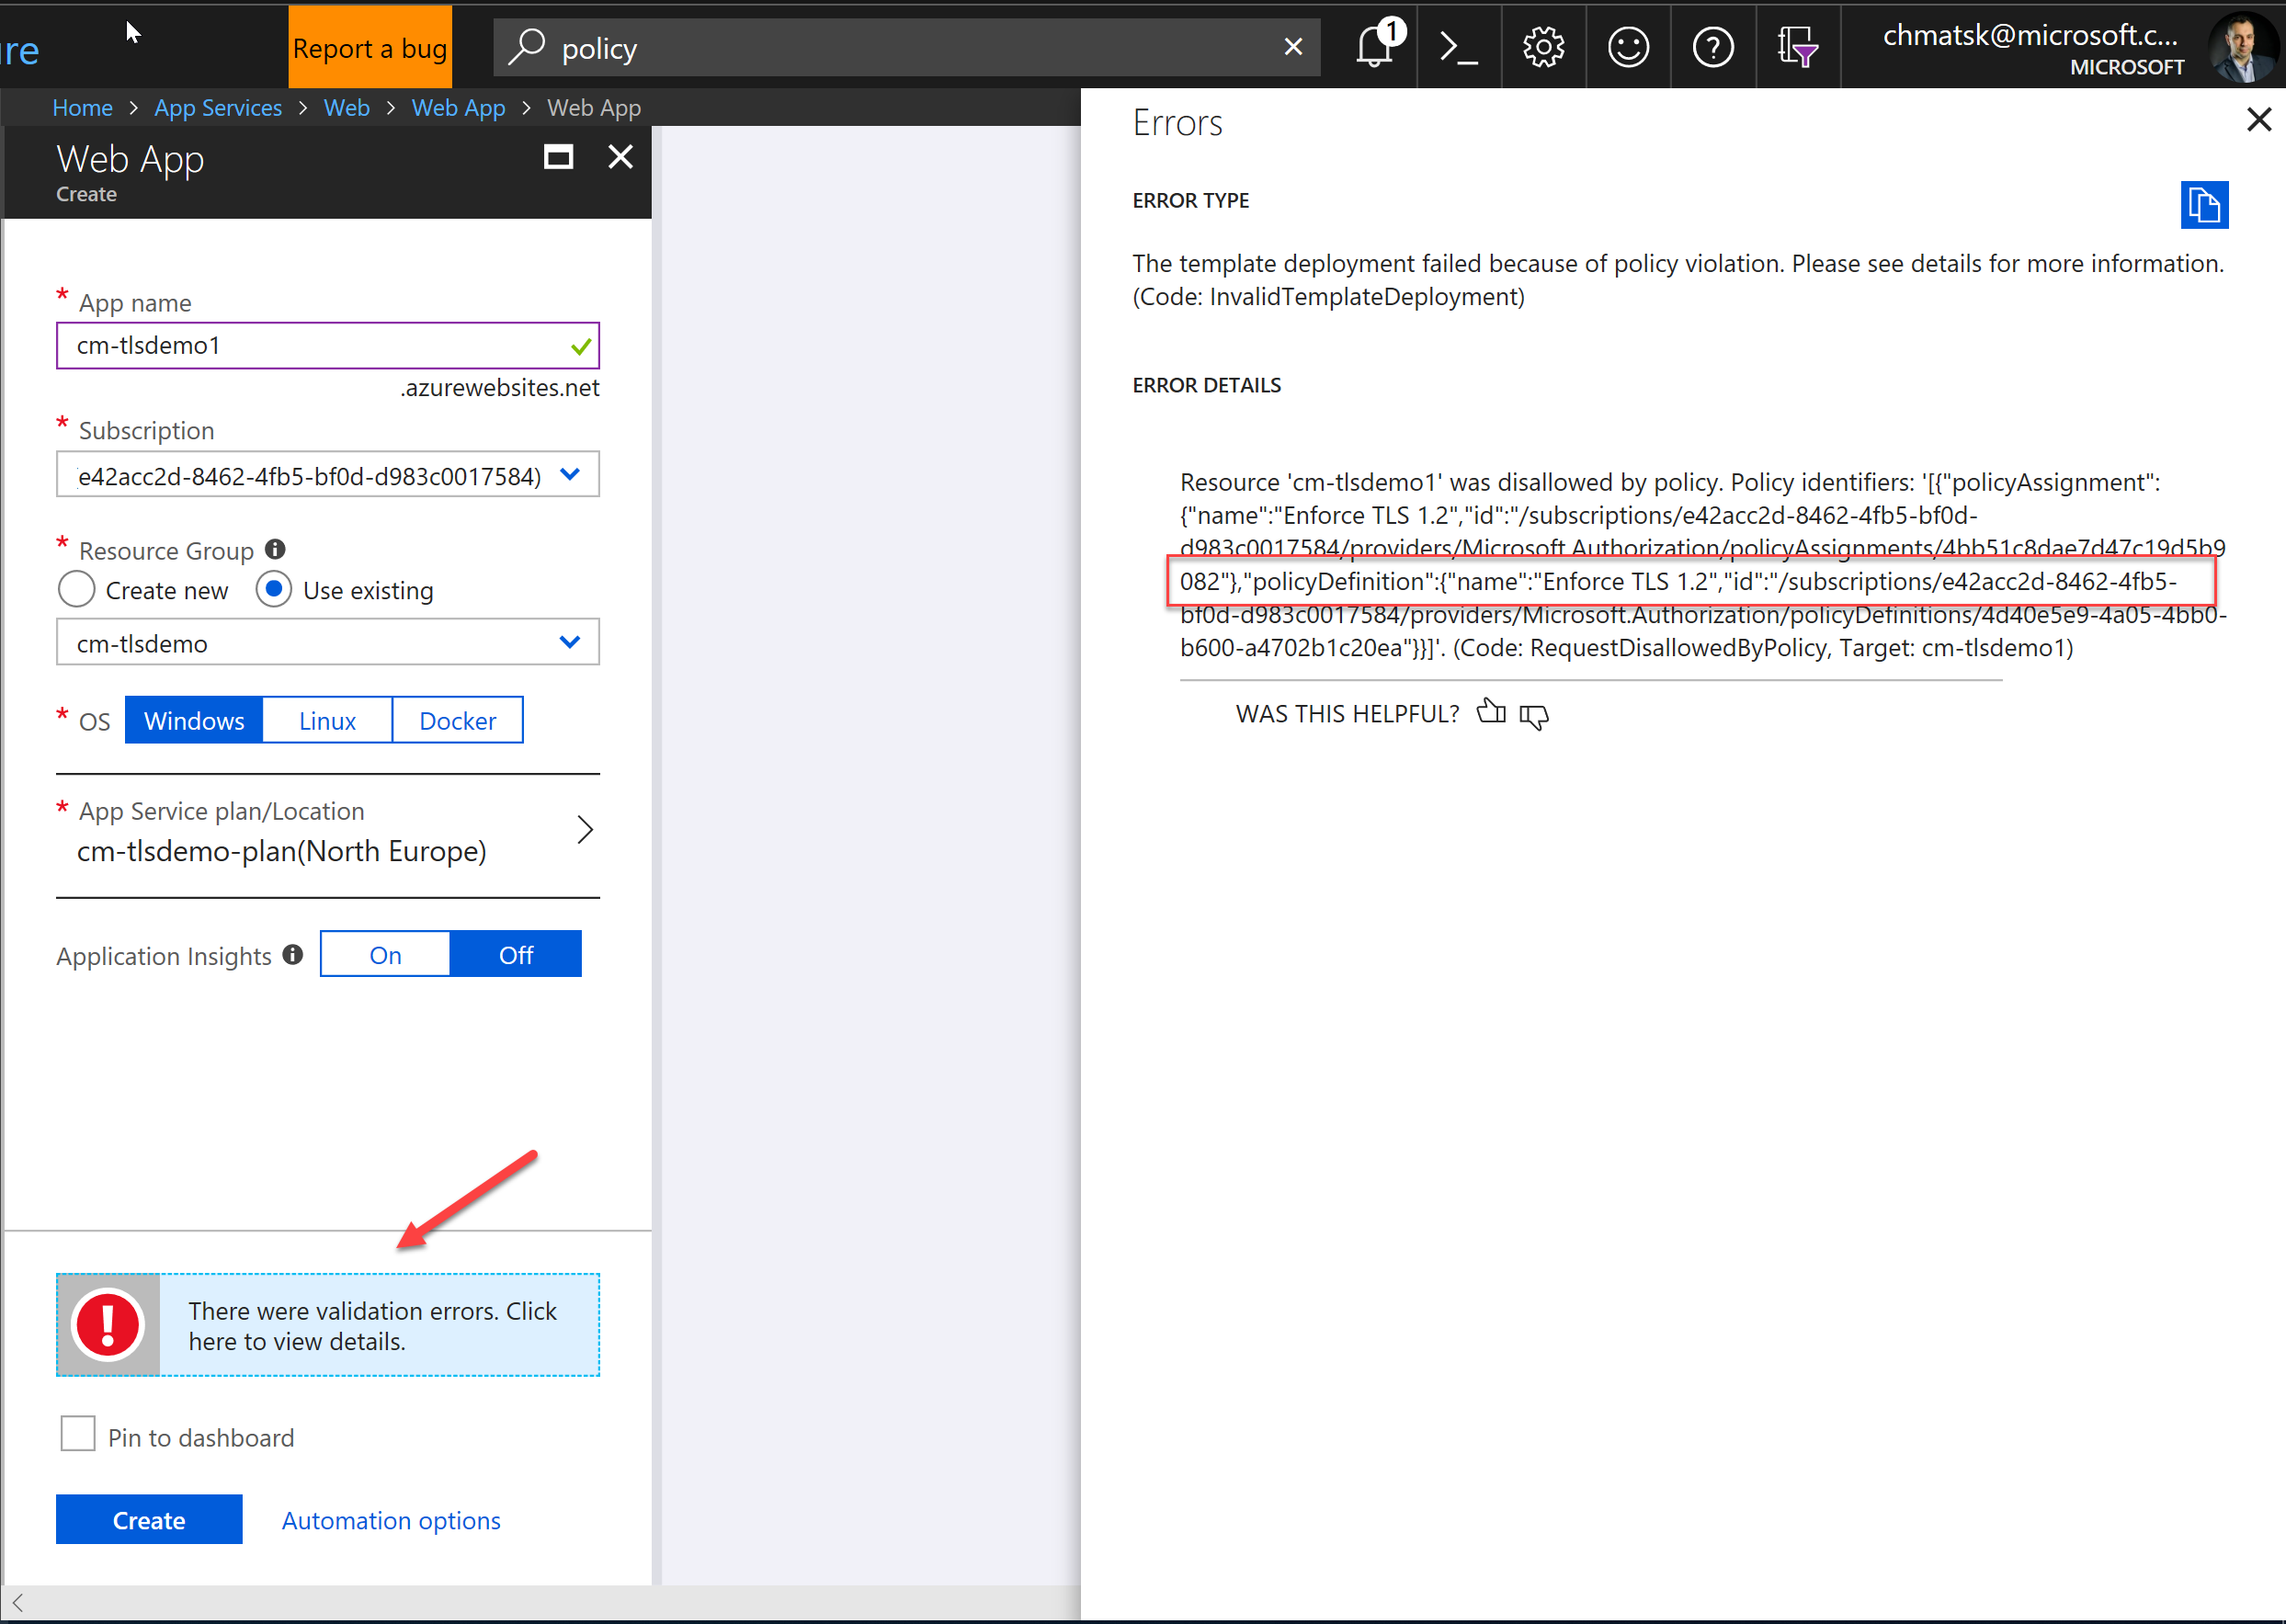
Testing the policy
With the policy in place, we can now put our new restrictions to the test. The easiest way to test that the rule has been applied correctly is by trying to create a new App Service from the portal. As soon as we press the Create button on the New App Service blade, you'll notice that the process fails at the validation stage. This is because the default template uses TLS 1.0 and we have enforced a Deny rule via our Policy
Deploying resources the "right" way
Since the new policy, and rightfully so, prevents us from doing deployments from within the portal, we need a way to deploy an Azure Web App that complies with the new rules. The appeal of policies is that it forces guides developers down the best-practices route of using the right tools for the job. In this case, the right tool is ARM templates. Consequently, for an azure Web App deployment to work we need to amend the default ARM template to contain the following 2 properties:
HTTPSOnly (line 22)
TLS 1.2 (line 30)
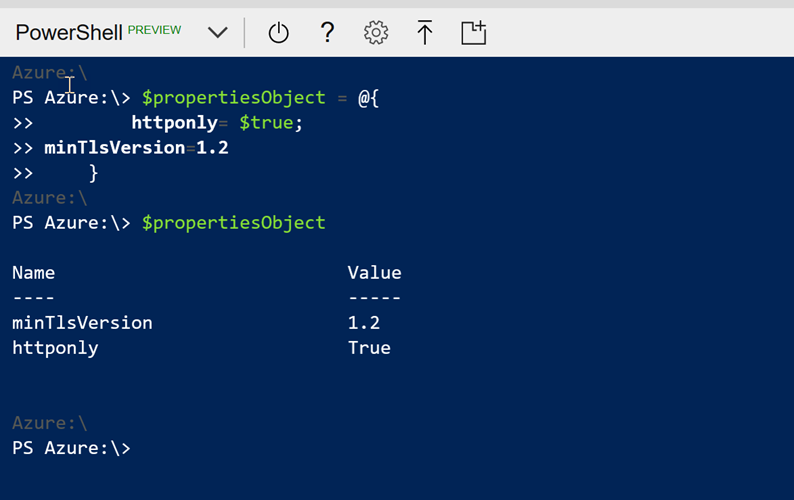
Alternatively, you can use PowerShell or the Azure CLI to configure these properties. My good friend Tom Chantler has a nice blog post on configuring HTTP2 on Azure Web Apps using PowerShell, so we can borrow (see steal) his code and change it slightly to meet our needs:
The PowerShell (version 6.2) script necessary to set the HttpsOnly and MinTlsVersion is shown below:

Scripting Azure Policies with the Azure CLI
Finally, if you want to script the Policy Creation and assignment, you can use the following Azure CLI commands:
NOTE: the script assumes that the json file containing the definition of the policy is in the current directory. If you're using the Azure Cloud Shell, you can easily upload files to your local (cloud) drive.
Summary
I'm finding Azure Policies and extremely versatile and powerful tool that every company should be using to enforce consistency and compliance. They do come with a steep learning curve especially if you want to script everything, but once you get the hang of it, hopefully you'll start using them more.