For most of your monitoring and alerting needs, [Azure Monitor](https://docs.microsoft.com/en-us/azure/monitoring-and-diagnostics/monitoring-overview" target="_blank) should be the tool of choice. It's made the whole process so much easier and streamlined while, for the first time, providing management through the portal. I've already blogged about various monitoring options [here](GHOST_URL/monitoring-applications-and-infrastructure-on-azure/" target="_blank). However, there are a still few edge cases (not for long) for which Azure Monitor can't be the solution. In this instance, I needed a way to monitor and alert on failed backups on Azure Web Apps
Azure Web Apps have this awesome feature that allows you to run backups on a schedule to ensure that you have business continuity (and save your backside from silly user errors - usually me screwing up a deployment). The backup data is stored to an Azure storage account at a predefined, configurable times and frequencies. Depending on the Application Service tier (standard or premium) you have different options on how to set your backups. The problem with this solution that is that the backup logs are not exposed to Azure Monitor. Consequently, monitoring and alerting for backup failures has to be a bespoke. Since [Azure Functions](https://docs.microsoft.com/en-us/azure/azure-functions/functions-overview" target="_blank) is one of my favourite tools, I decided to use them [Azure Functions() to solve the problem. So let me guide you through the process.
Note that Azure Functions was ONE of the ways to solve this and there are other alternatives. One the other hand, you can easily extend this solution to address other bespoke monitoring and alerting needs that can't be covered by Azure Monitor or AppInsights or Operations Management Suite (OMS)
Prerequisites
I wanted to be able to capture failed backups based on log entries and then email someone. I could, alternatively, used texting (Twilio) or a webhook for Teams or Slack.
To send emails you need a SendGrid account, or something similar. You also need to setup a Service Principal which will be used to communicate with the storage account. So all in all, you'll need:
- An active Azure Subscription
- A SendGrid account
- An Azure Service Principal
You can get yourself a free Azure subscription plus some free credits through [Visual Studio Dev Essentials](https://www.visualstudio.com/dev-essentials/" target="_blank). You can register for a free SendGrid account on their site and you can create a Service Principal following these [instructions](GHOST_URL/service-principals-in-microsoft-azure/" target="_blank).
Step 1 - Getting the logs
Log in to your Azure Portal, select the subscription you want to work with and create a new Powershell-based TimerTrigger Function.
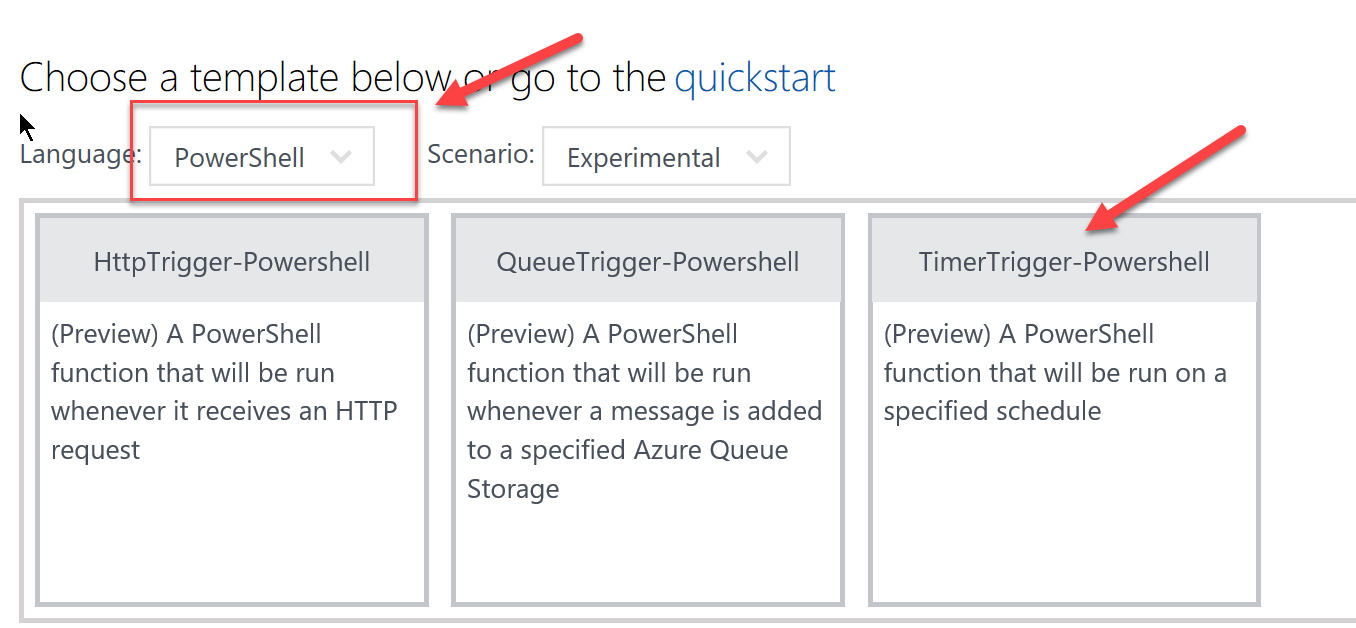
Give it a name (BackupLogQueryOnTimer) and set up the schedule using the [Cron time format](https://en.wikipedia.org/wiki/Cron" target="_blank). Now, press Create to -ha- create your Function!
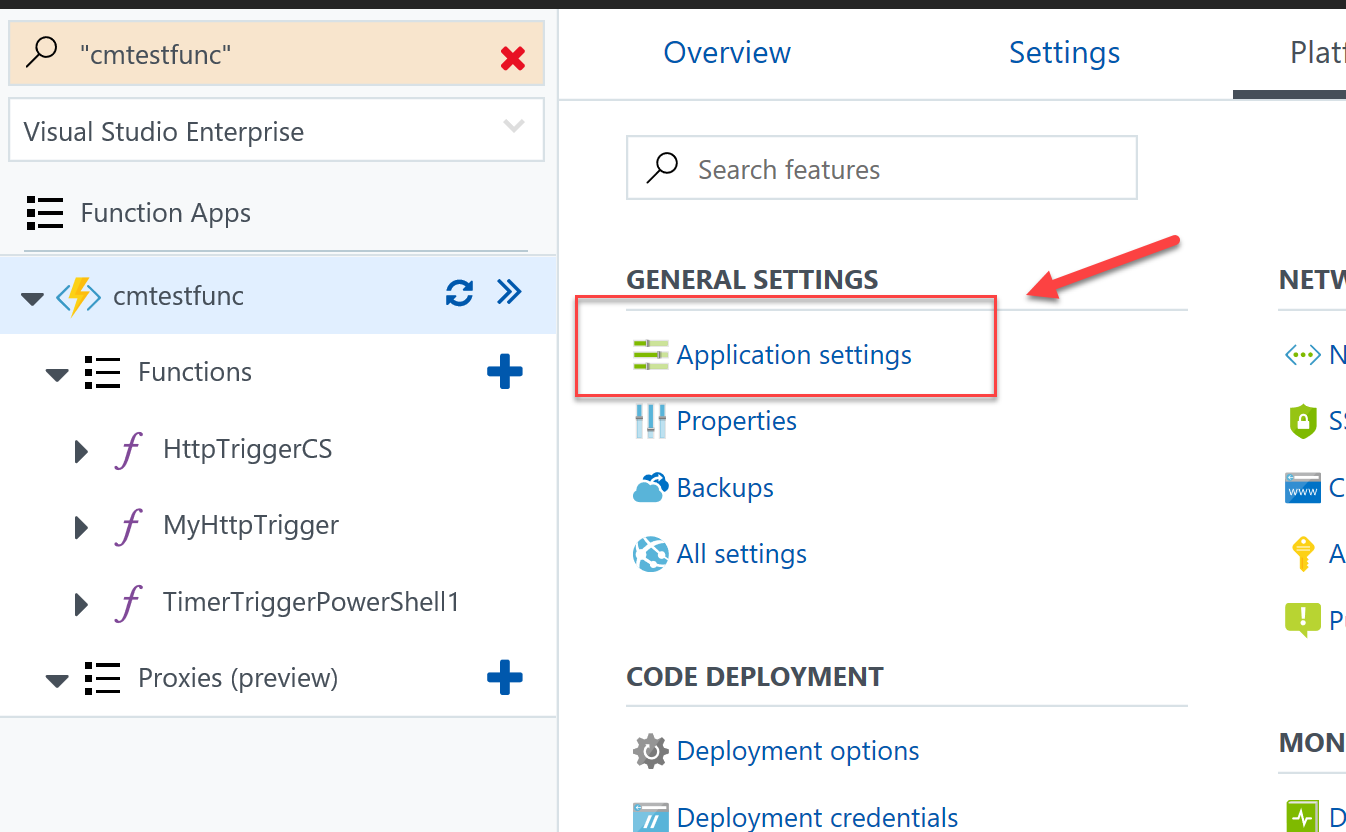
Next, go to the Application Settings and add 3 new application parameters. There's a new and refreshed UI so some of "your cheese" may have been moved around in the process (you've been warned).
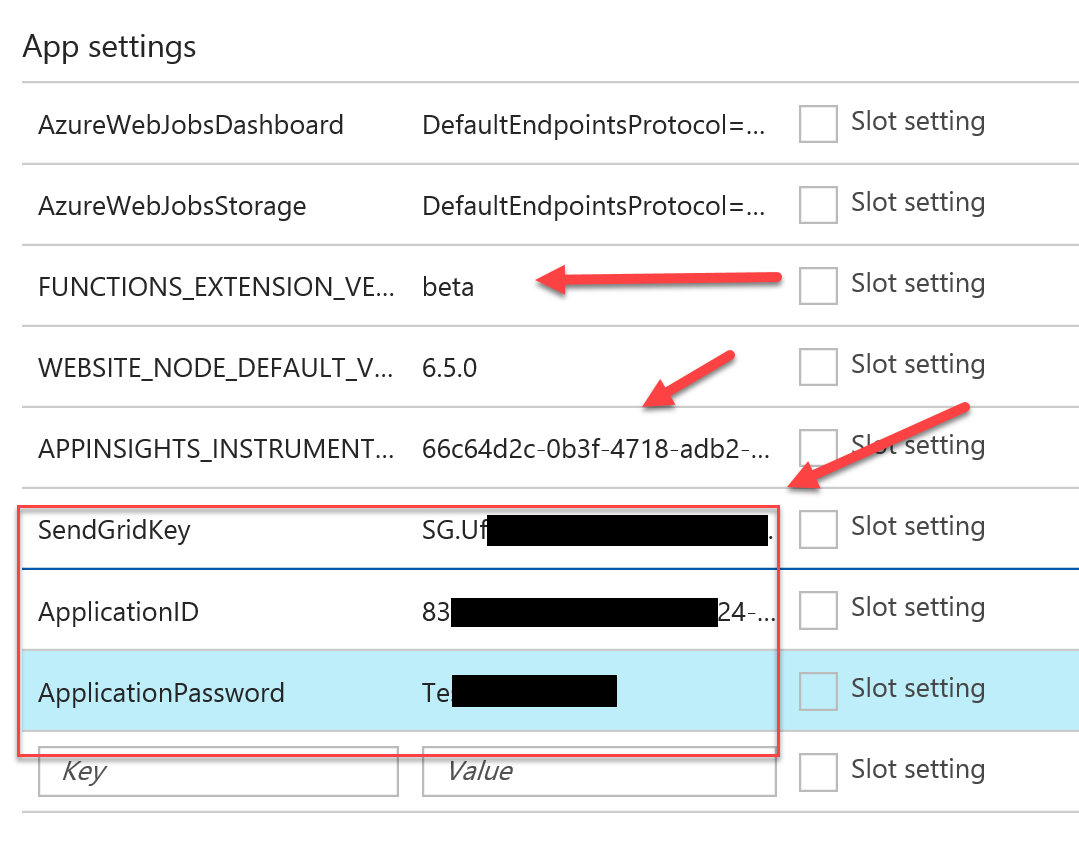
- your SendGridKey
- your Service Principal Application ID
- your Service Principal password
Save the changes and go back to your Function Code Editor. The code necessary to query the logs is provided below. Copy-paste it into the editor and save.
Make sure you replace the values inside <> in the script. In particular, the TenantID, the name of the web app you're monitoring, the resource group of the app and, finally, the duration of logs you wish to query for failures. For example, if you're checking the logs once a day, the interval should be 24 hrs. Also, I could comment out this line of code as we don't have the second Function that sends emails yet.
#Invoke-WebRequest -Uri "https://cmtestfunc.azurewebsites.net/api/EmailSender?code= -Method POST -ContentType "application/json" -Body $json -UseBasicParsing
Save the Function and run it to make sure you can get some logs back and that the Service Principal is working as expected.
Step 2 - Alerting on error
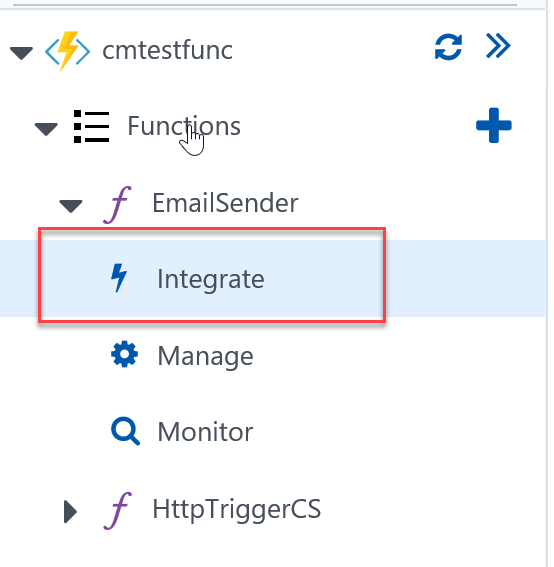
For alerting, we're going to create another Function. This time, we will go for a C# HttpTrigger. Give it a meaningful name and leave everything else as default. Now we need to move to the Integrate blade to configure our outputs.
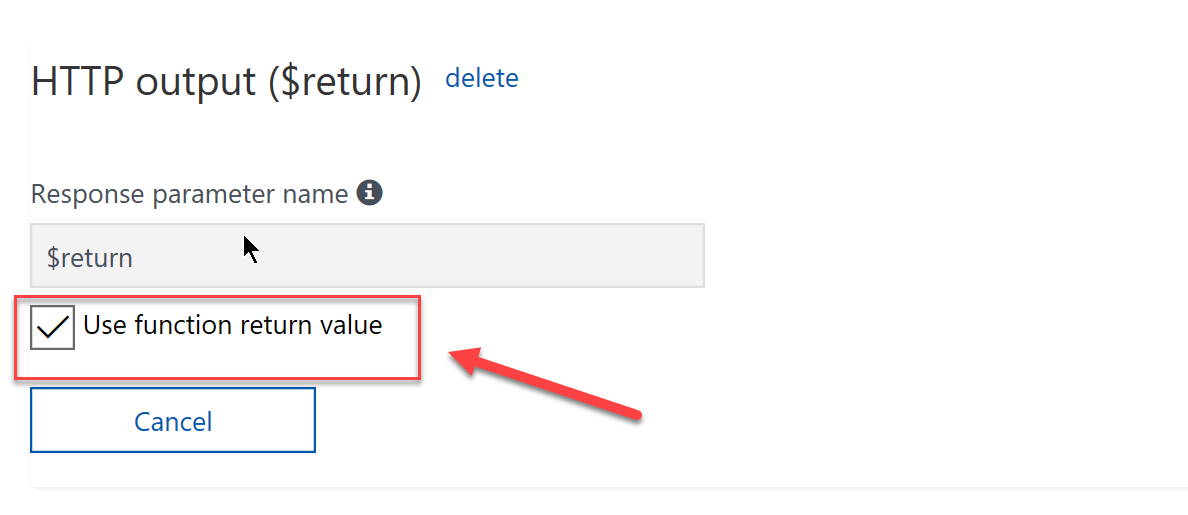
You need to add 2 Outputs. The first should be an HttpResponse. Make sure you check the Use function return value option and leave everything else as default.
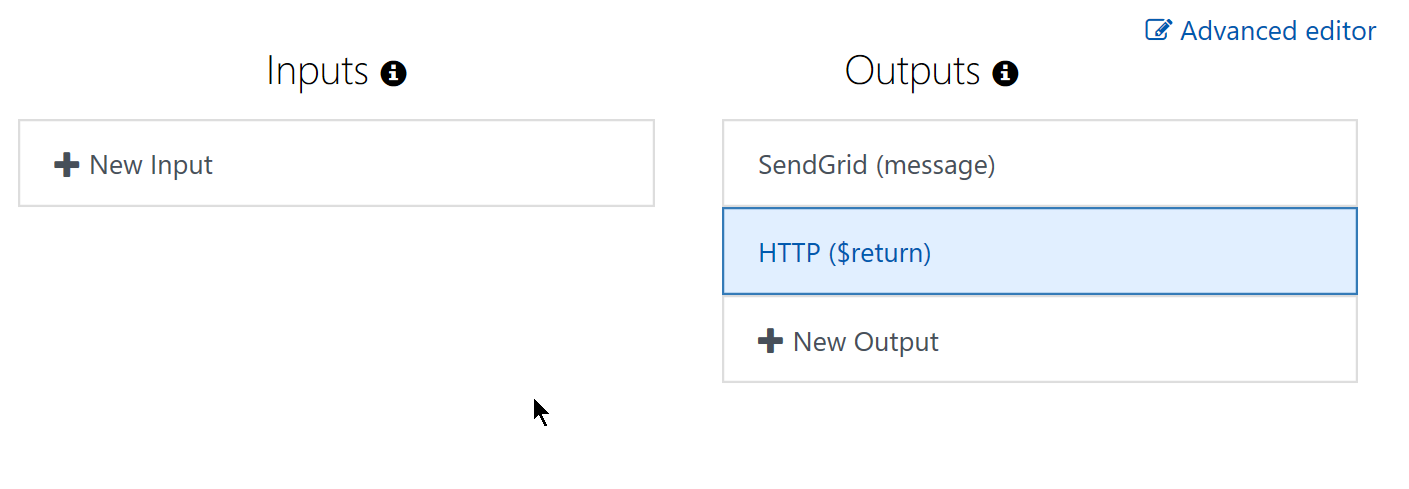
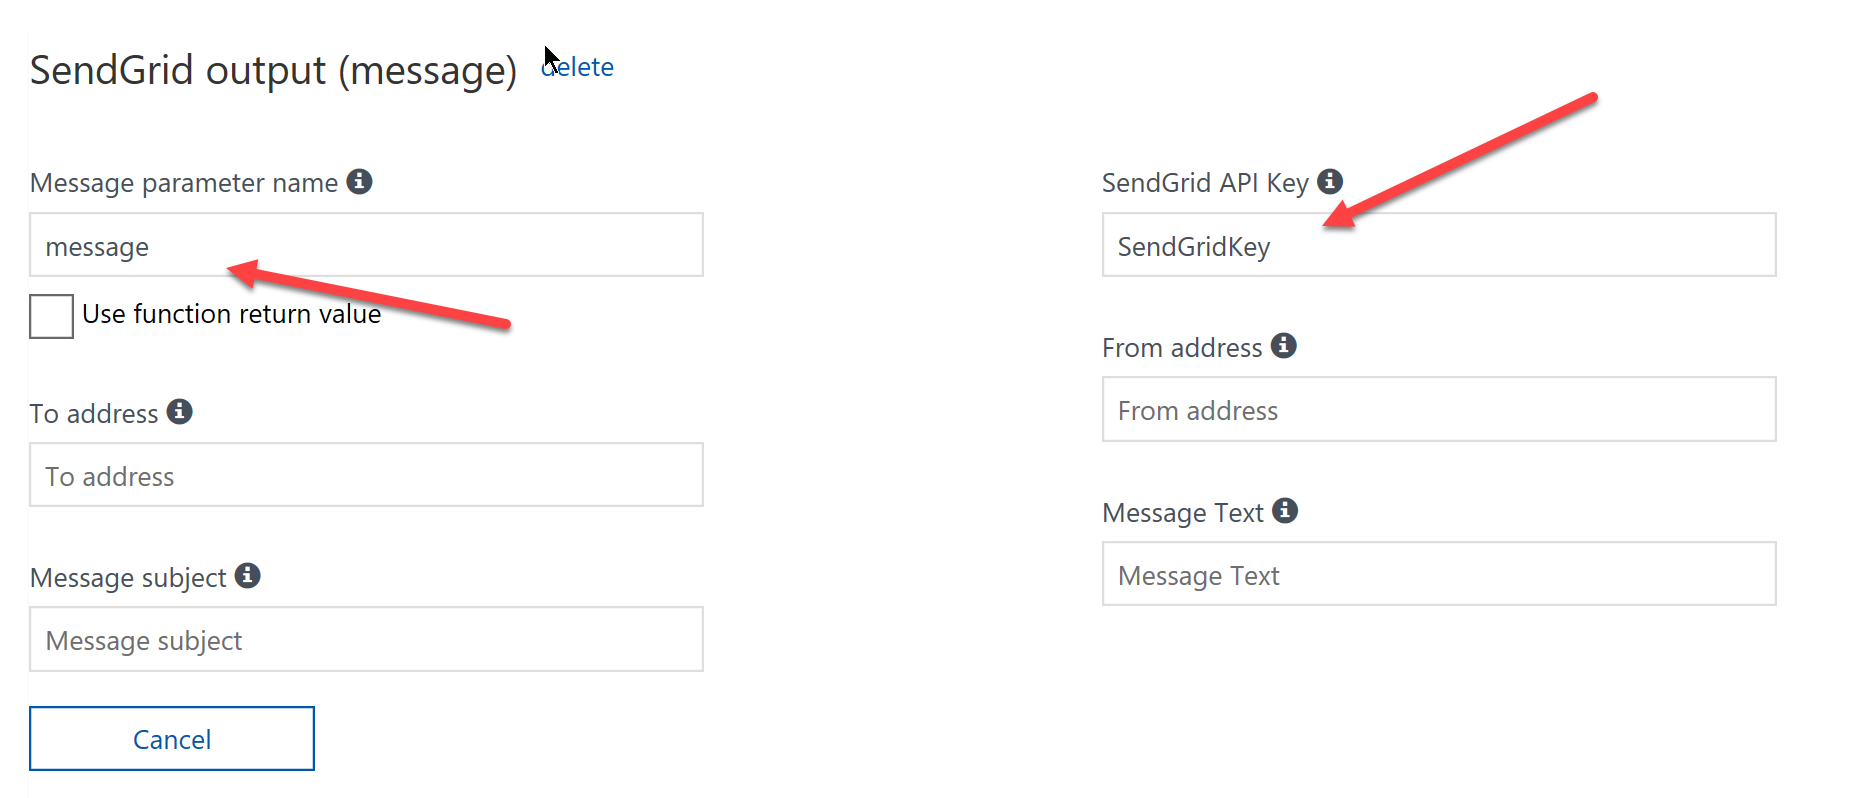
Then add the second Output which should be a SendGrid (message). For this one, you need to pass the SendGridKey that we configured earlier on in the App Settings. Leave everything else as default.

Now we are ready to add the necessary code that will take the data from the HttpMessage and compile and send an email using the SendGrid API. The code to do all this is below:
Save and run the method to ensure that it works as expected.
Summary
With only a few steps, we were able to configure a custom alerting solution that scales on demand and is extremely lightweight and efficient. The cost for running these 2 Functions is inconsequential but the beauty of the solution is in its simplicity. We could extend and rewrite the SendGrid Function to be a generic one that parses the HttpRequest content and sends the appropriate message. I'll leave this as an exercise for you, my reader.