I'm currently working on a somewhat restricted environment where we have to run SSH commands on a Windows Server. The commands are needed to configure certain settings on a Linux machine running [Puppet](https://puppet.com/product/capabilities/orchestration" target="_blank) (the orchestration tool).
This is the first time I had to use this setup so, as with everything else, I had to work out how to do it - and then blog about it! For the purpose of this post, I provisioned a small Ubuntu VM on Azure in order to be able to SSH into it and prove that it's doable through PowerShell. Consider it my small PoC for this post :D
Disclaimer - there are certainly better ways to SSH these days (Bash on Windows, Git CLI etc) but considering the restricted environment I work with, PoSH is the only option. If you're on the same boat, then I hope that this will help you too.
Requirements - Putty
There are only 2 requirements to get SSH to play well with PowerShell and this are:
- Powershell (obviously)
- [Putty](http://www.putty.org/" target="_blank)
The first one comes installed with Windows, at no extra cost. To install Putty, we'll use [Chocolatey](https://chocolatey.org/" target="_blank). If you don't use Chocolatey, then you're missing out on the best software/package management tool for Windows.
choco install putty
Choco will download and install everything we need! It will even create the necessary shims for me :). Remember to run the command line as administrator or Chocolatey will complain!
Running SSH from PowerShell
With Putty in place, we can now use plink.exe to run SSH commands. There are a few caveats when using plink with PowerShell so you'll need to be aware of them before we get started:
- The first time you connect to a server, you'll be prompted to add the host key to your registry, so this won't work in a non-interactive mode for brand new servers. There isn't a way to disable this, or is there - hint: see blow
- The private key file has to be in
.ppkformat forplink.exeto recognize it. If you've stored your private key in.pemformat, useputtygen.exeto create a.ppkfile. - The path to the key file cannot contain any spaces or the command will fail.
- If you want to send multiple commands at once, write them to a file and use the
-mswitch withplink.exe. - If you configure a passphrase for your private key, you'll be prompted to provide it every time you connect. You may choose to create a private key without a passphrase if you want to automate things through scripting.
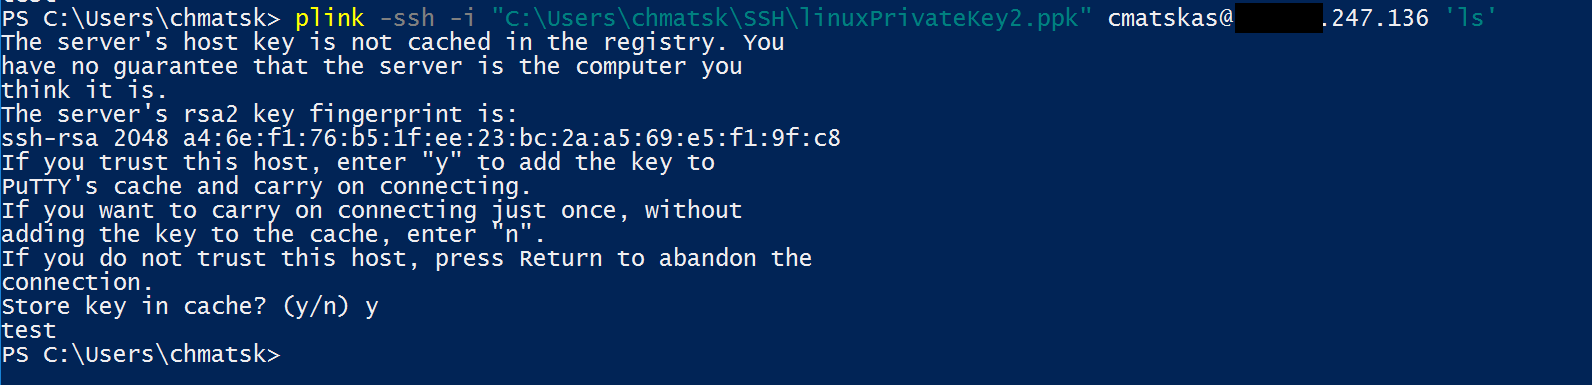
With Putty and PowerShell installed, we can go ahead and issue our first SSH.
The first time you do this, you'll be prompted to store the host's key to the registry. This manual effort is only required once and should look like this:
Update: apparently there's a workaround for accepting the host key automatically based on [this post](http://www.virtu-al.net/2013/01/07/ssh-powershell-tricks-with-plink-exe/" target="_blank). It looks a bit hacky to me but if this works for you, then you've got my blessing.
TL;DR
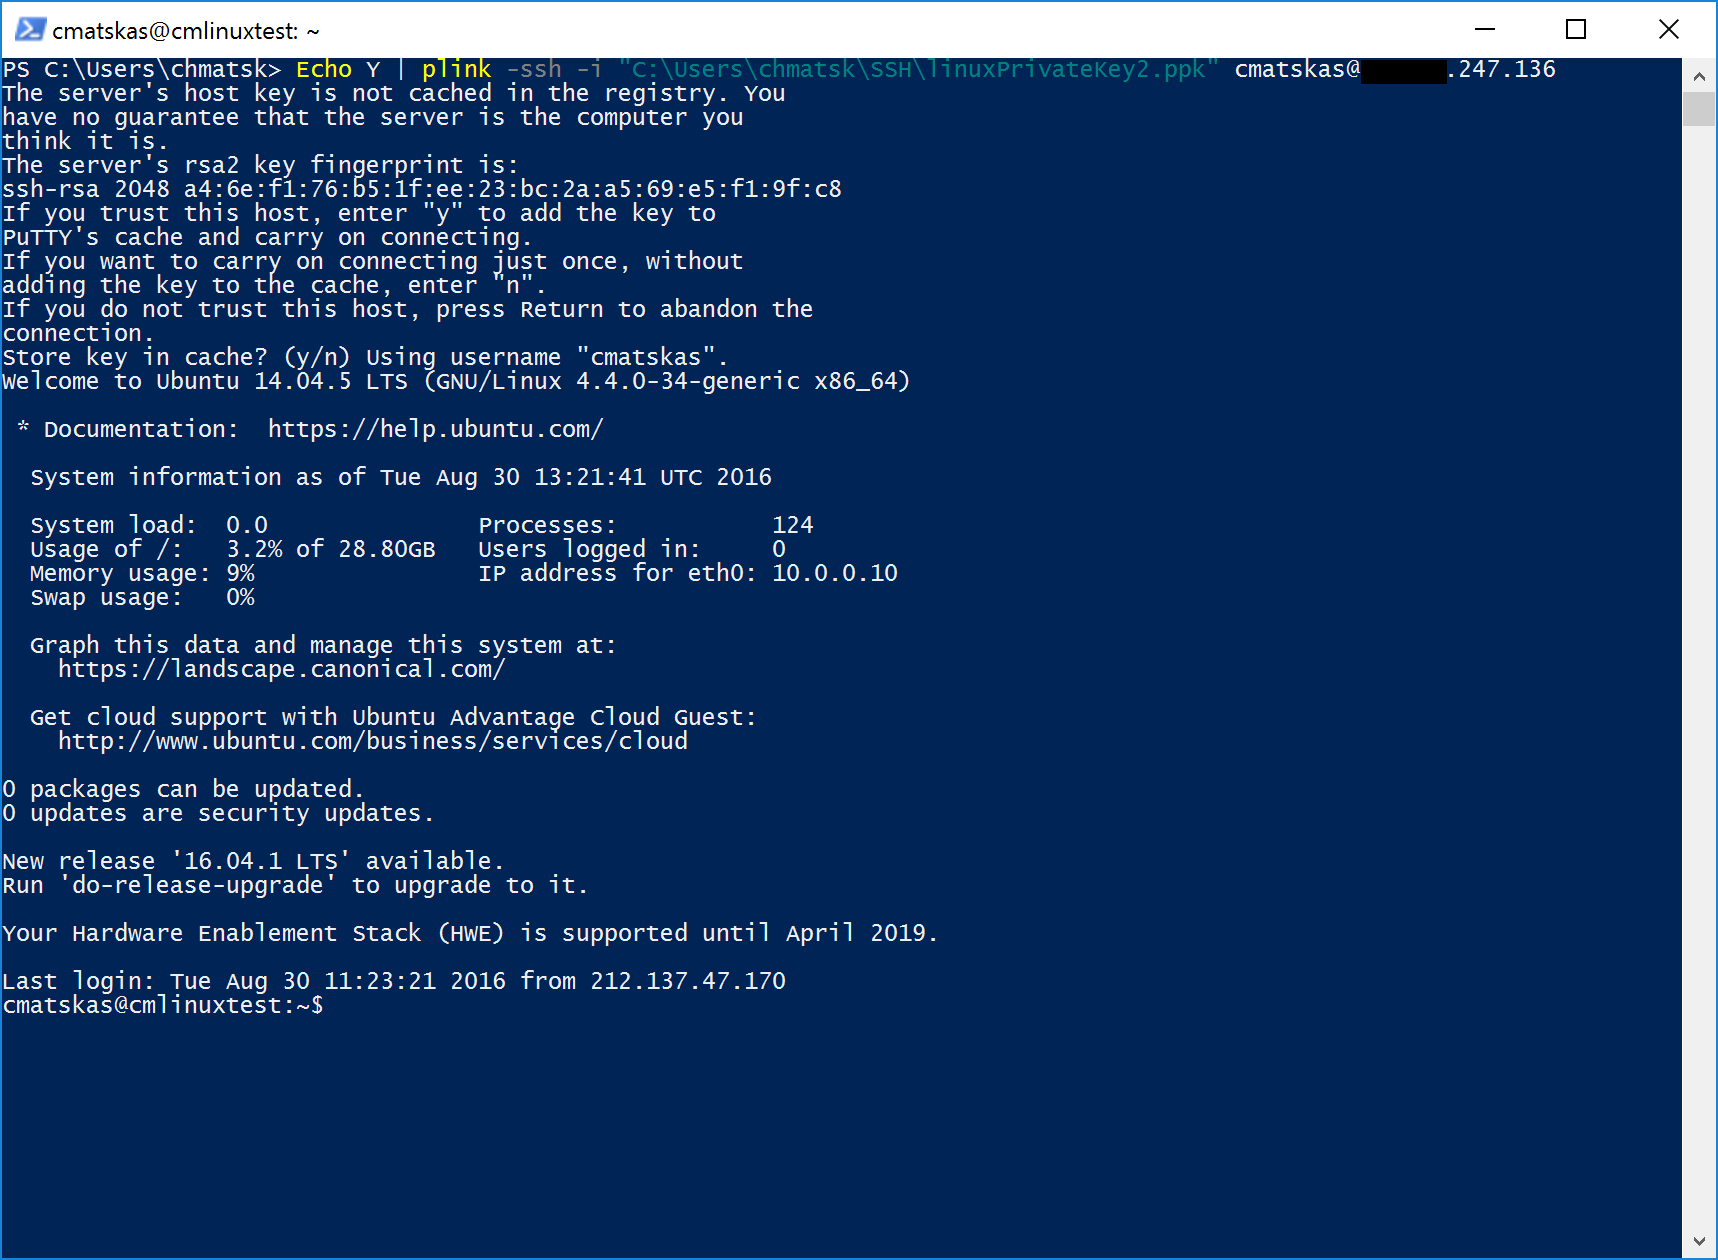
First-time run could be executed using the following command to automatically accept and store the host key:
Echo Y | plink ....
As per the screenshot below, it seems to work just fine:
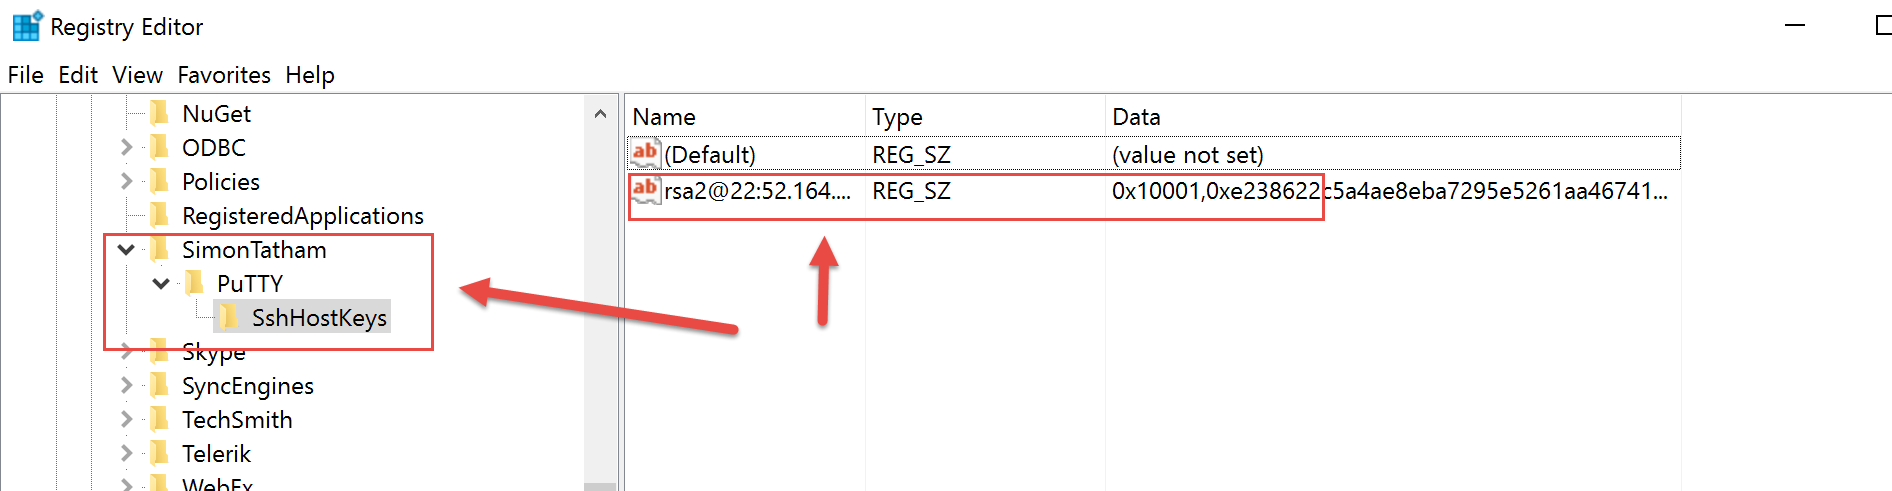
The host key will end up in the following registry location:
HKEY__CURRENT__USER\Software\SimonTatham\PuTTY\SshHostKeys
The PLINK command
The basic syntax to SSH with plink is:
plink -ssh -i <pathToYourPrivateSSHKey> <yourUserName>@<serverDNSorIPAddress> "command"
A real life example that lists the contents of a directory is:
plink -ssh -i "C:\Users\me\SSH\myPrivateSSHKey.ppk" [email protected] "ls"
Finally, below you can find the full list of plink command options:
Z:\sysosd>plink
PuTTY Link: command-line connection utility
Release 0.58
Usage: plink [options] [user@]host [command]
       ("host" can also be a PuTTY saved session name)
Options:
  -V        print version information and exit
  -pgpfp    print PGP key fingerprints and exit
  -v        show verbose messages
  -load sessname  Load settings from saved session
  -ssh -telnet -rlogin -raw
            force use of a particular protocol
  -P port   connect to specified port
  -l user   connect with specified username
  -batch    disable all interactive prompts
The following options only apply to SSH connections:
  -pw passw login with specified password
  -D [listen-IP:]listen-port
            Dynamic SOCKS-based port forwarding
  -L [listen-IP:]listen-port:host:port
            Forward local port to remote address
  -R [listen-IP:]listen-port:host:port
            Forward remote port to local address
  -X -x     enable / disable X11 forwarding
  -A -a     enable / disable agent forwarding
  -t -T     enable / disable pty allocation
  -1 -2     force use of particular protocol version
  -4 -6     force use of IPv4 or IPv6
  -C        enable compression
  -i key    private key file for authentication
  -m file   read remote command(s) from file
  -s        remote command is an SSH subsystem (SSH-2 only)
  -N        don't start a shell/command (SSH-2 only)
I hope you find this useful and, as always, feel free to let me know if you have any issues in the comments below.