I work with Azure Functions a lot. I also work a lot with Docker, Windows Containers, and microservices in general. For some time I have been talking about these subjects either to customers or at conferences trying to explain how they can be used to fulfill different tasks and meet different project requirements. Azure Functions are the swiss army knife of developers and IT/Ops teams because they can solve so many problems with minimal code, maintenance overhead and infrastructure abstractions around scalability and reliability. Up until now, if someone needed to create a run an Azure Function there were 3 options:
- On the Azure Platform
- On Azure Stack running on infrastructure deployed and manage by you
- On your own Infrastructure using the [Azure Functions Runtime](https://azure.microsoft.com/en-gb/blog/introducing-azure-functions-runtime-preview/" target="_blank)
If you didn't know about the Azure Functions Runtime, prepare to be amazed by how we took the best bits of the Azure Serverless platform and made them available to your (OSS) to run on your own platform, as you see fit.
These 3 options have been great for a long time and developers have been leveraging the power of Microsoft's serverless architecture to solve complex problems. However, the Azure Functions team wanted to take the platform to the next level by introducing a 4th, even more amazing option for developers to run Functions. This new option has turned Functions into a true platform agnostic technology while materializing the "Run your Functions on any platform and operating system using your favorite language" vision.
The new option combines the best of both worlds allowing Azure Functions to run inside a Docker container. This has been made possible with the recent release of the new Azure Functions Runtime (v2) which was re-written from the ground up using .NET Core to make it cross-platform and portable. Although v2 currently has limited language and bindings support (in the templates), expect full parity with v1 in terms of languages, along with support for some new ones!
Creating and running an Azure Function inside a Container locally
Both the v2 Runtime and the Container support are still in preview so they are not recommended for production workloads. However, unlike the limitation on the Azure Portal that changes may break a deployed Function-based workload, the fact that the new solution is based on Containers means that you fully control the code and the runtime so it's less likely that your Functions may break. Especially if you run them on your own container toolchain (Kubernetes, ACS, ACI, DC/OS etc). It's still a preview though so approach with caution, you've been warned (I know, I like to play with fire too, but not on production systems)!
Azure Functions on Linux (the official name) is only supported on Linux (it's in the name) if you plan to run on Azure. At the moment, there's no option to run these Functions on the Consumption model, i.e. infinite scalability. Your Function Apps need to be deployed on a Linux-based Azure App Service. You get to decide this when you create the Function App for the first time through the Portal, CLI or PoSH.

If you wish to migrate existing code, you'll need to migrate your Function Apps to a new App Service Plan. The Azure Functions on Linux deployment model comes in 2 flavors:
- Bring your own Container (BYOC) - you create, deploy and run your own custom image
- Bring only your code - you deploy your code in the container already provisioned and managed by the Azure Functions platform
To use the new fancy tooling we need to ensure you hae the latest versions of the Functions Runtime and the Azure CLI tools. The last one is needed if you run the CLI tools locally or on your Continuous Integration (CI) toolchain. Alternatively, you can use the equally powerful, always up-to-date and browser-based [Azure Cloud Shell](https://azure.microsoft.com/en-gb/features/cloud-shell/" target="_blank) - no installation required ™.
Prerequisites
In order to ensure you can follow along with this post, you need to following installed:
- Node.js 8.5 or greater
- Azure CLI (or Cloud Shell)
- [Azure Functions Core Tools v2](https://docs.microsoft.com/en-us/azure/azure-functions/functions-run-local" target="_blank)
- Docker running locally
Writing the Function code
First, we need to create a Function that does what we want. For this example, we're going to create a Function that has a Blob Storage trigger (listens for new blobs on a specific container on Azure), does a bit of processing to grab the name of the blob and then uses an outbound binding to an Azure Storage Table to write the retrieved Blob name along with the current date/time. I like this slightly more "advanced" scenario as we can use it to prove that triggers fires even when the Function runs inside a container deployed somewhere - more on this later. We'll use the Azure Core tools to create and run the Function locally. Open a command-line of your choice and run the following:
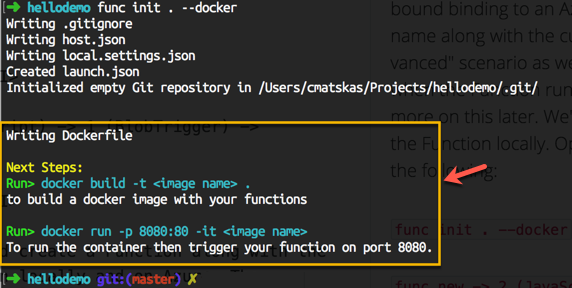
func init . --docker
func new -> 2 (JavaScript) -> 1 (BlobTrigger) -> <FunctionName>
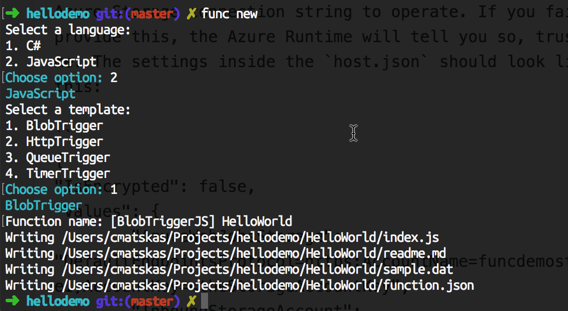
These 2 commands should create a Function and the files necessary to allow us to run both locally and on Azure. The interesting bit here is the --docker option in the func new command that adds an extra dockerfile. The Dockerfile contains the information necessary to create the Docker container. Next, we need to configure the following:
- local.settings.json
- inbound trigger
- outbound bindings
In the local.settings.json we need to provide the Azure Storage connection string. All Azure Functions, apart from HttpTrigger-based ones, need an Azure Storage connection string to operate. In particular, the AzureWebJobsStorage needs to point to a proper Storage Account (either the local emulator or an Azure-based one). If you fail to provide this, the Azure Runtime will tell you so, trust me. The settings inside the local.settings.json should look like this:
{
"IsEncrypted": false,
"Values": {
	"AzureWebJobsStorage": "DefaultEndpointsProtocol=https;AccountName=funcdemostorage1;AccountKey=<theStorageAccountKey",
	"InboundStorageAccount": "DefaultEndpointsProtocol=https;AccountName=funcdemostorage1;AccountKey=<theStorageAccountKey"
	}
}
The AzureWebJobStorage is required by default. The InboudStorageAccount is the Azure Storage Connection string required by the Function trigger. This is the storage the Function monitors for any events and responds accordingly. The `OuboundStorageAccount' points to the Azure Storage Table we want to write the data to.
Both the inbound and outbound bindings are defined inside the function.json file. You can find more information on how bindings work [here](https://docs.microsoft.com/en-us/azure/azure-functions/functions-triggers-bindings" target="_blank). In the end, the function.json file should look similar to this:
Finally, the code that does the work and moves the data around:
To make sure that all is working, I can run the code locally and debug it using VS Code. Open the project in VS Code. Open the integrated terminal and issue the func host start command. You can also attach the VS Code debugger using the 'Attach to Azure Functions` option. Any new blobs uploaded to the storage account defined in the inbound binding should trigger the Function and hit the breakpoints set in the code.
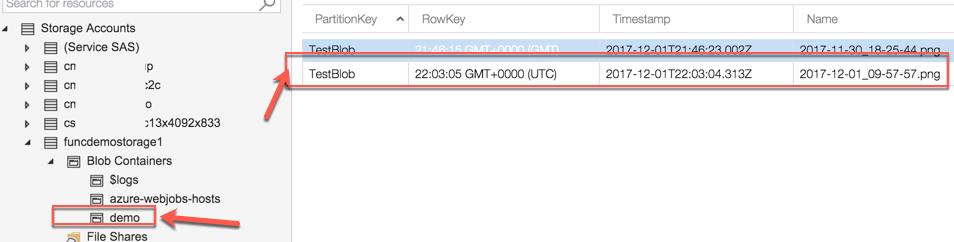
A new image gets uploaded to the demo storage container:
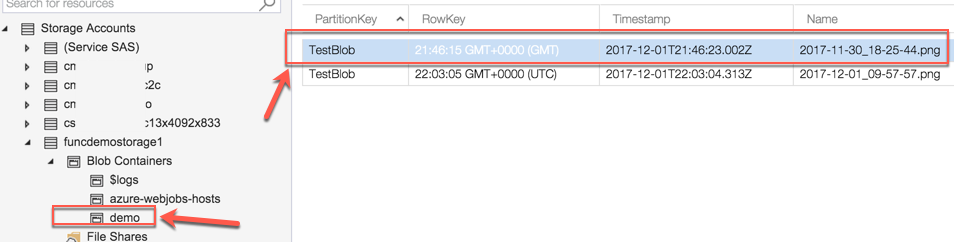
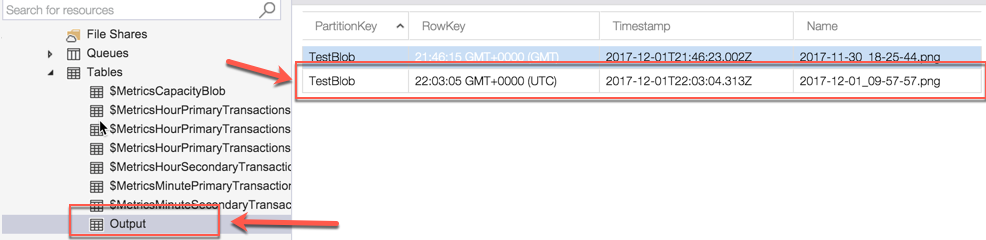
A new entry is created in the output storage table

We have successfully proved that the code and bindings work.
Adding Container support
The next step is to create the Docker container and run the Function in it. To do this, we need to also configure the appropriate environmental variables consumed by the Function code. For now, we only have 3 variables. These variables can be configured directly inside the dockerfile as per the example below:
With everything in place, we can build our image. Assuming the Docker CLI tools are installed (check the prerequisites section), we can open the command prompt and type the following
docker build -t <dockerImageName> .
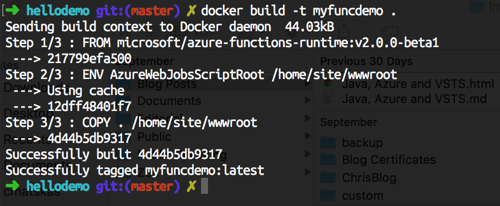
The first time we run it, it may take a bit of time to download the image from DockerHub. Subsequent runs are much faster (see instantaneous) since the image is cached locally. Finally, we want to run a container off that image. In the command prompt type:
docker run -p 8080:80 <dockerImageName>

Testing the Containerized Function
To prove that everything's working, we can upload another image to the same Storage Container and see it all in action.
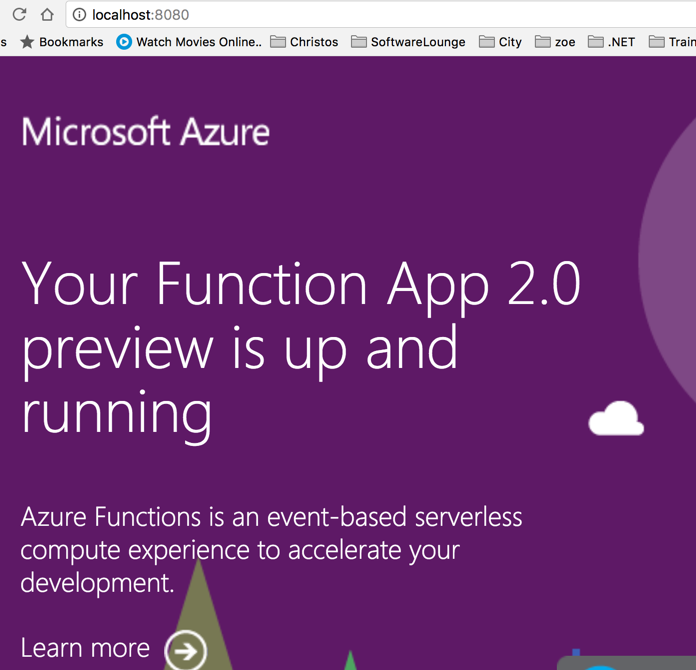
We can also navigate to http://localhost:8080 and make sure that the Function Runtime inside the Container is operational. If all has gone according to plan, we should be greeted with this lovely page:
Next Steps
I mentioned earlier in the post that one of the goals of containerizing Functions is to allow us to truly deploy and run our Function(s) anywhere we want. In my next blog post, I'll show you how to use a number of Azure Container-Supporting Services to deploy and run the Function image we just created.