It's been a very long time since I tried to access my OneDrive data programmatically and I was curious to find out what the new experience is like. Especially since MS Graph now allows you to interact with your OneDrive data programmatically using .NET Core. The nice thing is that I didn't have to start from scratch and I was able to get the project off the ground quickly using one of the existing MS Graph tutorials. The code for this project is loosely based on this .NET Core sample. And it took a little bit of experimentation and looking up the Graph API documentation to find out how to make calls to my OneDrive via the MS Graph Files API.
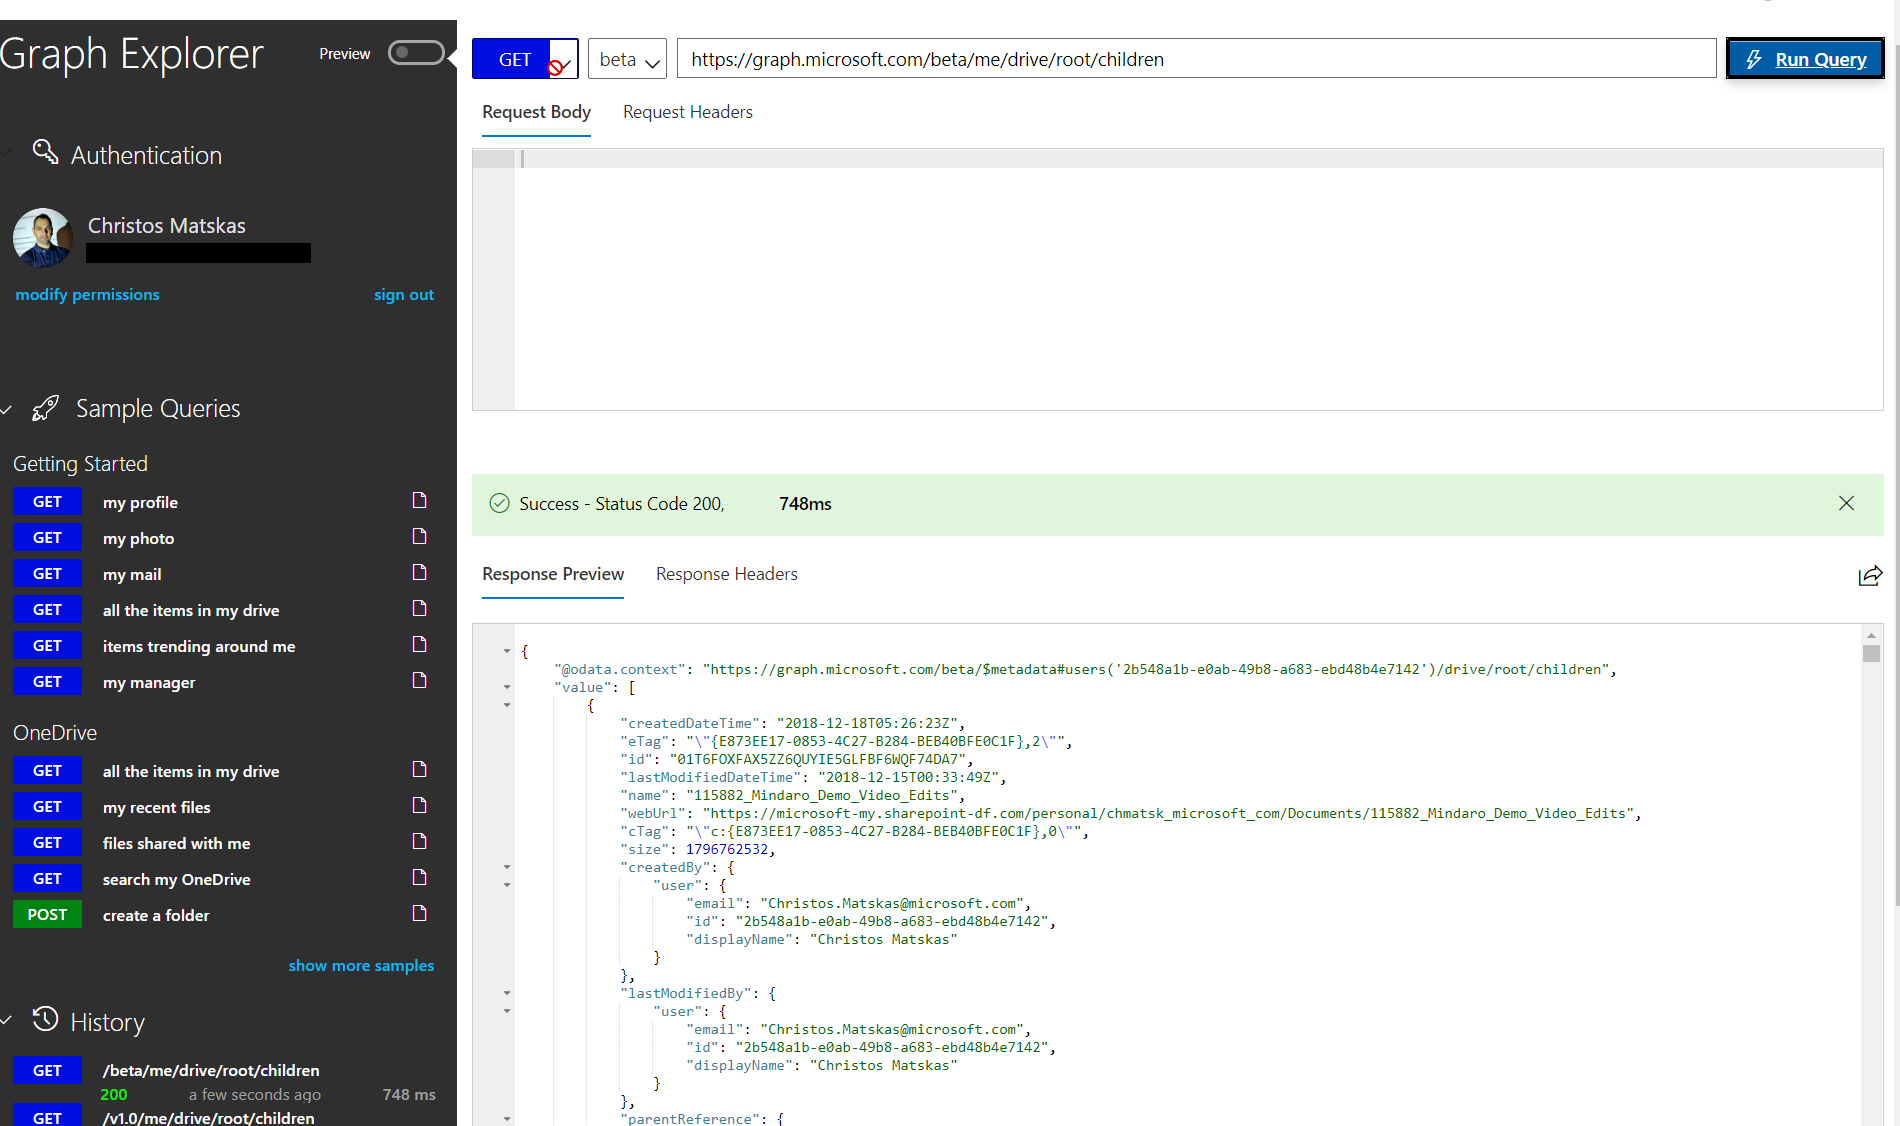
But before we even touch the code, we can get a feel of what it looks like to work with the Graph API for OneDrive via the Graph Explorer - I truly love this tool as it allows me to get a quick glance into the possibilities of MS Graph.
Now that I have a good grasp of what I can do with with MS Graph, I'm ready to start playing with the code. For this project, we have the following components:
- .NET Core 3.1
- Visual Studio Code
- MSAL (Microsoft Authentication Library)
- Graph SD
And since I'm using a console app, I am going with Device Code Flow for the authentication. The device code flow is a type of authentication flow that is designed for native applications (desktop, mobile…) which are by nature considered “insecure” (in the sense that you do not have direct control over the execution context).
Create the .NET console app
Open the command prompt of choice and type the following to create the console app and add the appropriate dependencies/NuGet packages:
mkdir OneDriveWithMsGraph
cd OneDriveWithMSGraph
dotnet new console

dotnet add package Microsoft.Extensions.Configuration.UserSecrets --version 3.1.2
dotnet add package Microsoft.Identity.Client --version 4.10.0
dotnet add package Microsoft.Graph --version 3.0.1
We now have a basic .NET Console app. The packages above add MS Graph and MSAL libraries as well as a standard .NET Core config extension where we can store user secrets such as API Keys etc that can be used during development. Although this is a bit of an overkill and for this exercise we don't have any sensitive information to store, it's a really good practice to follow :)
Register your Azure AD app
Next, we need to create an App registration in Azure Active Directory to allow our users to interact with their OneDrive data. For this scenario, I opted for a single-tenant, line of business (LOB) app assuming that we only want to give access to our corporate OneDrive data. It's a subtle configuration change in the AAD App with significant connotations. If you opt in for another registration model, the app can also allow be used to access personal OneDrive data using Microsoft Account.
To register a new application, head over to the Azure AD blade in the Azure Portal.
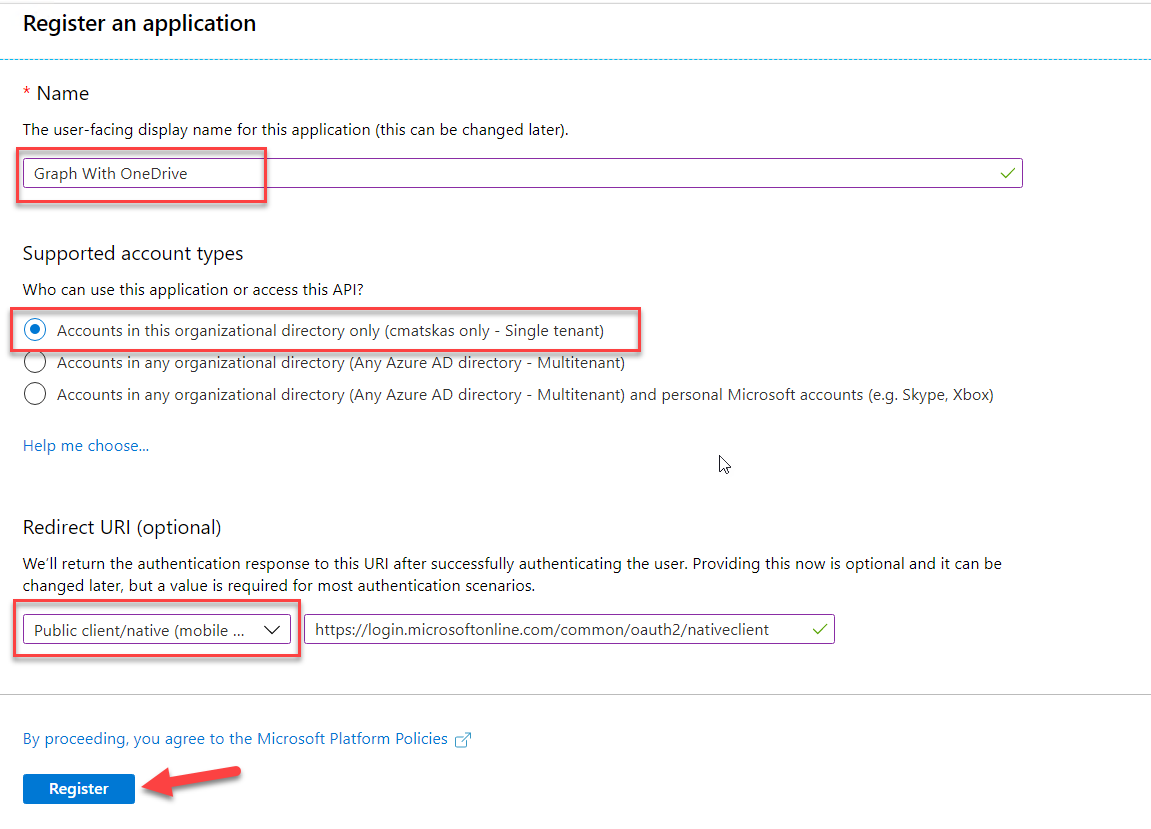
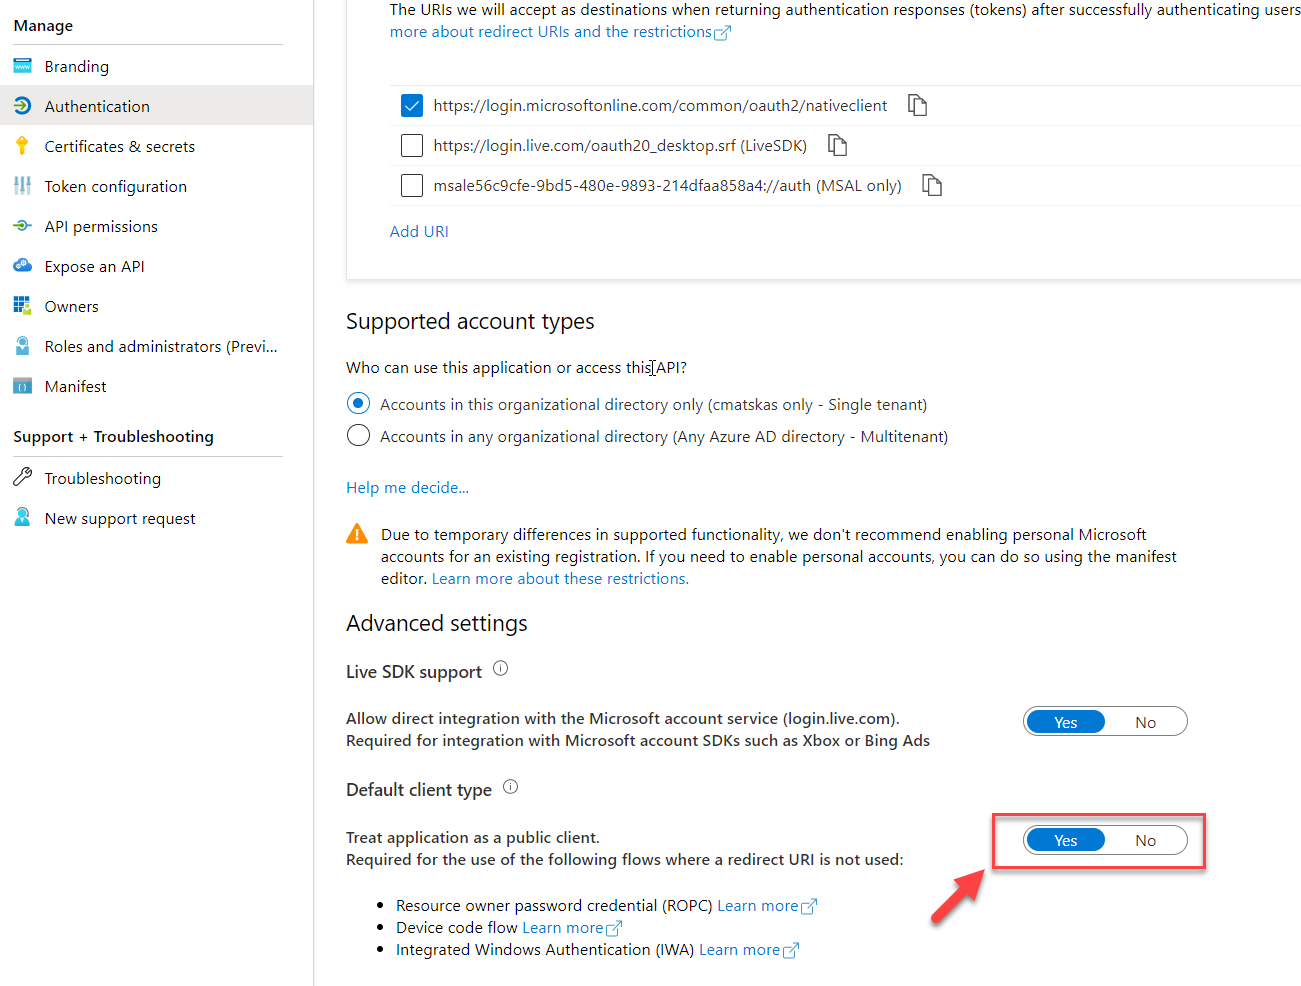
Ensure to set the Redirect URI to https://login.microsoftonline.com/common/oauth2/nativeclient. Next, navigate to the Authentication tab and set the Default Client Type option to Yes under Advanced Settings
Go back to the Overview and grab both the Application ID and Tenant ID values as we will need them in our app. Our Azure AD configuration is complete
Implement the Authentication code
Back in our .NET console app let's add the AppId to our our local secrets. Open the console and type the following:
dotnet user-secrets init
dotnet user-secrets set appId "YOUR_APP_ID_HERE"
dotnet user-secrets set scopes "User.Read;Files.ReadWriteAll;Files.ReadWriteAppFolder"
We also need to create a new class named DeviceCodeAuthProvider and add the following code to perform the authentication:
The difference here, when compared to the sample I based my code on, is that I'm explicitly configuring the my app to work with TenantId using the .WithAuthority(AadAuthorityAudience.AzureAdMyOrg, true) and .WithTenantId(<YourTenantId>) as per the complete code below:
    _msalClient = PublicClientApplicationBuilder
                .Create(appId)
                .WithAuthority(AadAuthorityAudience.AzureAdMyOrg, true)
                .WithTenantId("<YourTenantId>")
                .Build();
Add the Graph API calls
Next, we need to should add a GraphHelper.cs class to do the necessary MS Graph calls. Notably, we have 3 main methods:
- GetMeAsync()
- GetOneDriveAsync()
- GetDriveContentsAsync()
Make it all work - OneDrive with MS Graph
The last step is to implement the code that calls our helpers and pulls the OneDrive data we need. Open the Program.cs file and paste the following code:
The code above:
- Creates an appconfig and pulls our secrets in
- Initializes the authentication provider helper class
- Passes the auth provider to the GraphClient
- Provides an interactive way for the user to pull the data in the console app
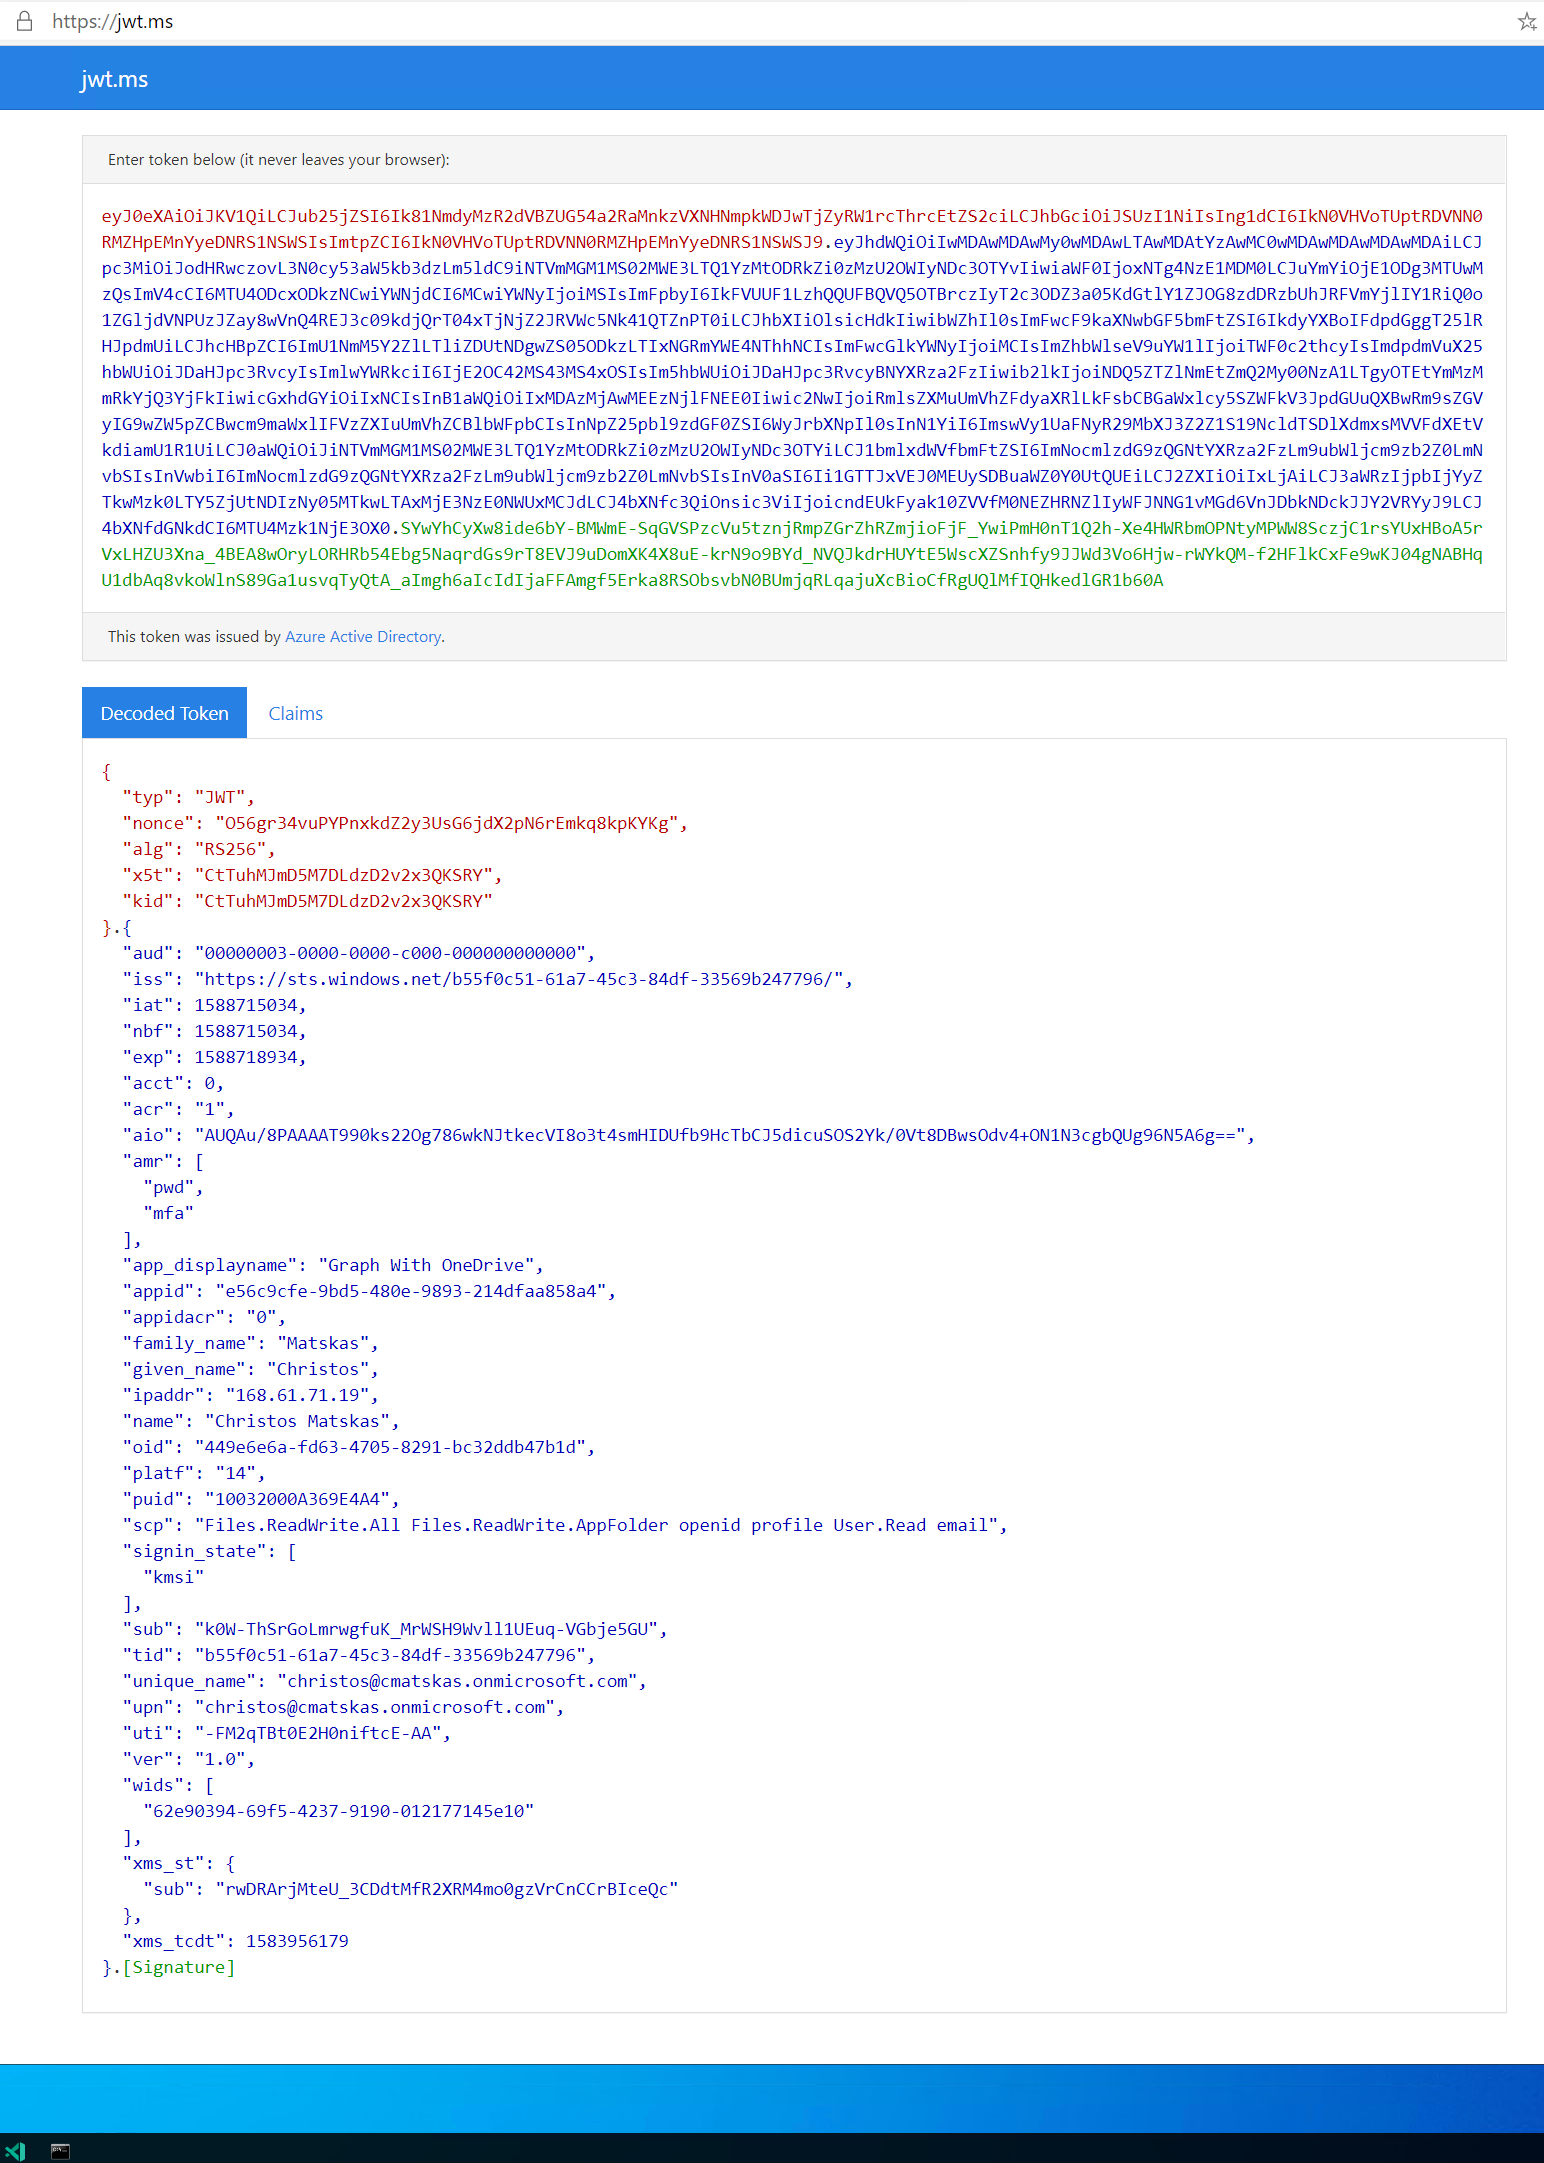
If you run the code the first time and select option "1" you are presented with your Authentication Token.
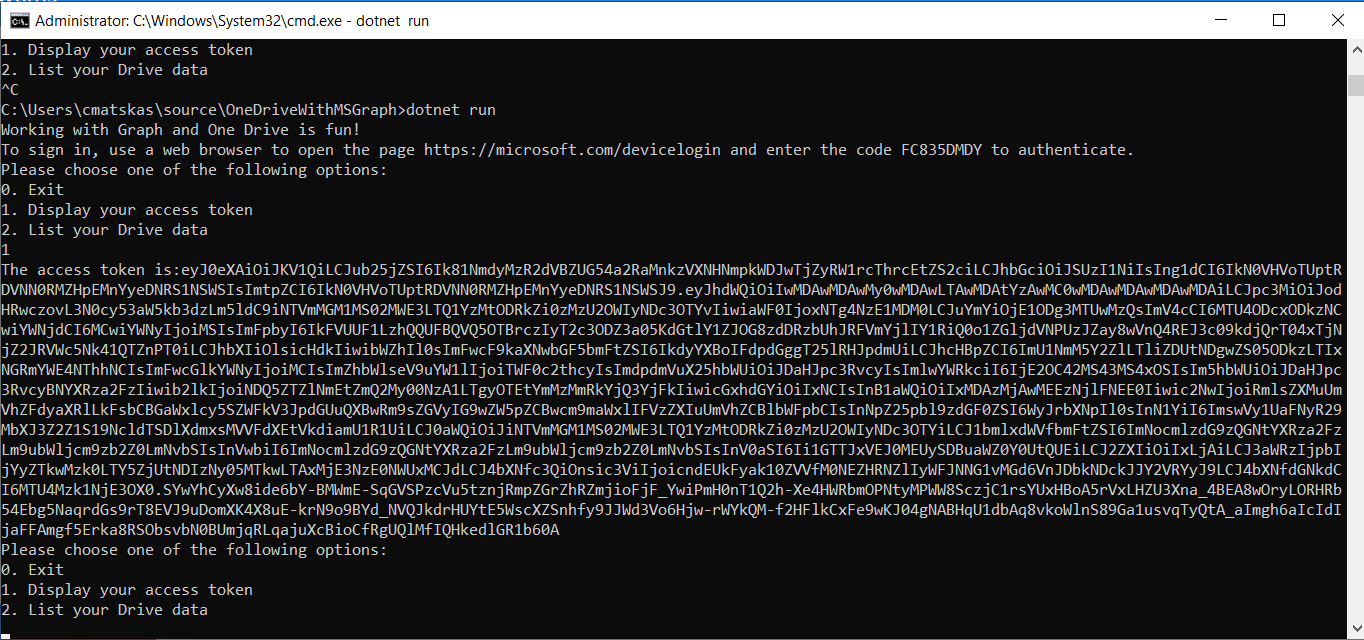
You can grab your authentication token and use the jwt.ms website to inspect it like in the example below (always handy if you want to ensure that your jwt tokens are in order:
Running the app and selecting option 2 or option 3 returns the following results respectively:
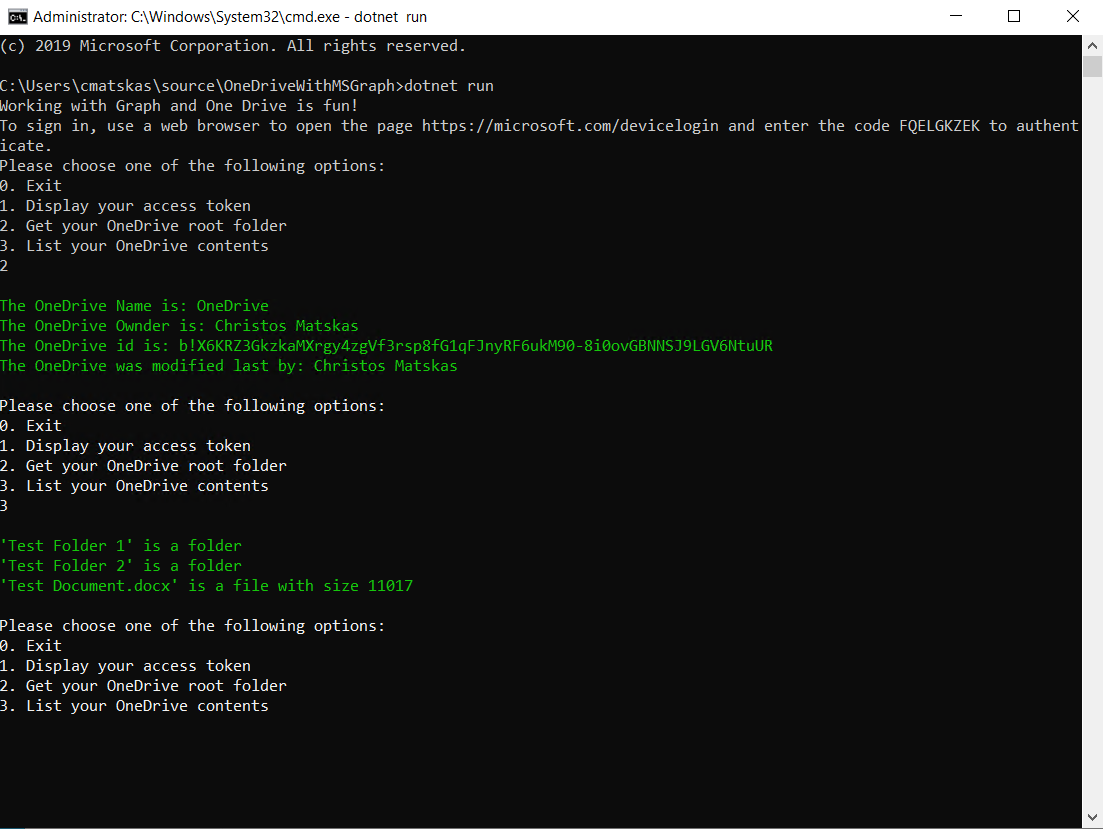
Fairly basic functionality so far but with all this in place, we are now able to start adding, removing editing files and folders in our OneDrive. In effect, we can programmatically do whatever the UI offers and more!
As always, you can find a fully working code sample on GitHub.
Summary
I was pleasantly suprised to see that MS Graph and MSAL have transfored the way we programmatically interact with not just OneDrive but all our Office365 data. The next time you are creating an app for your enterprise, think about how you can delight your users and create richer, more immersive experiences by leveraging the power of MS Graph and MSAL. Let me know what you think and feel free to reach out if you have any questions :)