Azure WebApps is one of the best services on Azure. I bet you heard me say this for every Azure service I write about. But, considering my first experience working with Azure was developing and deploying web apps, I have a special love for WebApps. I've been using the service since the early days when it was just Azure WebSites only to see it grow and mature to an awesome PaaS (Platform as a Service) offering. A fully managed service that allows you to run various apps, from basic small size websites all the way to multi-node, load balanced e-commerce solutions. What is also impressive is the support for many (non-Microsoft) languages. Whether you like to develop using Node, .NET (Core included) or Java, WebApps can cater to many languages and frameworks.s.
In this post I want to take you through the process of deploying a Java web application to Azure by configuring a full CI/CD pipeline in Visual Studio Team Services (VSTS). The goal is to highlight the steps necessary to set everything up and to show the versatility of both Azure and VSTS. I demo'ed (video at the bottom) this setup recently at my [FutureDecoded](https://www.futuredecoded.com/session/f0525520-eea8-e711-80c2-000d3a2269dd" target="_blank) talk. The message is now loud and clear: VSTS is for any platform and any language. And what's even better is that it's free for up to 5 full users, unlimited stakeholders (no code contributors) and that if you hold an MSDN license then that can also count as a full VSTS licence. This means that for many developer teams the cost of running a powerful CI/CD pipeline can be significantly low. I promise to cover the benefits of VSTS on a subsequent post.
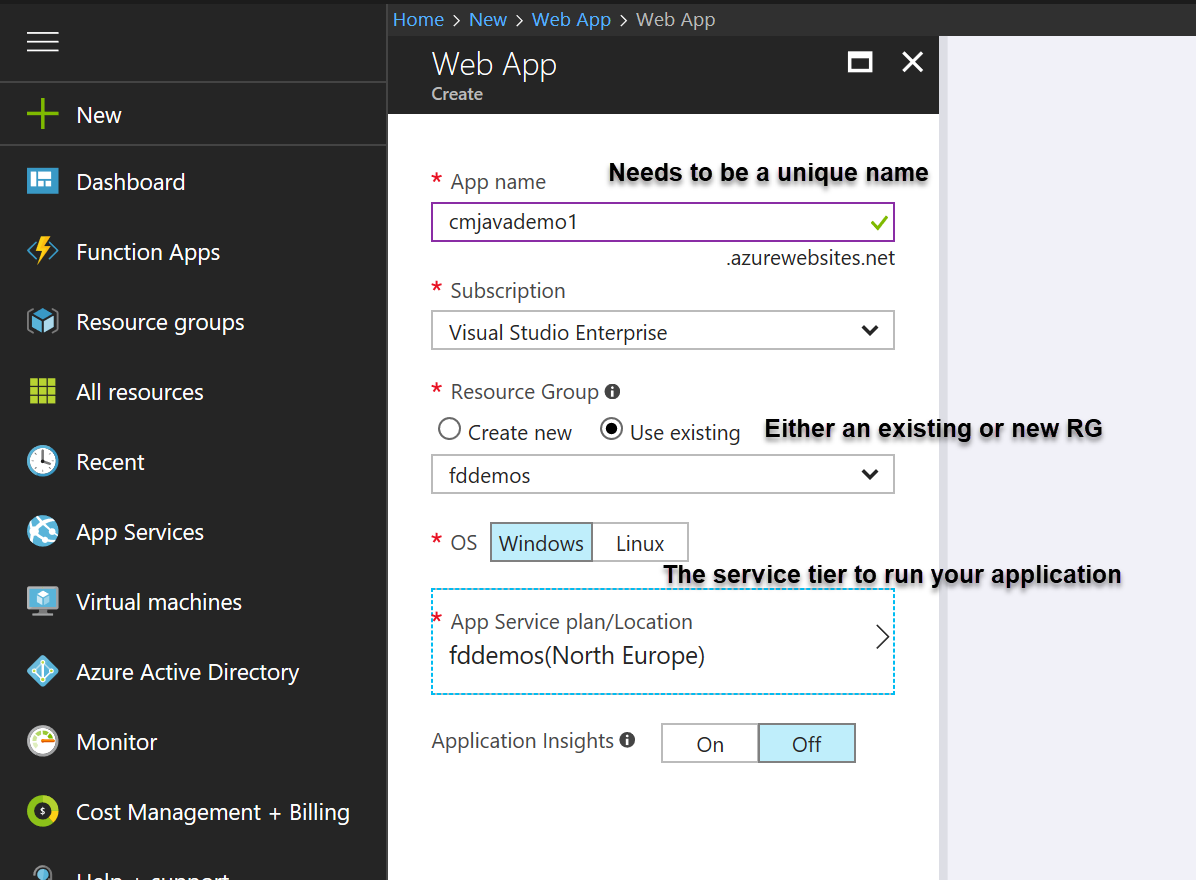
Create the Azure Website
To run our Java application on Azure we need to create a web app. On the Azure Portal, we select New -> Web App, press Create and then we configure the various settings in the new blade as per the image below:
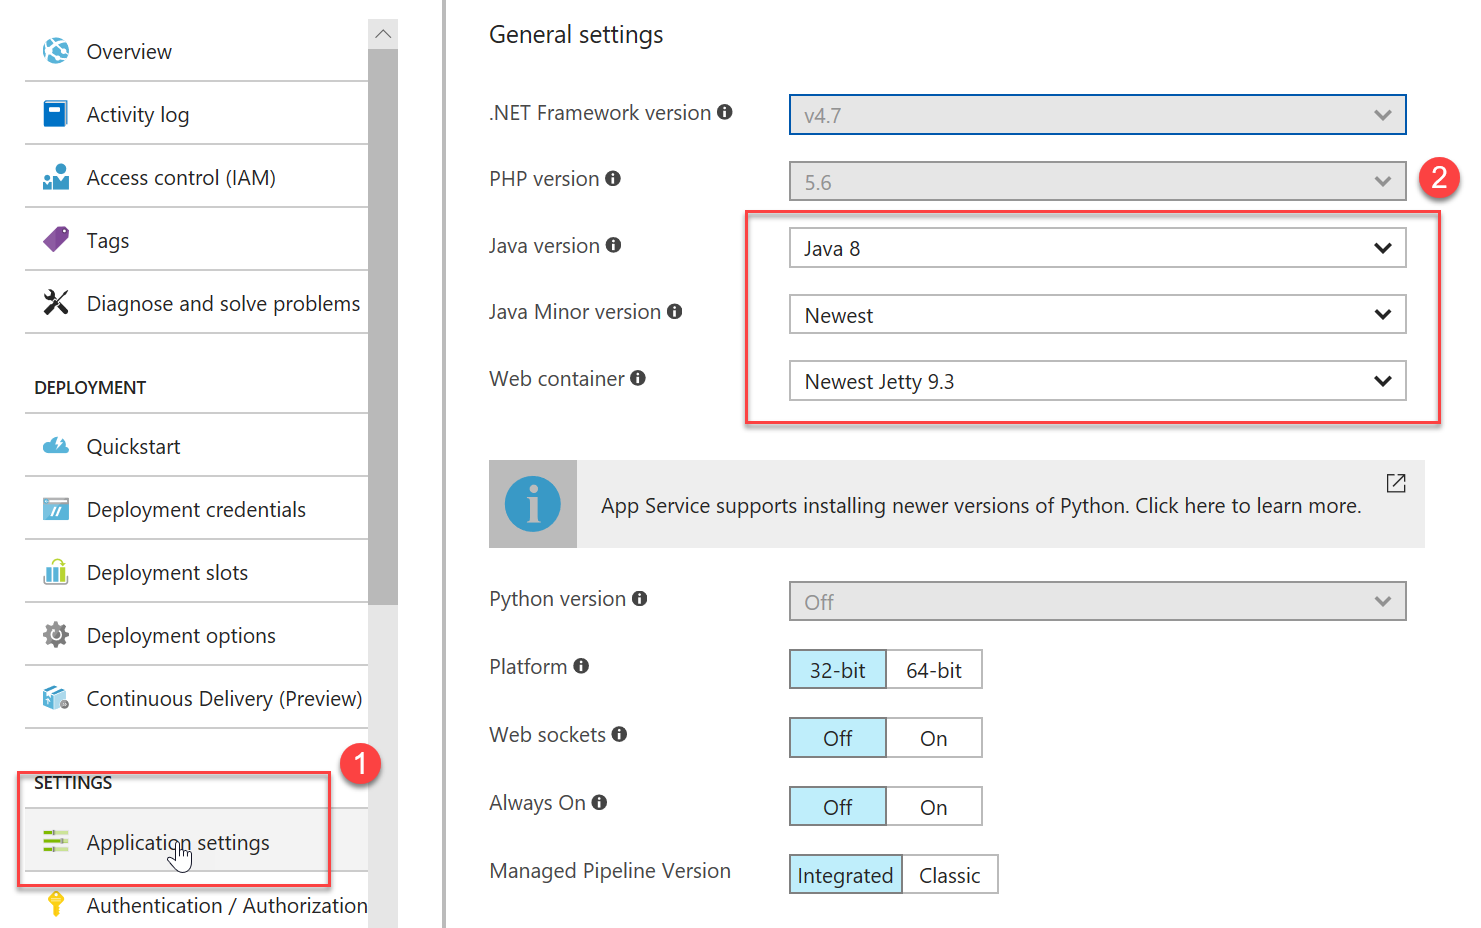
Once the application is provisioned, we need to go to the Application Settings blade and enable Java. Unlike .NET and Node.js that are enabled by default, Java needs to be explicitly enabled. Here we can choose the settings that apply to our application (I went with the default). Ensure to press Save to commit the changes. Job done.
Create the CI/CD pipeline on VSTS
I will start with the assumption that the code is already committed in source control. If you don't use source control in 2017 I'll hunt you down and push all your code to GitHub! You've been warned. Your source control doesn't have to be in VSTS. VSTS build tasks work equally well with GitHub, Subversion or any other Git-based repository. For this example, I'll go with VSTS Git. The first step is to configure the Build step. Some build tasks come in 2 options:
- Create a build step that only builds the code, runs the tests and creates the artifacts
- Do all of the above (1) but also deploy to an App Service.
Unless you're working on a pet/side project then #1 is the recommended option. Separating the build and release process we can introduce things like security and quality gates (change management) and proper release management. This example covers option #2 since we mean business and you play as you practice (that last quote one belongs to [Donovan Brown](https://twitter.com/donovanbrown" target"=_blank).
The Build Definition
In our VSTS project we need to navigate to the Build Definitions area. Press the big blue + New button on the right-hand side to setup a new build definition. To find the right task use the search feature. Type Java to filter the tasks to those that are relevant to our java project. I would encourage you to have a look at the other available tasks to familiarise yourself with the variety of tasks you can execute in VSTS. There are many tasks available out-of-the-box and even more in the Market Place. These tasks can help speed up the configuration of elaborate build workflows.
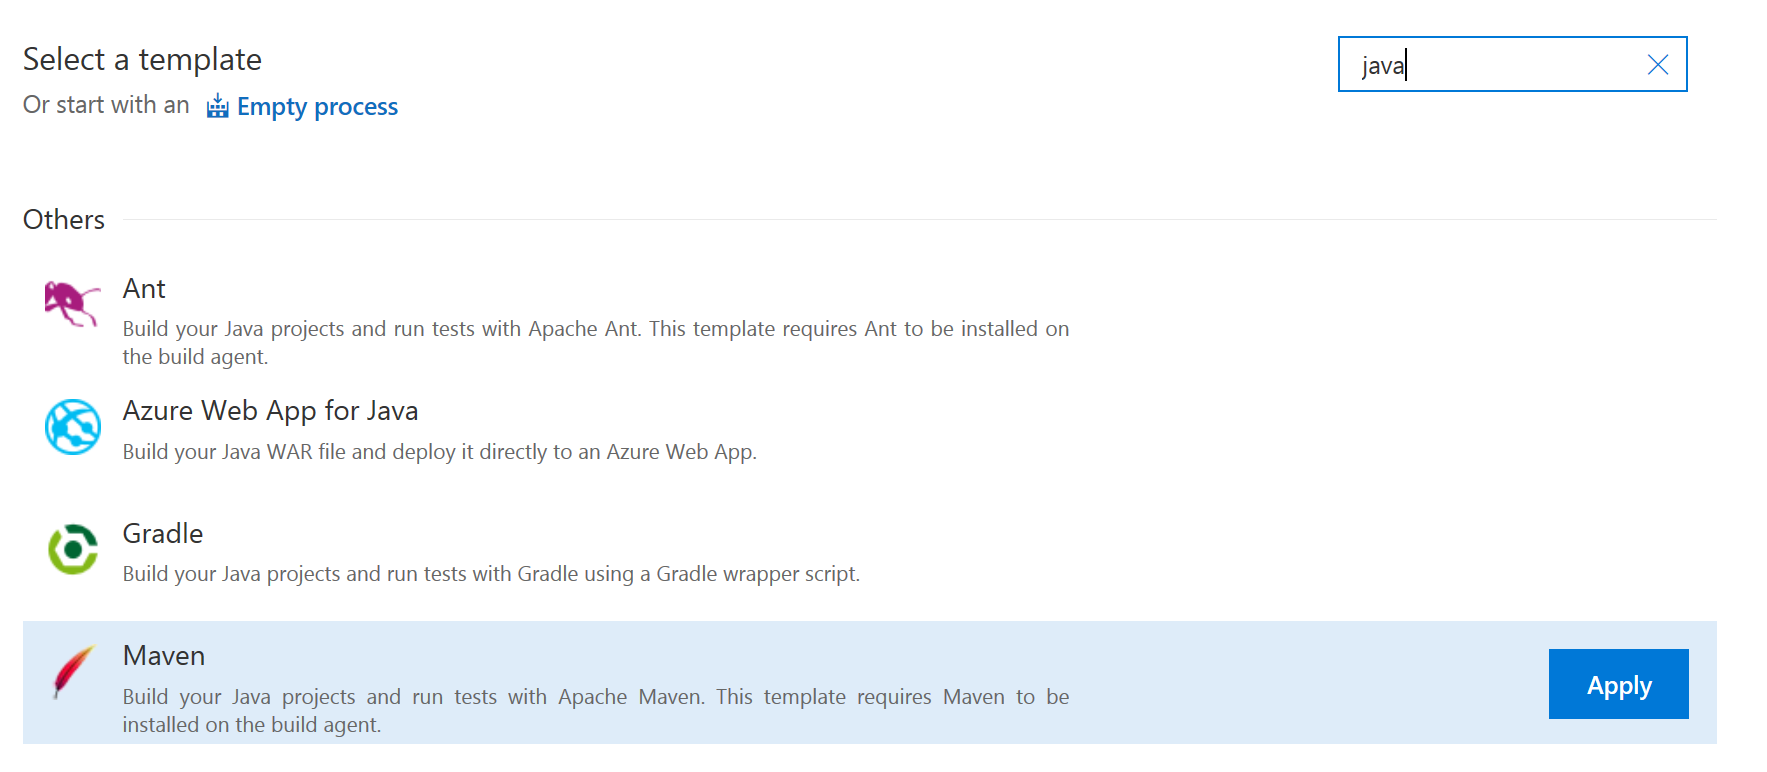
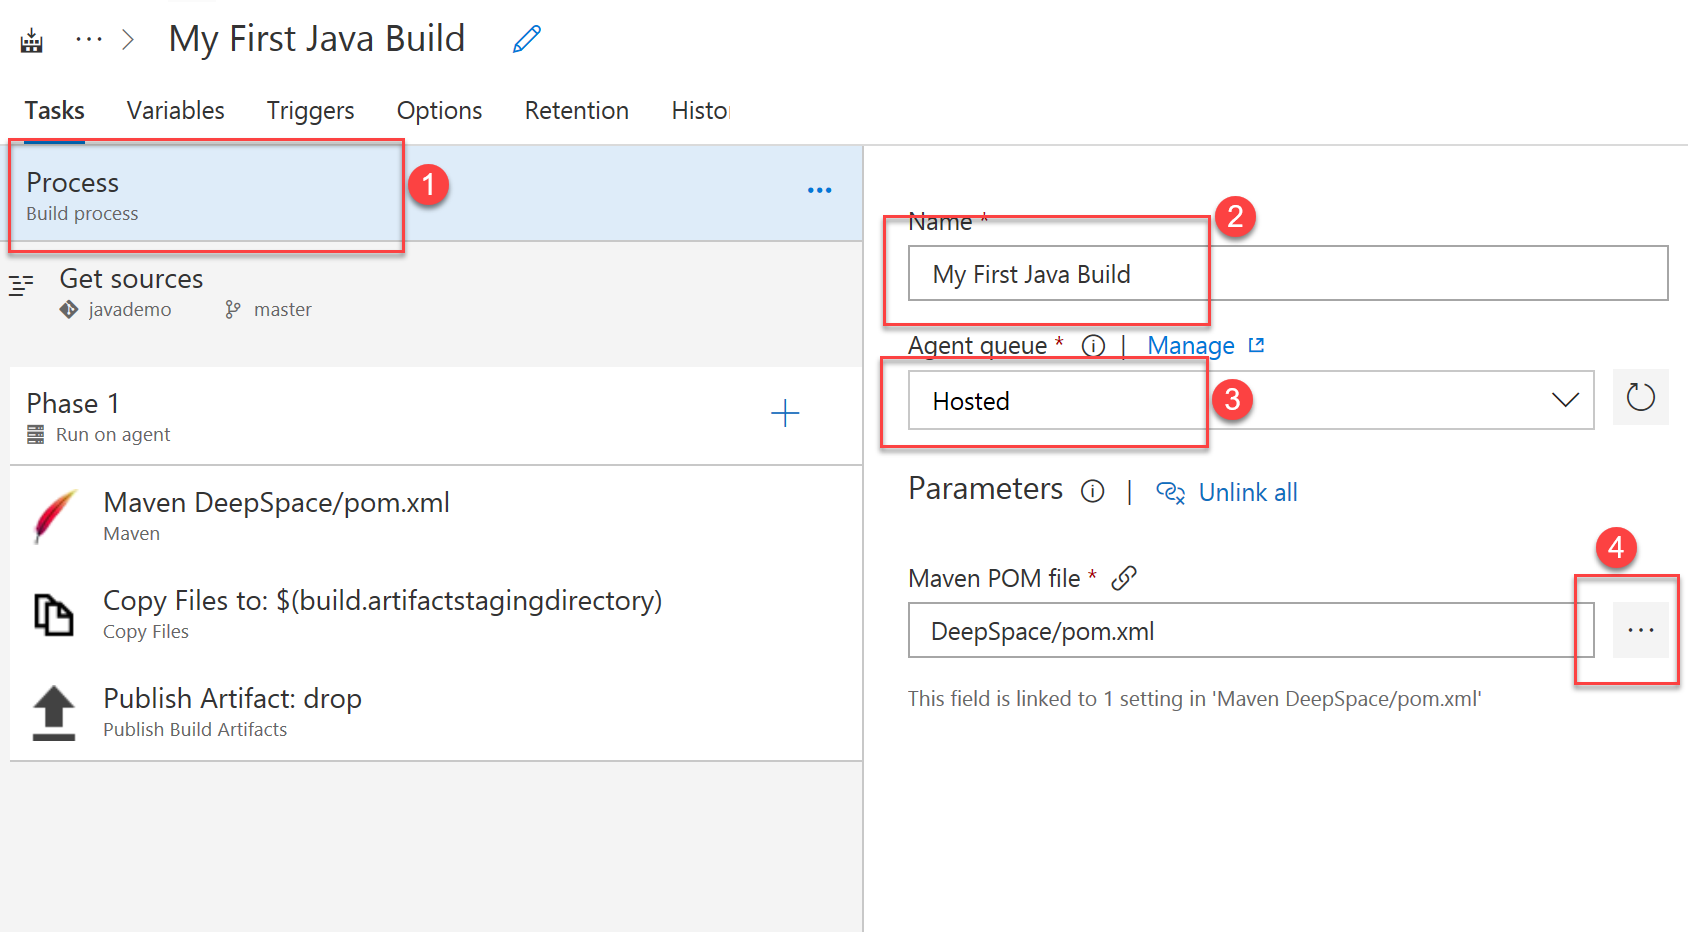
Choose the Maven definition and click Apply. This takes us to the configuration page where we can define the Build parameters. Start with the Process (step 1). It makes sense to give the Build a meaningful name (step 2) since a VSTS project may have many different build definitions. Next, we need to ensure that we have the correct Hosted agent. The agent is the "process" that compiles our code. Agents can be hosted (cloud provided) or private (running on one of our machines). Hosted is fine unless you have restrictions or you hit your quota limits often. Ensure that the path to the POM.XML is correct as it may not always be at the root of our project.
NOTE: currently there is a weird expectation by Kudu that the Java artifact deployed to Azure is named
ROOT.war. If not, the deployment will fail or will be incomplete. I believe that this is some weird Azure Kudu requirement but I need to verify this with the WebApps team. Therefore, we need to edit thePOM.xmlto output a WAR file named "ROOT". Yeah, I know....
In the Get sources task we need to ensure that we point to the right repository and branch. Change as necessary.
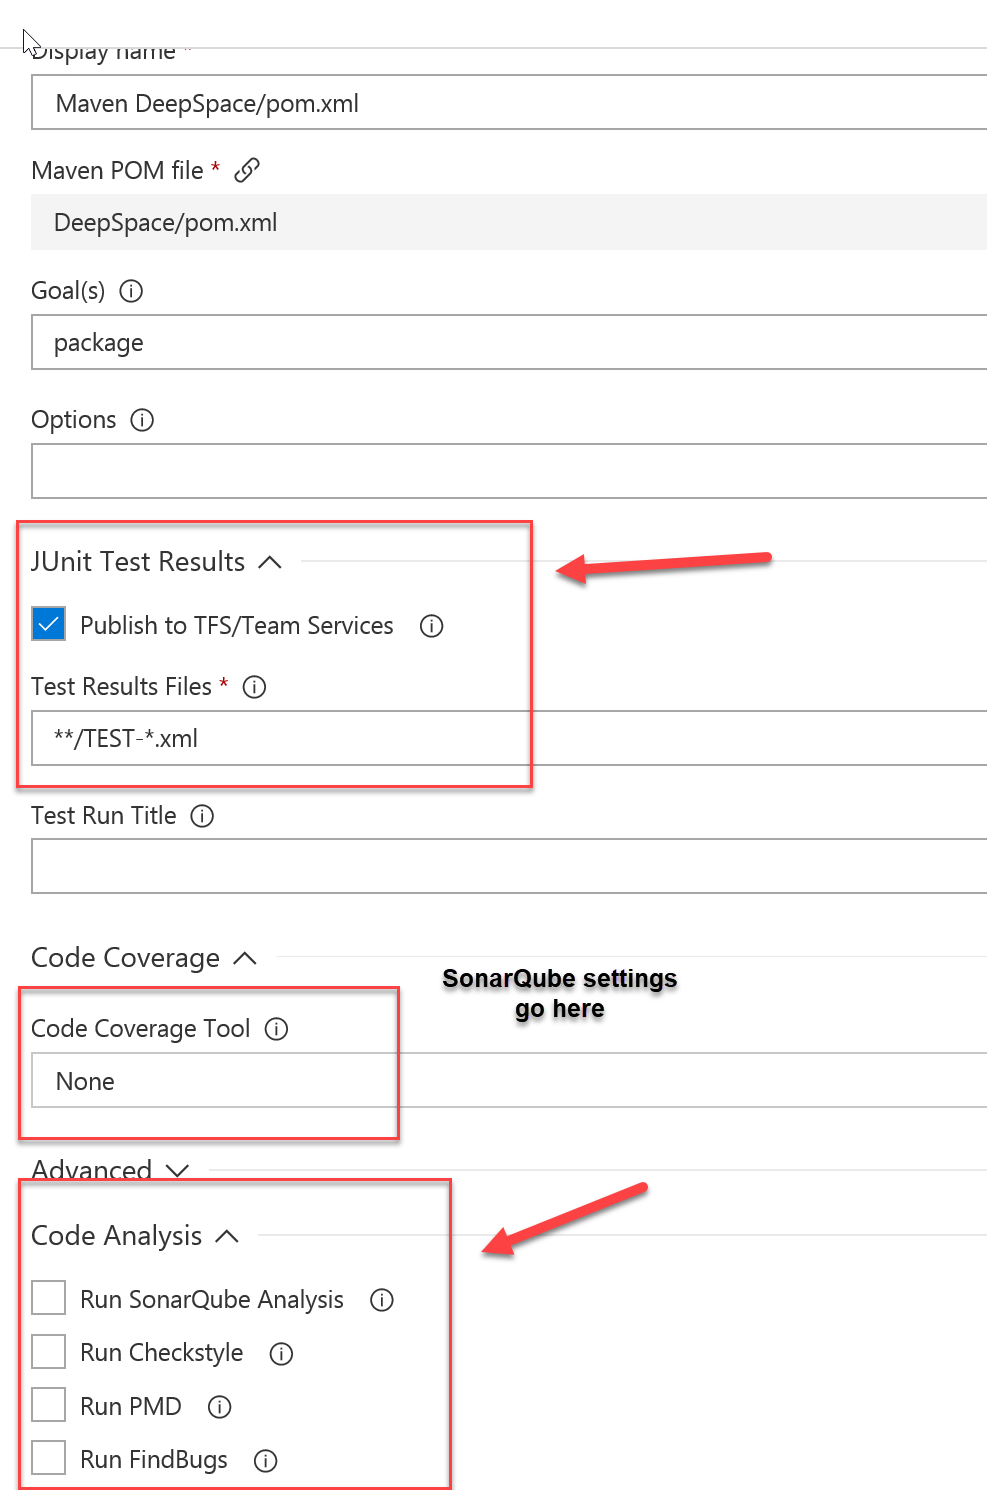
In the Maven task, we need to ensure that everything is correct. At this point we also have the option to turn on static code analysis to check for code coverage etc. I will blog about using SonarCloud in another post because it's a great way to get an insight on the quality of our code. Remember, metrics rule :)
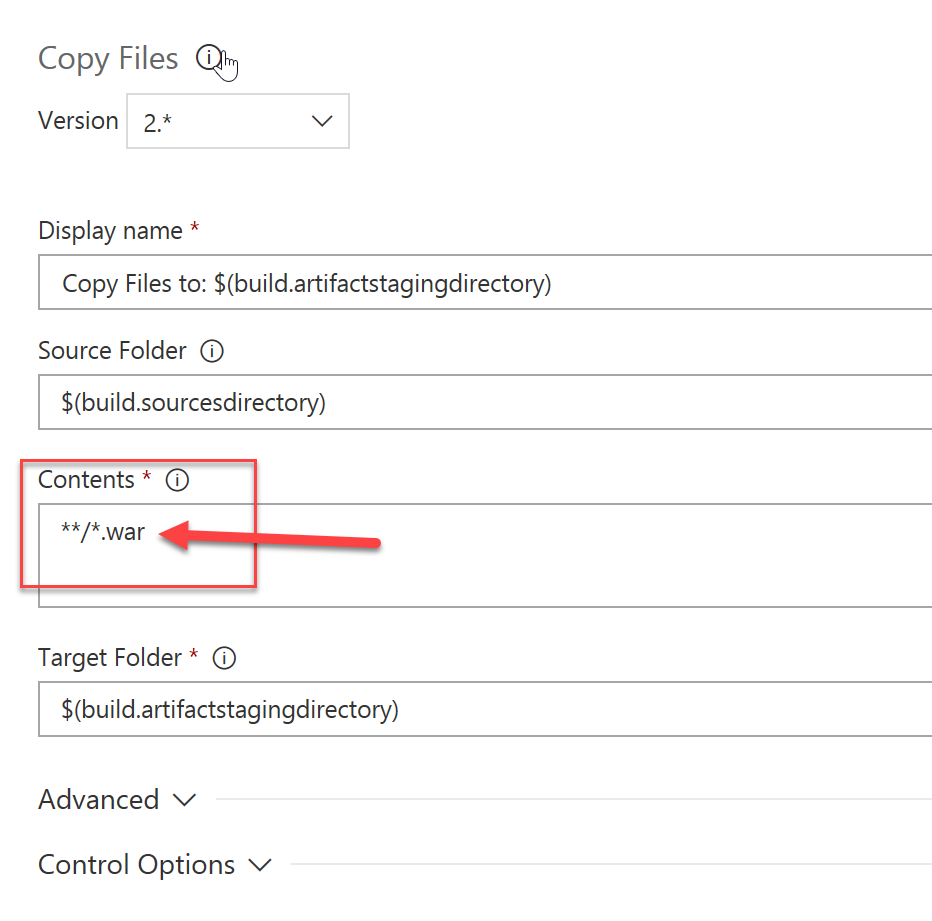
In the Copy Files task, we need to ensure that the Root.war file is copied to the drop directory. Change the Contents field to copy the **/*.war file.
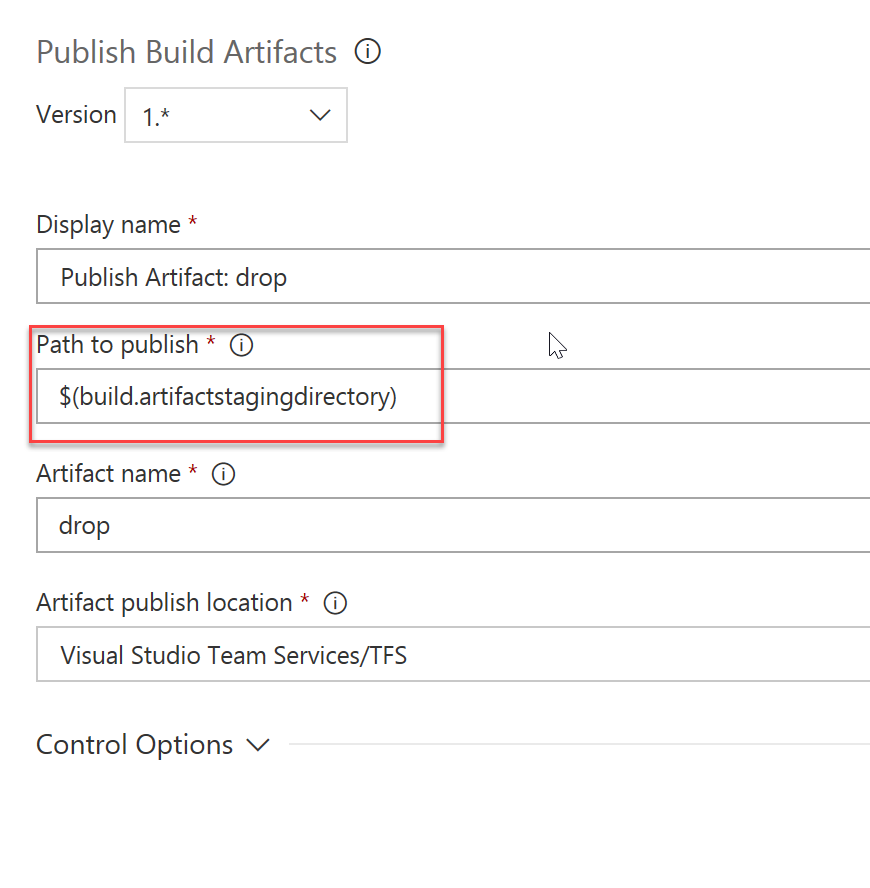
The final step publishes the artifacts to the drop folder and the Build process performs the clean up. You can leave everything as default. One thing to notice here is the use of built-in environment variables that can help standardise the process. The $(build.artifactstagingdirectory) is important as this location because the Release definition will look into this location to deploy the artifact.
Make sure to click on the Save button to ensure that you don't lose your changes. If you want to queue a build immediately, chose the Save & Queue option.
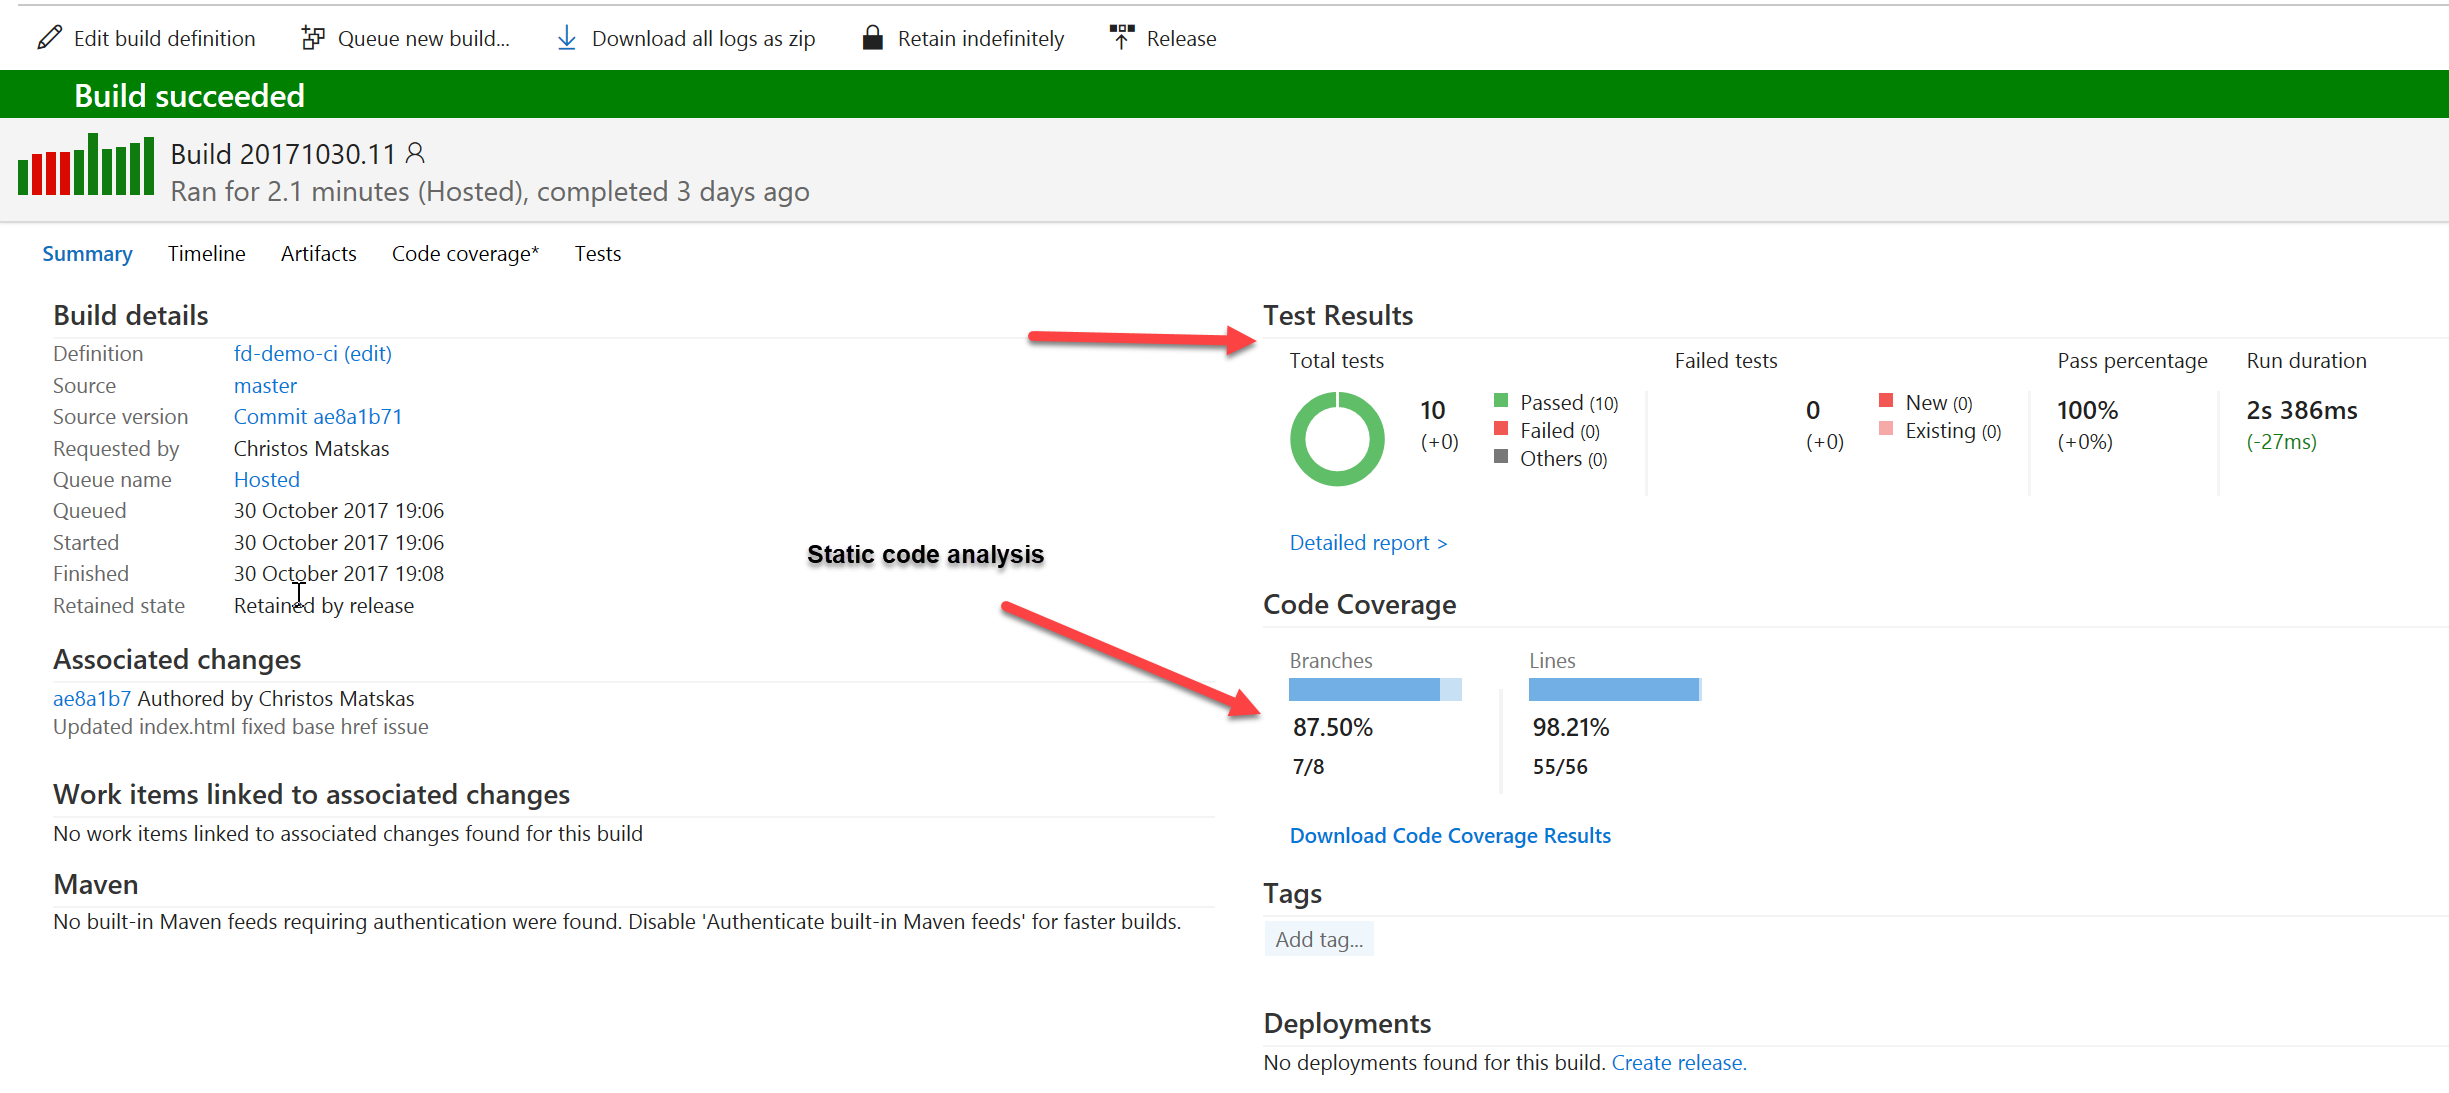
A successful build in VSTS looks like this (we love green!)
The Release Definition
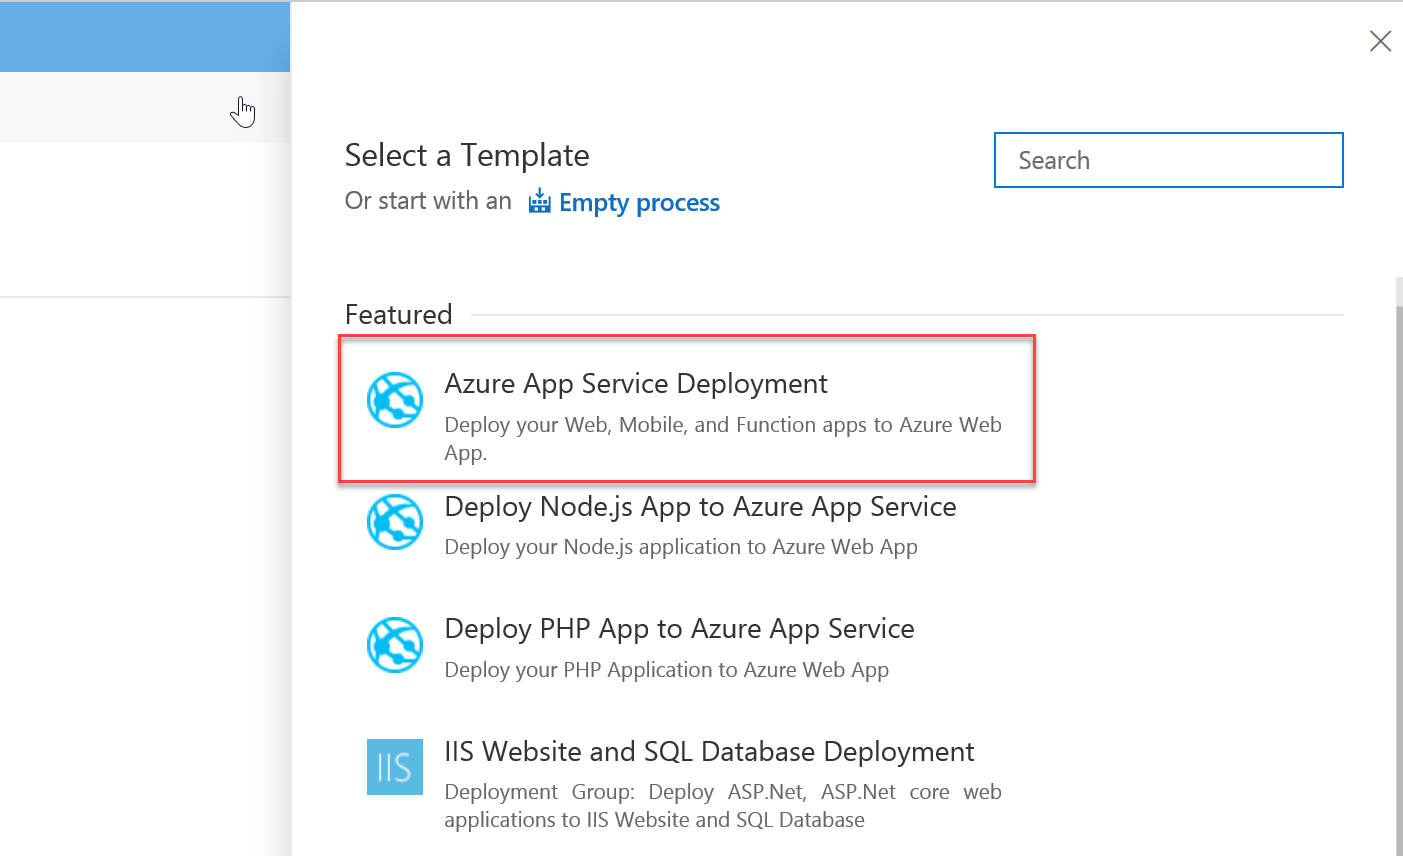
Go to Releases and press the Create Release Definition button. Next we need to make sure we select the right definition. In this instance, we want to the Azure App Service Deployment task.
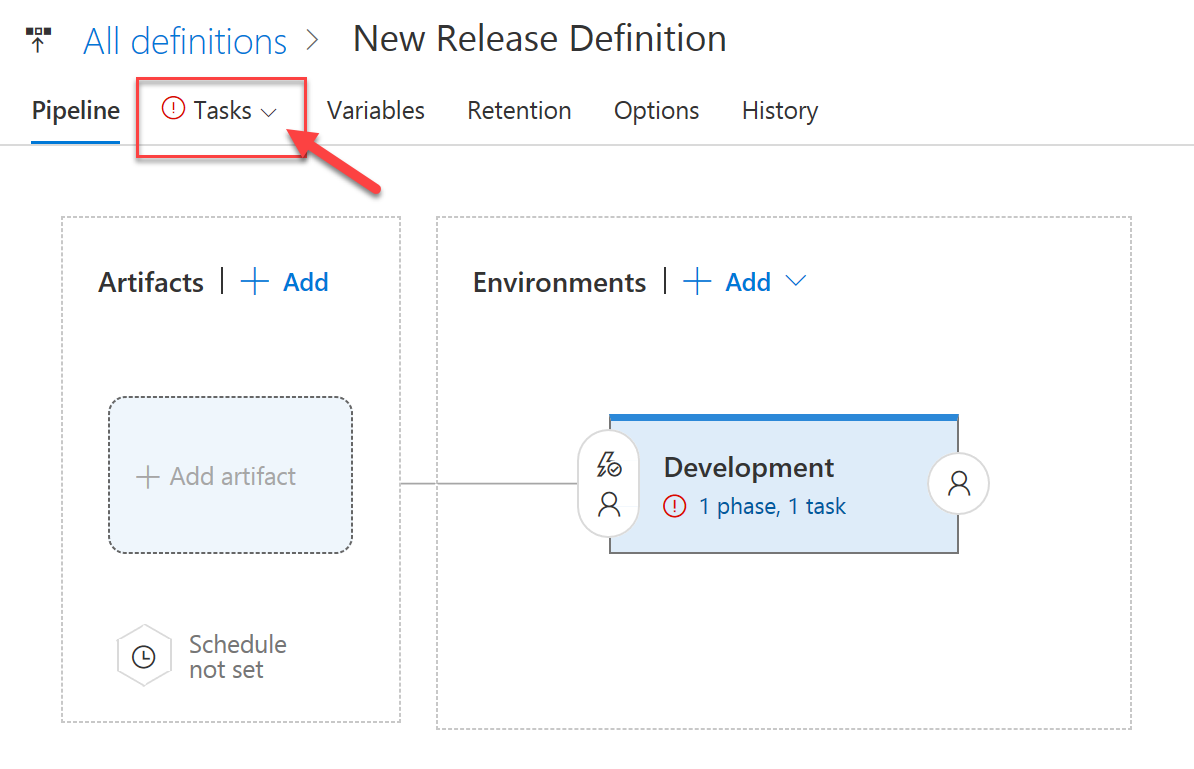
Name the environment based on the destination and then configure the individual tasks. Note that each environment can have different subtasks.

Next we want to configure the Azure Subscription and App Service that we wish to deploy the application to. VSTS does a great job to tie everything together, including Azure. If this is the first time you're accessing resources on Azure, VSTS will prompt you to log in. Otherwise, you could use the reload buttons on the right of each textbox to refresh the data and load the latest changes and subscriptions from Azure.
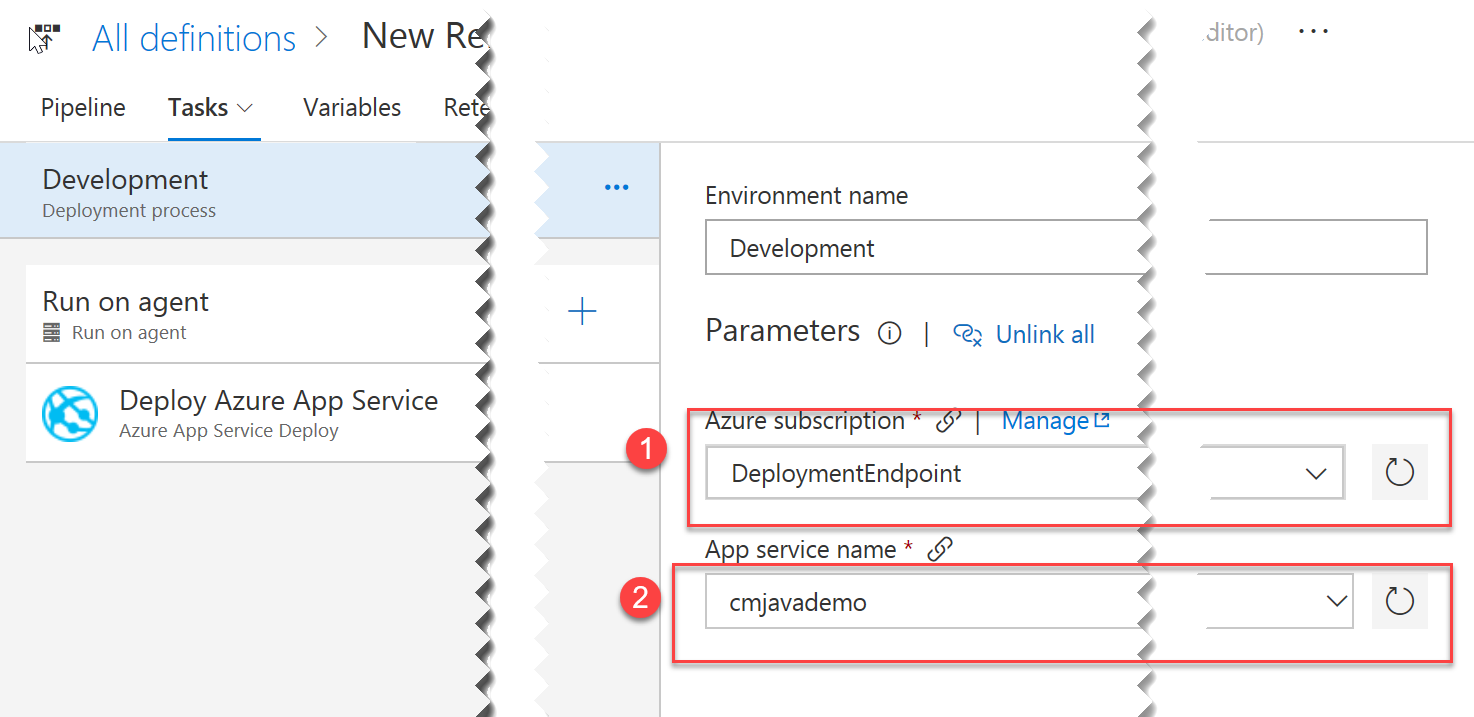
Leave the Run On Agent task with all the defaults and move to the Deploy Azure App Service task. The important bit here is to ensure that we copy the right artifact which was produced by the previous Build task.
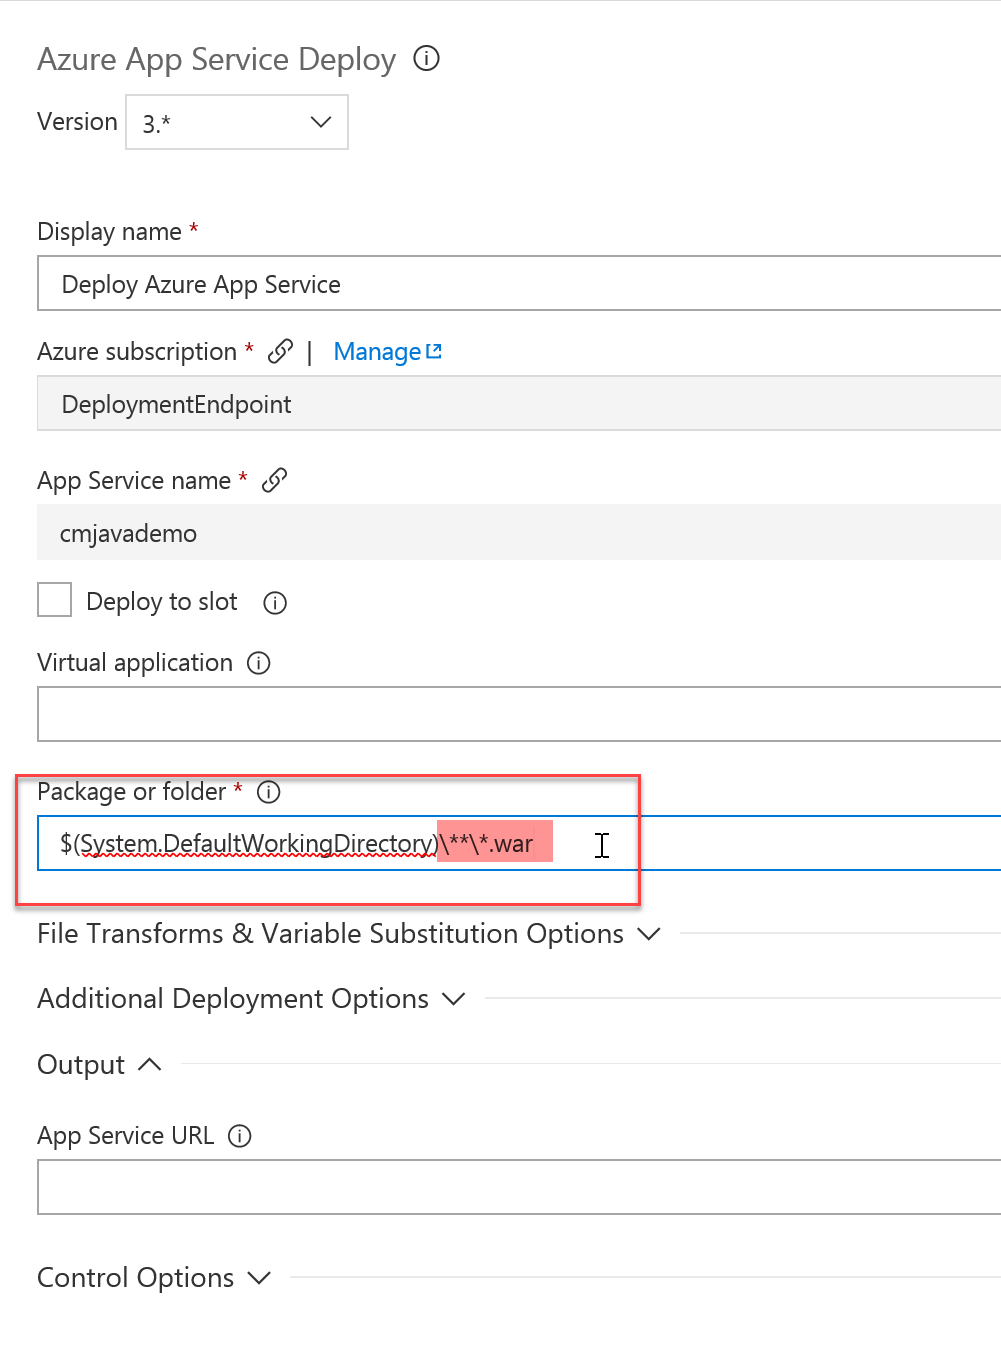
In this case, since we expect to deploy a WAR file, we need to set the Package or Folder value to $(System.DefaultWorkingDirectory)/**.*war.
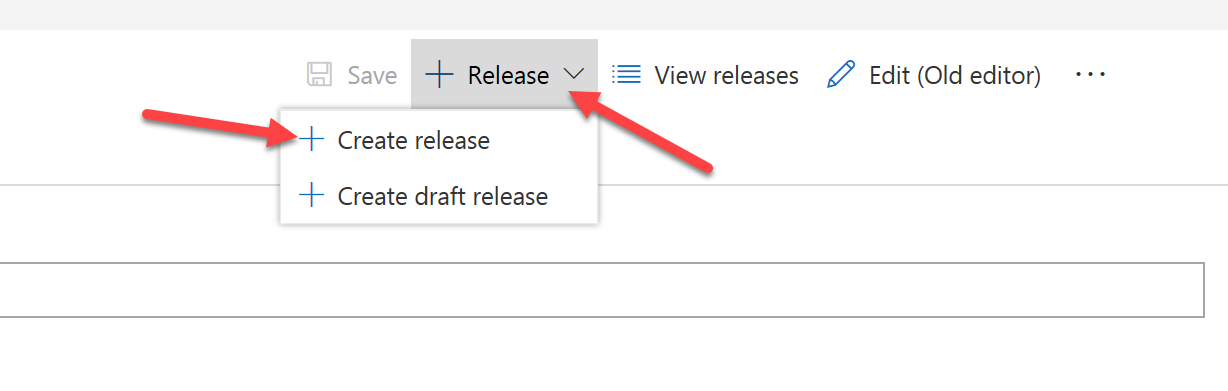
We can now press the Save button and create a new release which should run through our Release Definition tasks and deploy our code to Azure.
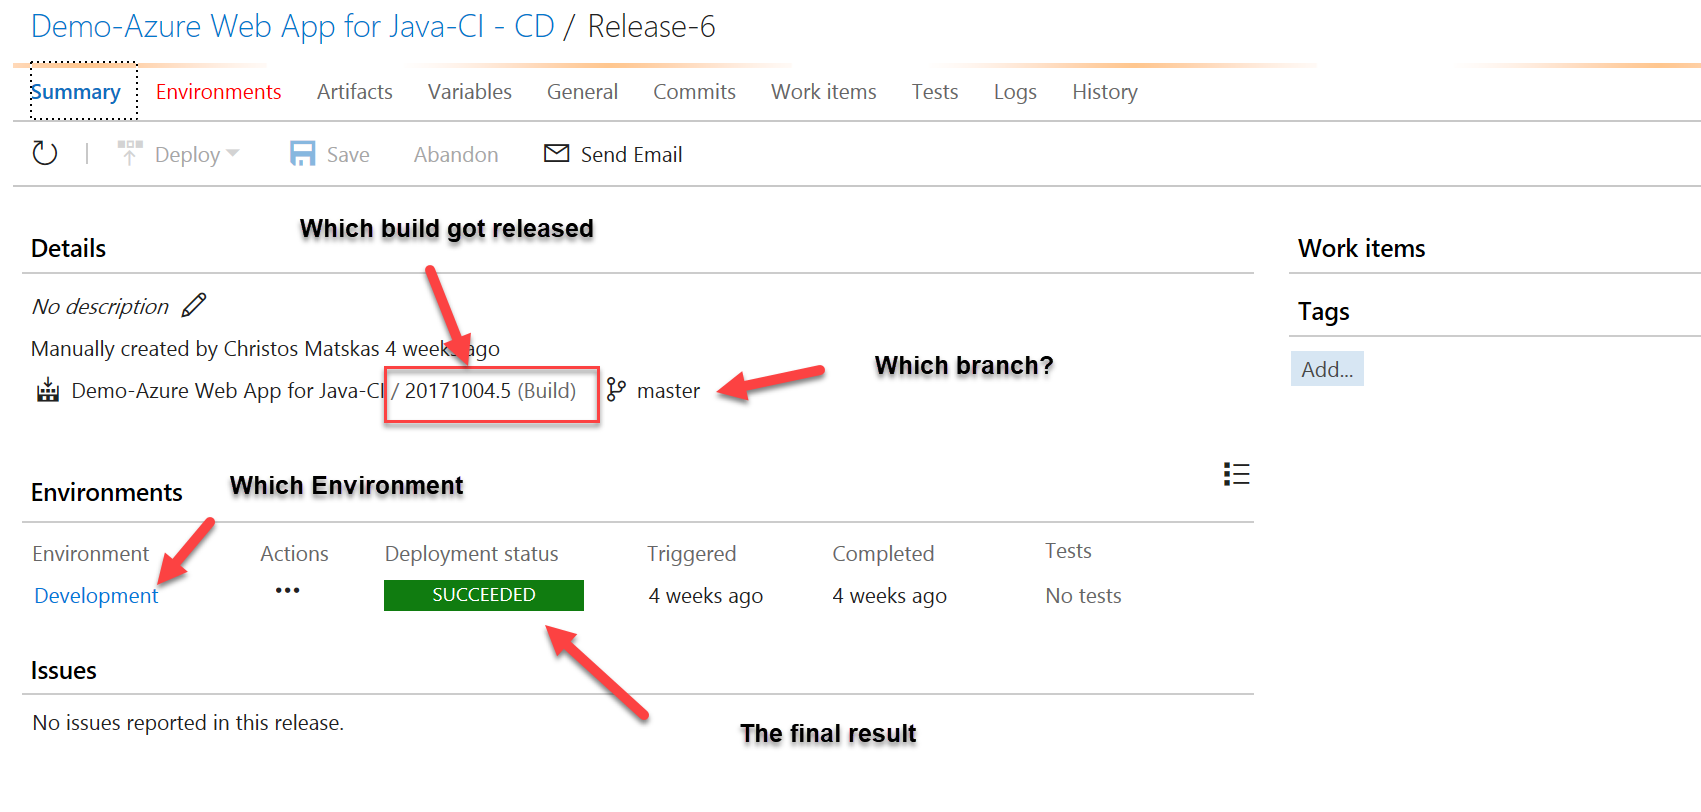
We can check the status of our release in the Overview. After a couple of minutes, we should be presented with the following:
I will post the videos shortly but I hope that this post highlights how straightforward it is to work with Java and VSTS. Any platform, any language, one VSTS.