Hot off the press! The new [Azure Container Instances](https://docs.microsoft.com/en-us/azure/container-instances/container-instances-overview" target"_blank) service is a new offering (still in Preview) from Azure that allows you to launch and run your Docker Images in less than 10 seconds. In this post, I'll show you how to get started and what you need in order to be able to leverage the service.
Prerequisites
In order to follow along you'll need the following:
- An active Azure Subscription
- A machine that has the following installed
- Azure CLI
- Docker
- .NET Core (if you want to deploy a .NET Core app). Alternatively, node or any platform you wish to use and is supported by Docker
Creating the Docker image
For the purpose of this post, I wanted to create and push my own Docker image to Azure Container Instances. I'm doing all this on my MacOS running .NET Core 2.0 Preview. You could use RTM 1.1 if you haven't had the chance to test the Preview bits yet.
Open bash or your favorite shell and type the following:
mkdir mydemoapp && cd mydemoapp
dotnet new mvc
dotnet restore -> this is only required for 1.1 as 2.0 runs the restore automatically
dotnet run
Since we plan to run the application on Docker, we need to create a self-contained output that will contain both the application and the .NET Core framework. I want to target Ubuntu so I had to change the
<PropertyGroup>  <TargetFramework>netcoreapp1.0</TargetFramework>
    <RuntimeIdentifiers>win10-x64;osx.10.11-x64;ubuntu.16.10-x64</RuntimeIdentifiers>
  </PropertyGroup>
If you're curious about the available Runtime Identifiers, you can find more details [here](https://docs.microsoft.com/en-us/dotnet/core/rid-catalog" target="_blank). Now we can publish our application targetting a specific runtime:
dotnet build -r ubuntu.16.10-x64
dotnet restore -r ubuntu.16.10-x64
dotnet publish -c release -r ubuntu.16.10-x64
Next, we need to add a dockerfile which will be used to generate the Docker image. Mine looks like this:
FROM microsoft/aspnetcore-build
COPY ./bin/ubuntu.16.10-x64/netcoreapp1.0/publish /app
WORKDIR /app
ENV ASPNETCORE_URLS http://*:5000
EXPOSE 5000
ENTRYPOINT ["dotnet", "test1.dll"]
A quick explanation of the above details:
- FROM -> the image you need to use (has to be -build)
- COPY ->
[Source] the output folder created from the dotnet release command
[Destination] the folder the application should be placed inside the container - WORKDIR -> The working directory inside the container. This is where your application code is going to live
- ENV -> ASPNETCORE_URLS is used to configure the URL and PORT that the web app should listen to inside the container
- EXPOSE -> the PORT that the container should listen for incoming HTTP calls
- ENTRYPOINT -> ["command", "your application's dll"]
With the Docker file in place, we can create our image. Open bash and type the following making sure you provide a meaningful alias:
docker build -t <alias of your image> .
Validate that the image was created successfully. The first time you pull the ASP.NET Core image it will take a while to download it. Subsequent builds will be very fast! Check the image is there by issuing the following commands:
docker images
docker inspect <image hash>
Create the Azure Container Registry
The Azure Container Registry is similar to DockerHub and allows you to host your Docker images. To use the Azure Container Registry, you'll need to deploy an Azure Container Registry. Fire up your bash and type the following Azure CLI commands to log in and select the appropriate subscription:
az login
az account list
az account set --subscription <subscription guid>
Now we can create the azure registry using the Azure CLI.
NOTE: Azure Container Instances is only available in the following locations: East US, West Central US, West Europe. Consequently, the Resource Group used to deploy ACR needs to be in one of these locations.
az acr create --resource-group <yourResourceGroup> --name <yourACRname> --sku Basic --admin-enabled true
This should output the following:
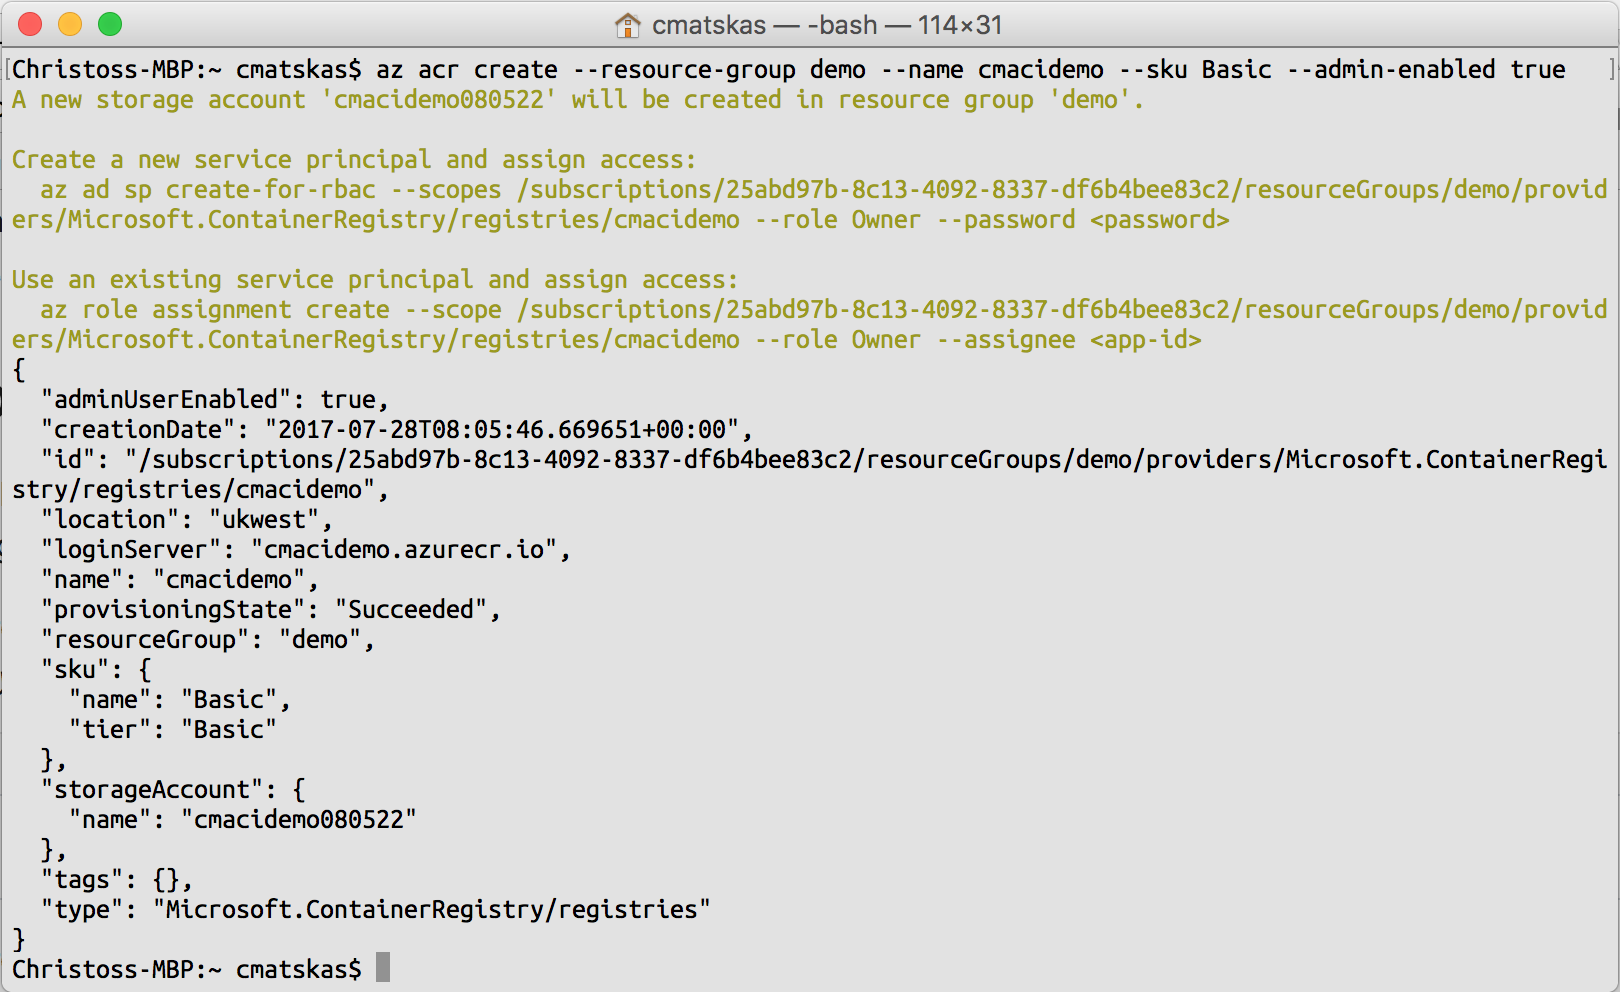
From the json output, grab the loginServer details which will be used along with the password in order for Docker to be able to push and pull our images. To get the password so that we can subsequently log in to the Azure Container Registry:
az acr credential show --name cmacidemo --query passwords[0].value
Copy the password and the loginServer values somewhere handy because we'll need them for the next step.
Deploy the Docker image to Azure Container Registry
The steps we described above are a one-off. Once you've deployed your ACR, you don't need to go back and do it again. Obviously, the images may differ for each application, but these are also one-offs. This part is the one that will describe the steps to push and deploy to Azure Container Instances.
First, we need to configure Docker to use the newly deployed Azure Container Registry. You may remember that we created an admin account along with the ACR in the previous step.
Although using an admin account for demo purposes is OK, you should never use this account in a production/work environment. Instead, you should create and use an Azure Service Principal for all subsequent operations.
You can find how and why you should use Azure Service Principals [here](GHOST_URL/service-principals-in-microsoft-azure/" target="_blank).
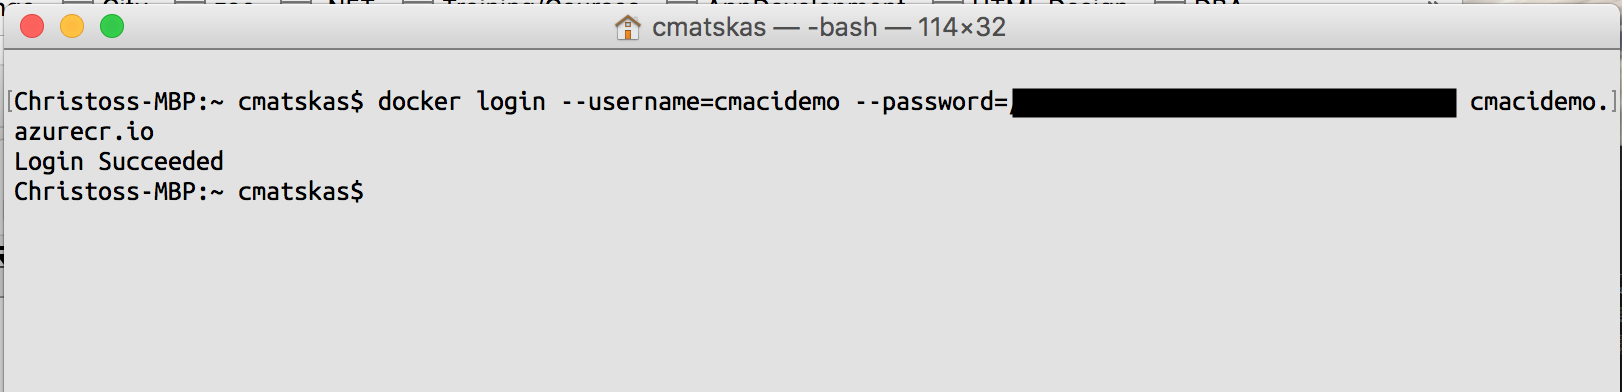
To configure Docker to pull and push to ACR we need to run the following command:
docker login --username=cmacidemo --password=<yourPassword> <yourLoginServer>
In the above command, we need to replace the username with either the ServicePrincipal AppID or the admin name (ACR name) and the corresponding password. It's important to point to the right LoginServer otherwise our push operation will fail.
The next step is to tag the image and mark it for uploading to ACR. In bash, we need to type the following:
docker tag <yourImageAlias> <yourLoginServer>/<yourImageAlias>:v1

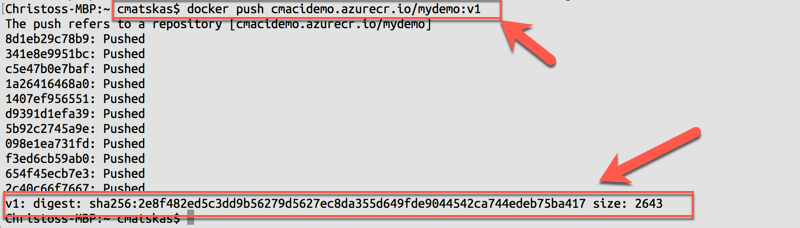
And now, we can push the tagged images to ACR
docker push cmacidemo.azurecr.io/mydemo:v1
The command used the fully qualified tagged name and the version. A successful push should look like this:
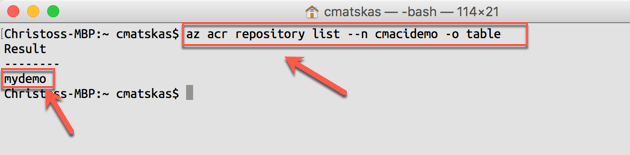
Let's verify that ACR now contains our newly created images
az acr repository list --name <acrName> -o table
Success! We're on the ball! Now, let's go and create a nice container to test the process. That's the final step in the process.
az container create --name <aContainerName> --image cmacidemo2.azurecr.io/mydemo:v1 --cpu 1 --memory 1 --ip-address public -g <yourResourceGroup> --port 5000 --registry-password <yourPassword>
This should take a few seconds to run. We can check the progress of our container with the following command:
az container show --name <aContainerImage> --resource-group <yourResourceGroup> -o table

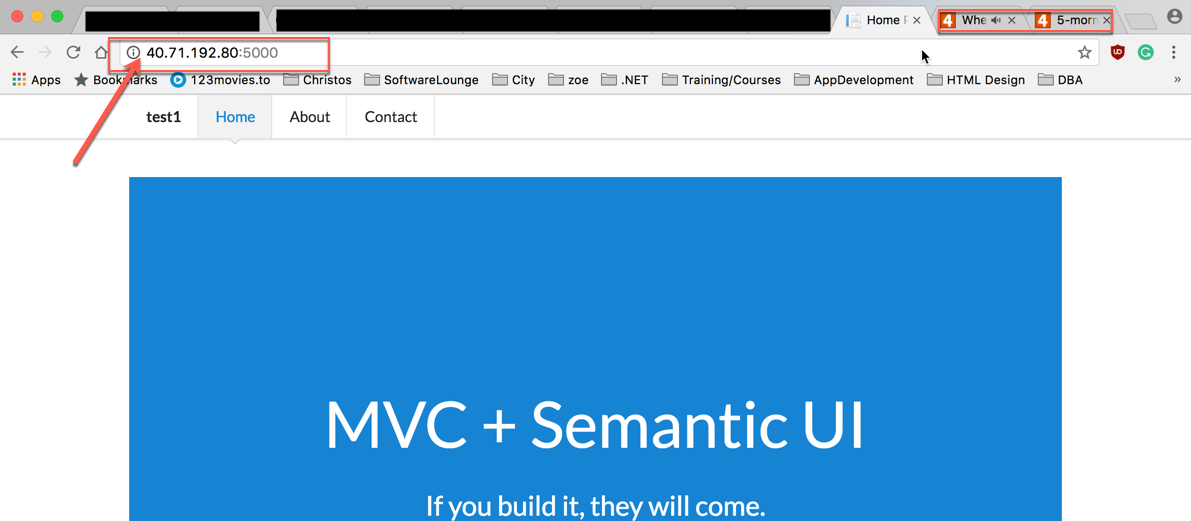
Once the ProvisioningState changes to Succeeded, we're able to browse our container app using the IP, and optionally port, based on the information provisioned by Azure Container Instances. In this case, I defined port 5000 because my Docker image was built to listen to this port. To prove all is working as expected, open the browser and navigate to the ip:port address
Pushing subsequent images and spinning up containers is a lot easier and as fast as advertised. Now it's your turn to take the service for a spin and let us know how you get on. Have fun...