RabbitMQ is a great queuing tool that can run on a variety of platforms. If you are planning on doing any distributed, asynchronous processing and you need a system to queue and process items in the background, then you should seriously consider RabbitMQ. The online documentation is great and there are plenty of tutorials that can take you through the basics of creating and consuming queues in your application. However, before you start typing any code, you first you need to get RabbitMQ up and running somewhere (local system, server etc). In this post, we will go through the installation steps and see what’s needed to get us to that point.
1. Erlang Installation####
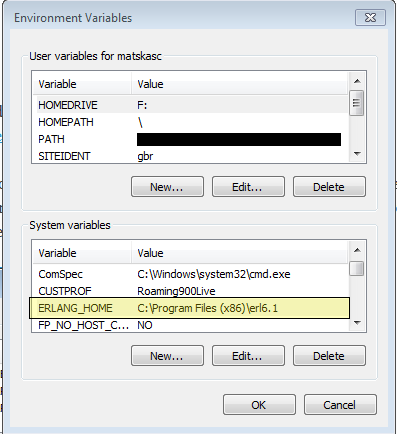
RabbitMQ runs on the Erlang virtual runtime. Don’t ask me why, but it does, so we need to install Erlang first as without it we can't get RabbitMQ to work. You can get the latest Windows installer here. Make sure you choose the 32 or 64bit version depending on the system you plan to run it. Download and install it. There is no restart required, so this first step is easy. Before we continue, ensure that the appropriate environment variable (ERLANG_HOME) has been created during the installation. If, for any reason, the environment variable is missing, you will need to create it manually as per the image below:
2. RabbitMQ Service Installation####
Grab the latest installer for Windows from the RabbitMQ website here Download and install. Again, nothing funcy here.
3. RabbitMQ Web Management Plugin installation####
RabbitMQ runs, by default, as a Windows Service and technically you shouldn’t need to do anything else to start interacting with it. However, any interaction with the service needs to happen over the command-line. If you are not a die-hard command-line, then there is an solution for you. RabbitMQ comes with a handy and, nice if I may say, web-based management plugin which is part of the installation files. To install the web plugin you just need follow the steps below:
- Open an elevated command line (Run as Administrator)
- Navigate to the sbin directory of the RabbitMQ Server installation directory. In my case the path is
C:\Program Files (x86)\RabbitMQ Server\rabbitmq_server-3.3.4\sbin - Run the following command to enable the plugin
rabbitmq-plugins.bat enable rabbitmq_management - Then, re-install the RabbitMQ service using the commands below:
rabbitmq-service.bat stop
rabbitmq-service.bat install
rabbitmq-service.bat start
To check if everything worked as expected, navigate to http://localhost:15672/mgmt. You will be prompted for username and password. The default credentials are:
Username: guest
Password: guest
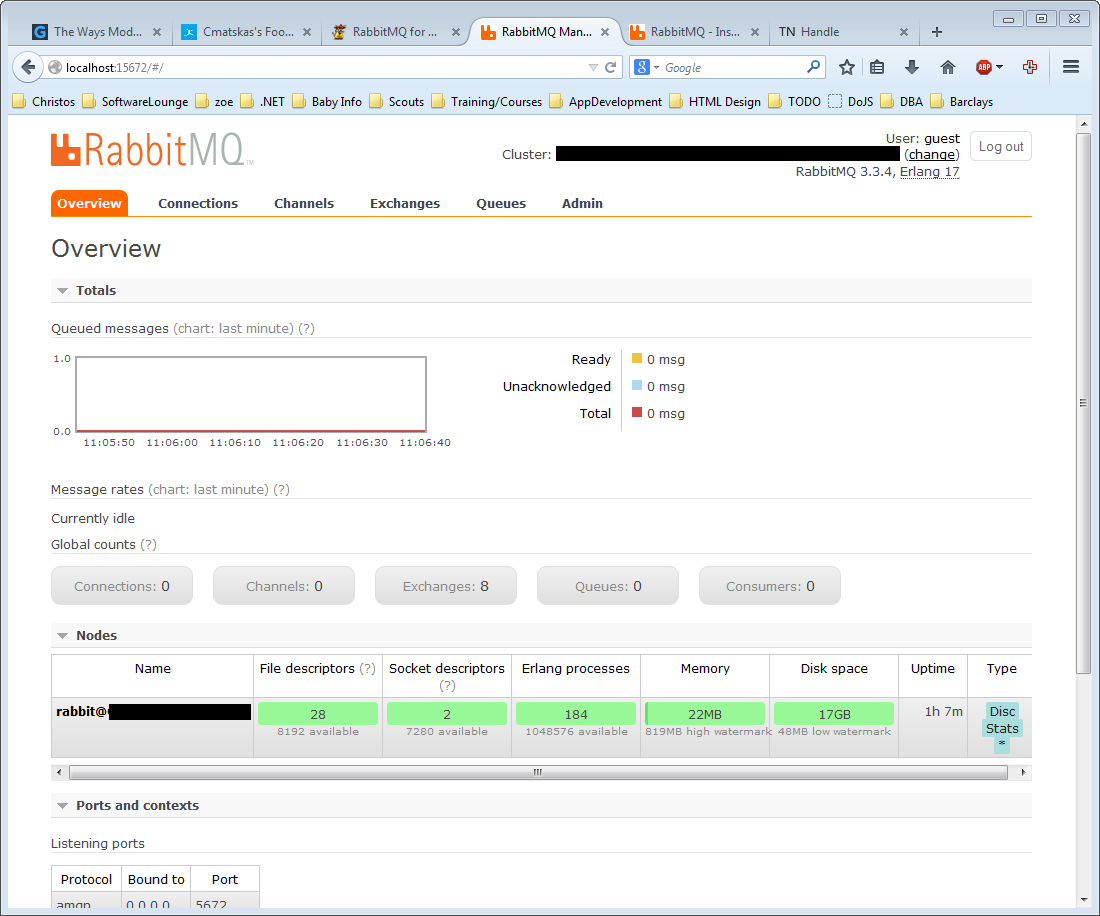
You should now be presented with the following page:
4. Install Handle.exe for RabbitMQ’s file descriptors####
When you first log in to the RabbitMQ web dashboard, under the "Overview" tab you will notice that in the "File descriptors" field there is a question mark about the missing Handle.exe. Handle.exe enables RabbitMQ to monitor the local file system. It will still work without it but I think that it's better to make it available, so let’s go and get it. The dashboard provides a handy link to the Handle download page, but you can also use this link to go to that same page directly. As a side-note, this tool is written by no one else but Mark Russinovich himself. This guy is a genius!
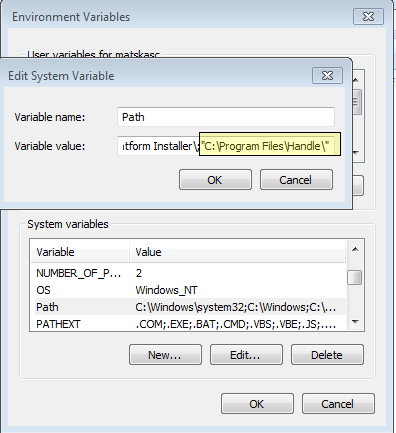
Download the zip file and unzip it anywhere you want. I decided to extract mine in “C:\Program Files\Handle”. It is important that you keep a note of the extracted path as we will need to add it to PATH environment variable so it is available to RabbitMQ.
- Open the Environment Variables Windows,
- Scroll down to the System Variables -> Path variable and click on Edit.
- At the end of the Variable Value, add the path to the Handle.exe:
- Click OK twice to close all windows down
Finally, we need to restart the RabbitMQ service so that our changes can be picked up. Use the steps below to restart the service:
- Open up an elevated command line
- Type the following commands
rabbitmq-service.bat stop
rabbitmq-service.bat start
Go back to the web dashboard and check the Overview page. The warning about the missing Handle.exe should now be gone.
Next time we will look into how we can use the queuing platform and integrate it with our .NET code.
Happy coding...