I've [blogged before](GHOST_URL/working-with-bash-on-ubuntu-on-windows-10/" target="_blank) about the tremendous work that the Windows team has done to bring a truly integrated Linux subsystem on Windows 10. That's right, you can use the native Linux (user and kernel modes) inside Windows without the need of a VM, Container or any other emulator.
This has opened up so many possibilities and brings a very powerful tool to Windows. Using native Bash is a dream come true for many people and even me, whose use of it is limited to 0.05% of its true capabilities!!! Do I care? No. Do I use Bash? Whenever and wherever I can. Any command I know or I need to use and is available, I'll use. My days lately consist of jumping between tools such as:
- native Windows CMD
- PowerShell
- Bash (on WSFL)
- Visual Studio Code
- Visual Studio 2015/2017
Every single tool come with it's own pros and cons and sometimes I mix it up to keep me on my toes. However, since I blog quite a bit lately about Azure and I usual include a number of scripts, I make a conscious effort now to be truly cross-platform by providing commands on both PowerShell (which is cross-platform anyway) and the Azure CLI (cross-platform as well). This is good; for 2 reasons:
- I get to spend more time using a number of tools and being versatile
- you, my readers, get to choose the tool that best fits your needs.
Working with the Azure CLI
Up until today, I would do my PowerShell scripting on Windows and then switch to my Mac to test the CLI equivalent commands. This was fine but meant that I had to take screenshots etc across 2 different devices. It also meant that I have to carry both laptops with me (which I do anyway) when I want to blog about stuff etc. I could, of course, use the Azure CLI on Windows but without tools such as grep etc, it's like typing with one hand behind my back! I want the true power that comes with a Linux command line, such as Bash.
Today I decided that this would happen no more! So I set out to find out whether I could install the Azure CLI tools on my Windows Subsystem for Linux! My initial attempts yield some results but in the end I was totally unsuccessful. Partly because of my limited knowledge of Linux and partly because of the special setup of WSFL. After failing to install, I reached out to Rich Turner, one of the masterminds behind WSFL for some advice. And of course, the man delivered!
Installing the Azure CLI on WSFL
There are only a couple of carefully choreographed steps required to get the Azure CLI up and running.
- Install the WSFL if you haven't. Instructions [here](https://docs.microsoft.com/en-us/azure/xplat-cli-install" target="_blank)
- Open Bash as an administrator
- Install NPM:
sudo -i apt-get install npm - Run the following command:
sudo -i npm install -g azure-cli
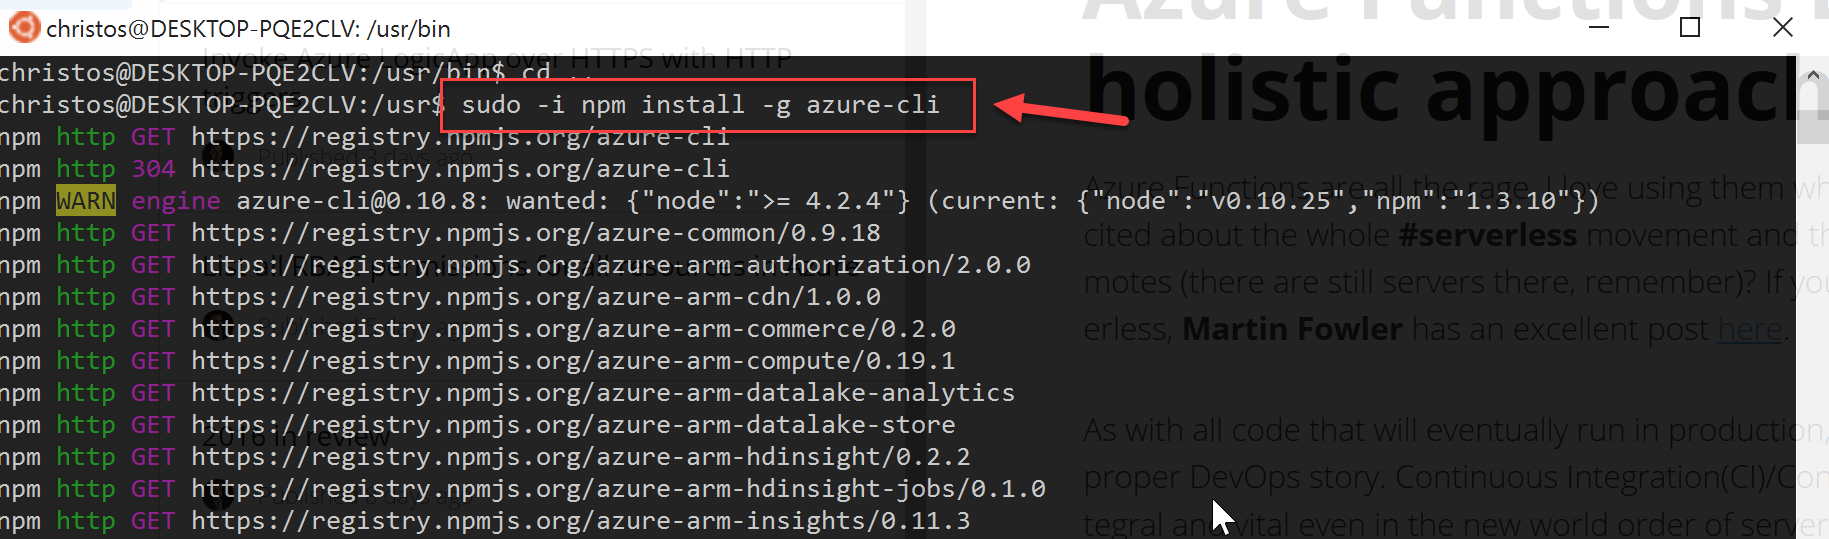
5. Verify that it's installed by typing: sudo npm list -g
6. Create a semantic link due to changes to the way Node.js is installed for later versions. More info on this here: sudo ln -s /usr/bin/nodejs /usr/bin/node
7. Run any of the azure commands
The key to all this, and something that I was totally unaware of (Linux n00b) is what Rich kindly explained on an email to me:
Now, to install the Azure-cli package, you also need to invoke sudo -i <command>the -i means that sudo creates a new shell instance which is given elevated priveliges. This is required because the azure-cli installer spawns several commands which, if -i is not used, spawn outside of the elevated permissions of the current shell, and which fail.
If all goes well, when running the azure command you should be presented with this:
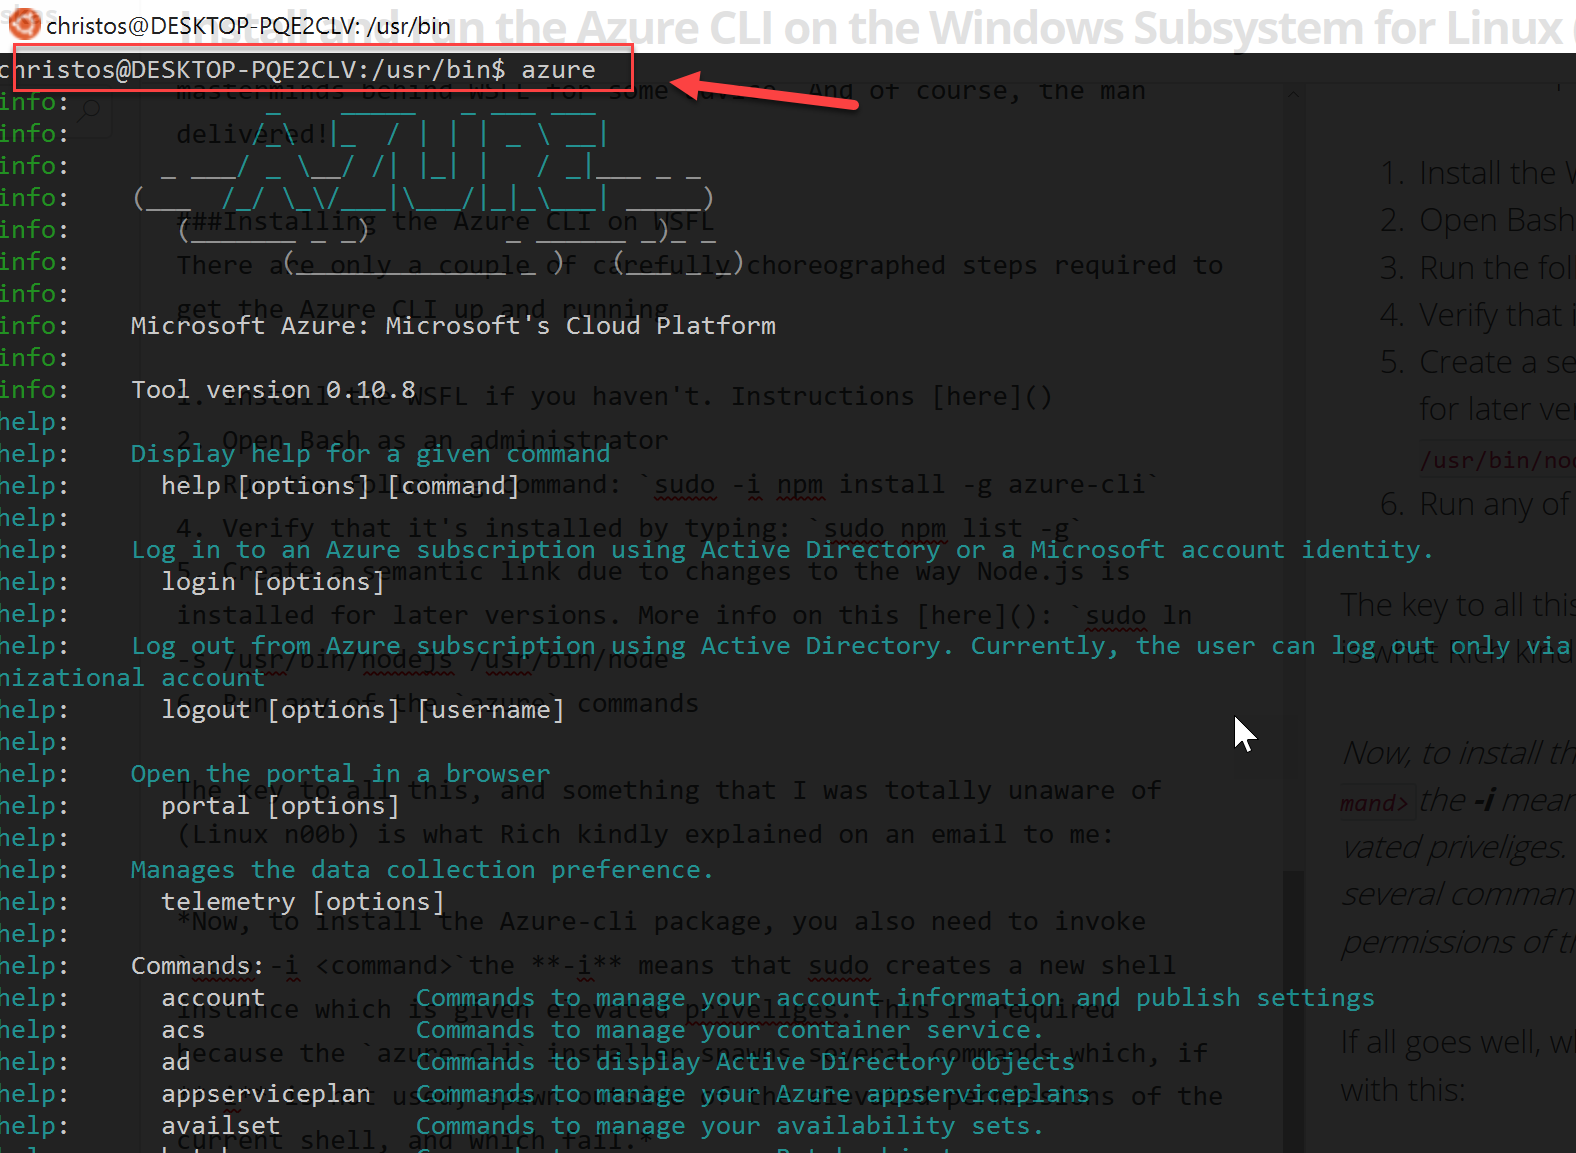
And you know it's serious business when there's ASCII art involved :) I can now login to Azure and execute any of the available commands against the appropriate subscription.
Azure CLI Telemetry - ET Phone Home
Something that didn't work as expected when I installed this time was the prompt to allow for telemetry to be collected on my usage of the Azure CLI. In the end, after bashing the keyboard a few times, it accepted the default which was....(drum roll)..."NO Telemetry". Kudos to the guys. But I'm a sucker for helping out so I decided to enable the telemetry anyway. You can, at any time,
- enable telemetry with:
azure telemetry --enable - and disable using:
azure telemetry --disable
Pro-tip
Did you know that you can switch between Bash and CMD without leaving the command line? While inside Windows CMD, type Bash and see the magic happen! Then, once you're done, type exit and you're back to where you started. I use it all the time to wipe out unwanted directories by switching quickly to Bash and running rm -rf'. Loving it, even if it's just for that!

Conclusion
It may have taken a couple of emails and a bit of head scratching, but the end result better than I would have imagined. I can now run and test Azure scripts using any of my favourite, open source tools from the comfort of a single Windows device. I hope this helps your setup as well.
Special Thanks
I would like to thank [Rich Turner](https://twitter.com/richturn_ms" target="_blank) (MS Windows team) for his help in setting this up and for his very thorough response to my email. Keep up the good work mate!