As a web developer, certain tools have become indispensable. I can't even imagine having to do any front-end work without [npm](https://www.npmjs.com/" target="_blank), [Grunt](http://gruntjs.com/" target="_blank) or [Gulp](http://gulpjs.com/" target="_blank). In fact, these tools are so great that the upcoming release of ASP.NET has thrown away proprietory package and task managers in favour of the widely adopted and established tools used by the community. And these tools are now first class citizens both in Visual Studio and Visual Studio Code.
Classic .NET developers and avid Visual Studio users will have a lot of catching up to do. But we are here to help! Today, I will show you how to use Gulp in Visual Studio code in order to run some basic tasks. Although there is a crazy amount of tasks that you can setup, we will focus on 2 (+1 bonus) things:
- Compiling TypeScript to JavaScript
- Compiling a Saas (CSS) file to pure css
- BONUS - Adding a couple of watch tasks to automatically build js and css when the code's changed
Although Gulp is a stand-alone tool, VS Code has excellent support for it out-of-the box. What this means is that as long as you have a gulpfile.js at the root of your project, VS Code will happily pick it up and make the tasks available in the IDE. Let's get started:
Create a project
I assume that you already have TypeScript and VSCode installed. If not, have a look [here](GHOST_URL/typescript-and-vs-code/" target="_blank). To create a project, you need a folder in the file system. Choose your preferred location and create a new directory with name VSGulpTest.
Install npm and Gulp
We will start from the basic. Npm is Node's package manager (hence the name, in case you missed it) and in order to get it you need to install Node.js. There are two ways to do it:
- Using chocalateyNuget
choco install nodejs - Download the executable from the [official site](https://nodejs.org/en/" target="_blank)
With this out of the way, you can now install Gulp. Open the Node.jS Command Prompt and type npm install --global gulp. Press enter to execute. This command installs Gulp globally. I generally tend to avoid global installs but for VSCode will not run Gulp if only installed locally. All subsequent packages will be installed at the local level through.

Next, we need to initialize npm on the current project. To do so, open the Node.js command prompt, navigate to the root of your project and execute the following command: npm init
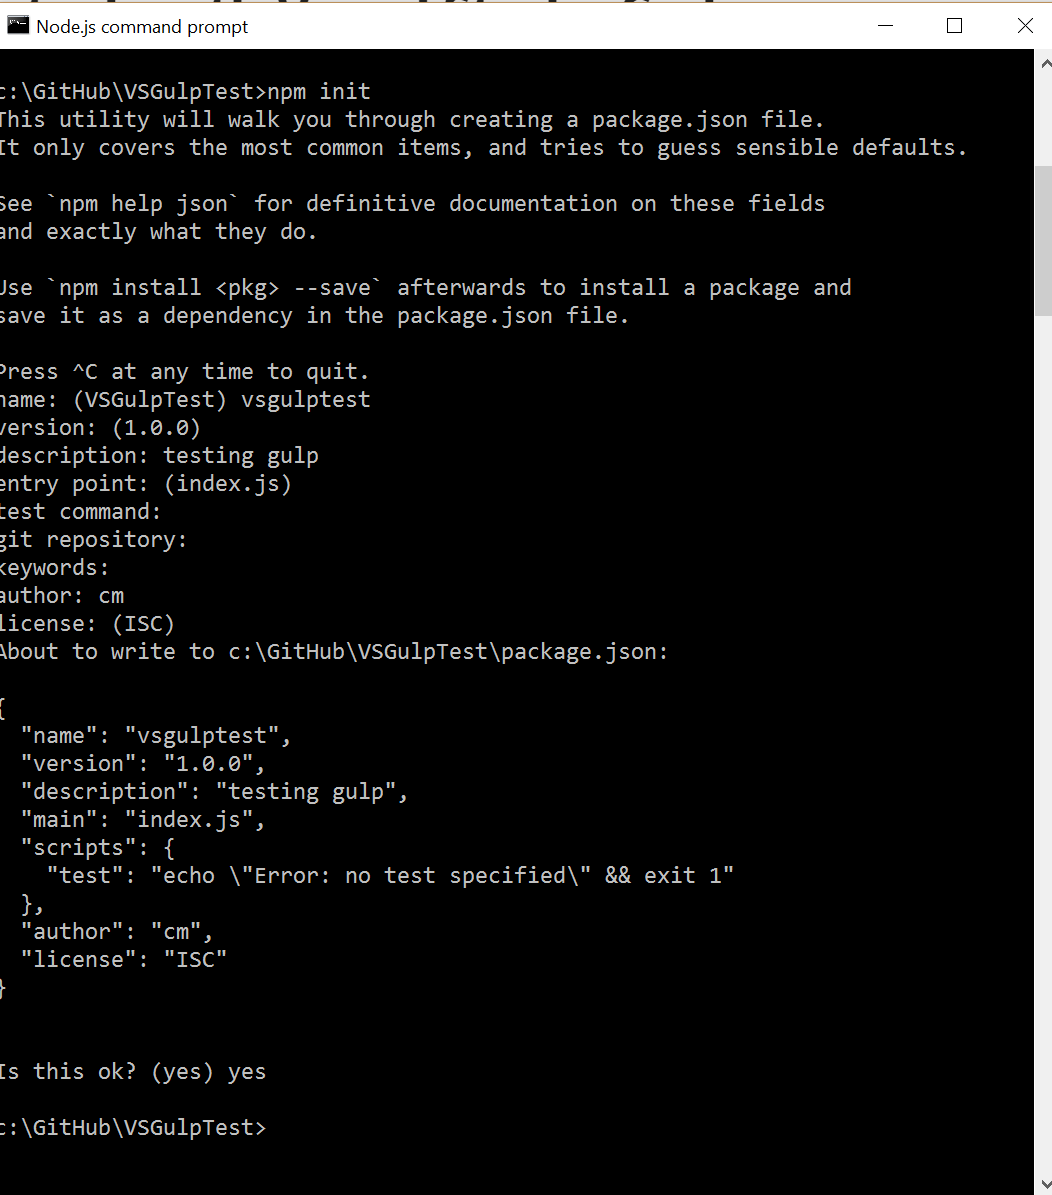
This task will create a package.json file at the root of your project. This file is used by node.js to keep track of the installed packages. The command prompt will take you through a set of questions (CLI Wizard) in order to generate the configuration settings. None of the settings is particularly important so you could either leave all of them blank or copy my settings. At the last step, just type yes to generate the file.
Install necessary packages
Gulp is a task runner so on its own it's pretty useless. We need plugins to help us perform the necessary tasks. For the purpose of this post, we need 3 plugins:
- typescript
- merge
- sass
To install the plugins, go back to the node.js command prompt and navigate to the root of your project. Then execute the following commands, one at a time:
npm install gulp-sass --save-dev
npm install gulp-typescript
npm install merge2
These commands will install the necessary plugins and a number of dependencies. These plugins will be called from gulp to perform our tasks.
Add some code
Right now, our project is empty. Let's add a couple of TypeScript files, a Sass file and an HTML file to make a crude, yet basic website. Add animal.ts and human.ts files and paste the appropriate code. Add a main.scss file for the CSS code and an index.html file for the main website page. Again, use the code below or add your own code to the appropriate files
Add the Gulp tasks
Time to glue everything together and get a working site. At the root of your project, create a gulpfile.js file. Add the following code:
I will try to explain briefly what's happening within this file. At the top of the file we define gulp we import all the plugins. Then we create 4 tasks:
- scripts - compiles the *.ts files to js, merges all code into one file, generated the typings (.d.ts) file and saves the generated files to the designated location (
release) - sass - compiles the *.scss files to *css and puts the generated file in the designated location (
css) - watch - monitors the *.scss & *.ts files for any changes and automatically executes the corresponding task
Now we are ready to run - almost. While in VS Code, press Ctrl+Shift+B to define a new task runner.

Press on **Configure Task Runner" option. This will present you with the tasks.json file. Delete everything from the file and add the following code:
This code instructs VS Code to use Gulp as the main task runner and inside there we declare the 3 tasks we wish to make available to the IDE. They need to correspond to the tasks we defined in the gulpfile.js file. You can always omit tasks you don't need but any new task needs to be defined in the gulpfile.js first.
Next, if you type Ctrl+Shift+P and then type Run Task, you'll be presented with a drop-down with the tasks we defined in the tasks.json file. Select the watch tasks and let it run. You'll notice that the Output Window is brought to focus and there is a small spinner at the bottom left-hand corner to indicate that the task is currently active.
Every time you do a change to a *.scss or *.ts file and you save the file, the change will trigger the corresponding task to execute. If you have your index.html page open on the browser, all you have to do is refresh and you'll see the changes instantly.
To stop the task, simply type Ctrl+Shift+P and then type Terminate running task. This will kill the running process. Luckily, IntelliSense kicks in quite early so you don't have to type all that - limited keystrokes/lazy etc.
Up your game
If you wish to take this to the next level, you can install the [npm-livereload](https://www.npmjs.com/package/livereload" target="_blank) package along with the appropriate browser plugin that will allow you to automatically refresh the page you're testing every time there's a change in the watched files. If you want to see this in action or an example, let me know in the comments.
Congratulations in creating your first Gulp task and running it withing VS Code.
Food for thought
Please note that this is not the only way to run Gulp or Grunt and some may advocate that you shouldn't be so dependent on IDEs. VS Code was designed to be lightweight and fast by getting rid the massive bulk that comes with the full Visual Studio IDE. Therefore, adding task dependencies and instantiating them through the IDE may not be the best idea after all. You can always use the Node.js command prompt to kick off all these tasks in the exact same way and expected behavior. If you don't like the approach I used above, feel free to use the right tool that makes you feel comfortable.
Let me know what you think in the comments and if you have a favorite Gulp plugin that we should know about.
Related Posts
- [Working with TypeScript in Visual Studio Code - a pair made for each other](GHOST_URL/typescript-and-vs-code/" target="_blank)
- [Visual Studio Code: getting insider builds](GHOST_URL/visual-studio-code-getting-insider-builds/" target="_blank)