I am in the process of developing a Windows Store App which has a dependency on SQLite. Today, I decided to implement continuous integration (CI) using my hosted TFS service. If you are serious about CI but don’t want to host your own CI Server and go through the pain of setting up the CI provider (TeamCity, TFS, CruiseControl etc), I highly recommend you looking at the official hosted Team Foundation Service here.
Although adding the custom build is very straightforward, I stumbled upon a few issues. The first problem was the fact that the project had a reference to an SDK. The default location for the SQLite SDK is here: C:\Program Files (x86)\Microsoft SDKs\Windows\v8.1\ExtensionSDKs. This works fine, as long as you build the solution locally. TFS is totally unaware of the SDK and as such the build failed straight away due to missing references.
The solution to this problem is to add the SDK(s) to you solution and check them in as part of your source code. This way, when the automated build is kicked off, TFS will be able to resolve the references and build the project. The first step requires that you add a folder to your solution where you will copy the SDK(s) files. You have two options:
- Add the folder at the solution level
- Add the folder to the project level
The folder can have any name but for the sake of simplicity we will call it “libs”. For this example, I will create it at the project level like this:
SolutionName\ProjectName\libs\Windows\v8.1\ExtensionSDKs
Next, you will need to copy the SDK(s) folder to the ExtensionSDKs directory, similar to the example below:
…\libs\Windows\v8.1\ExtensionSDKs\SQLite.WinRT81
Almost there. You have one more step in order to let your solution to know where to look for the SDK references. In Visual Studio, unload your project and then open the “projectName.csproj” in order to edit it. At the very bottom of the configuration, just below the <import project…> element, add the following setting as per the example below
<Import Project="$(MSBuildExtensionsPath)\Microsoft\WindowsXaml\v$(VisualStudioVersion)\Microsoft.Windows.UI.Xaml.CSharp.targets" />
<PropertyGroup>    <SDKReferenceDirectoryRoot>$(ProjectDir)libs\;$(SDKReferenceDirectoryRoot)</SDKReferenceDirectoryRoot>
</PropertyGroup>
This property allow us to override the default SDK location with our custom one to allow the project to build on any machine without the need to install the required SDKs. Save the .csproj file and reload the project. If you navigate to your references, you should notice that the location of the SDK reference has changed to the new custom one. If this doesn’t happen straight away (as it did in my case) make sure you have no typos and that the libs directory is in the right location.
NOTE: If you decide to place the libs folder at the solution level, you need to change $(ProjectDir) to $(SolutionDir) in the .csproj file.
At this stage you may think that all is well and you should get a successful build from TFS. Unfortunately, this is not the case. The default TFS Build Process is not compatible with Windows 8.1 and the build will fail with the multiple error messages like the one below:
App.xaml (11): Unknown type 'ThemeResource' in XML namespace "http://schemas.microsoft.com/winfx/2006/xaml/presentation"
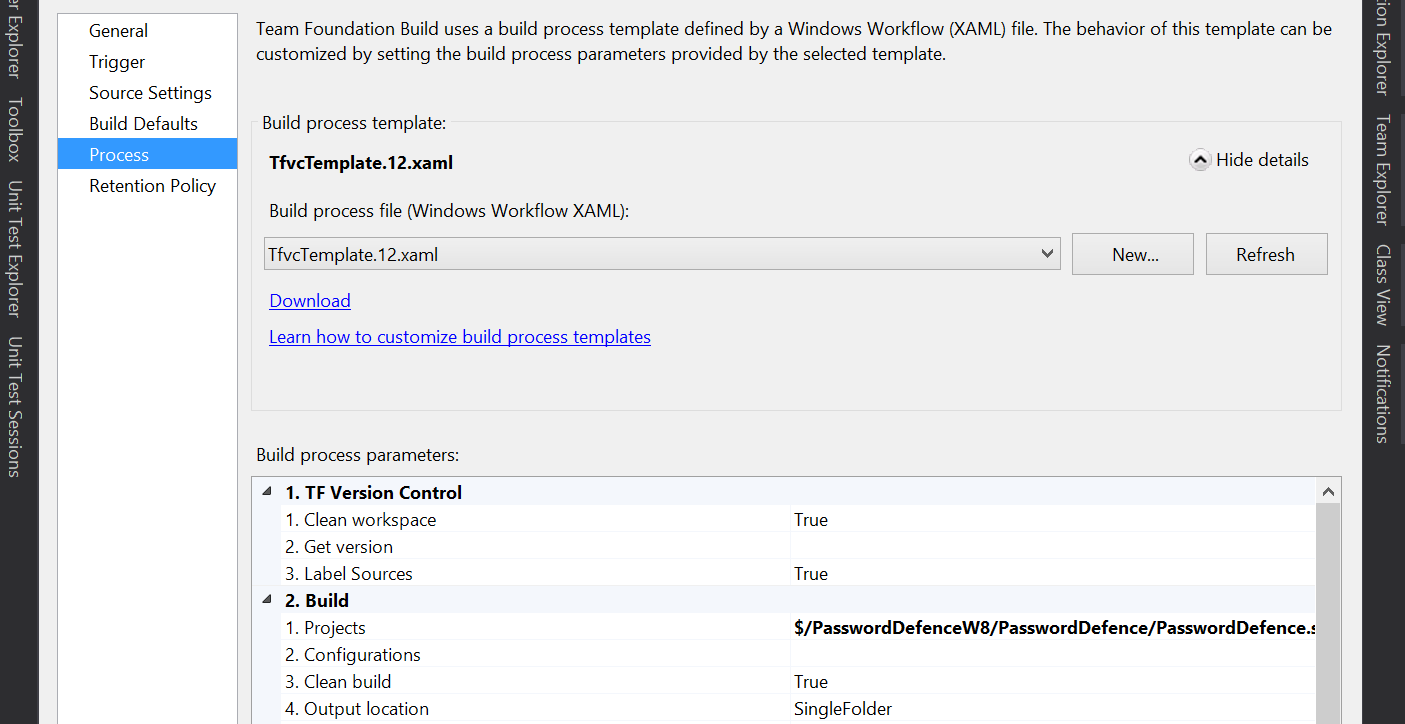
Fret not though, because the solution is easy. Open your TFS Build definition and navigate to the “Process” tab. Press on the “Show Details” on the right hand side to reveal the available process options and select the TfvcTemplate.12.xaml build process template from the drop down box as per the image below:
Save the build definition and check in your changes in order to kick off build. You should now get a nice successful green build and rest assured that your code is now under the watchful eye of your CI server.
Happy coding...