The new Azure PowerShell preview module is out. I use PowerShell on Azure to automate many tasks and it's something that we use in the team quite frequently. Yes, you can use the Azure Portal (website) to accomplish the same tasks but I like using PowerShell for a few reasons:
- Create repeatable and consistent tasks
- Share the files and knowledge that comes with it
- Automate all the things!
This preview release is the first major version taking it to 1.0. Unfortunately, it brings some breaking changes with it. For this reason, it's imperative that you read the documentation before jumping on the upgrade (like I did). In addition, Microsoft advises that this version is still in preview and should not be used for critical applications. If you need to use PowerShell to manage your existing Azure subscriptions and resources, you need to stick with version 0.9.8 for now.
You can find more details about the changes to the Azure Resource Manager cmdlets on [this Azure blog post.](https://azure.microsoft.com/en-us/documentation/articles/powershell-preview-resource-manager-changes/" target="_blank)
Installing the new Azure Resource Manager PowerShell modules.
-
If you already have a previous version of Azure Powershell (0.9.*) installed, then you need to uninstall it first. Go to Control Panel -> Add Remove Programs -> Microsoft Azure Powershell -> Uninstall
-
Open a new PowerShell window with elevated permissions (Run as Administrator)
-
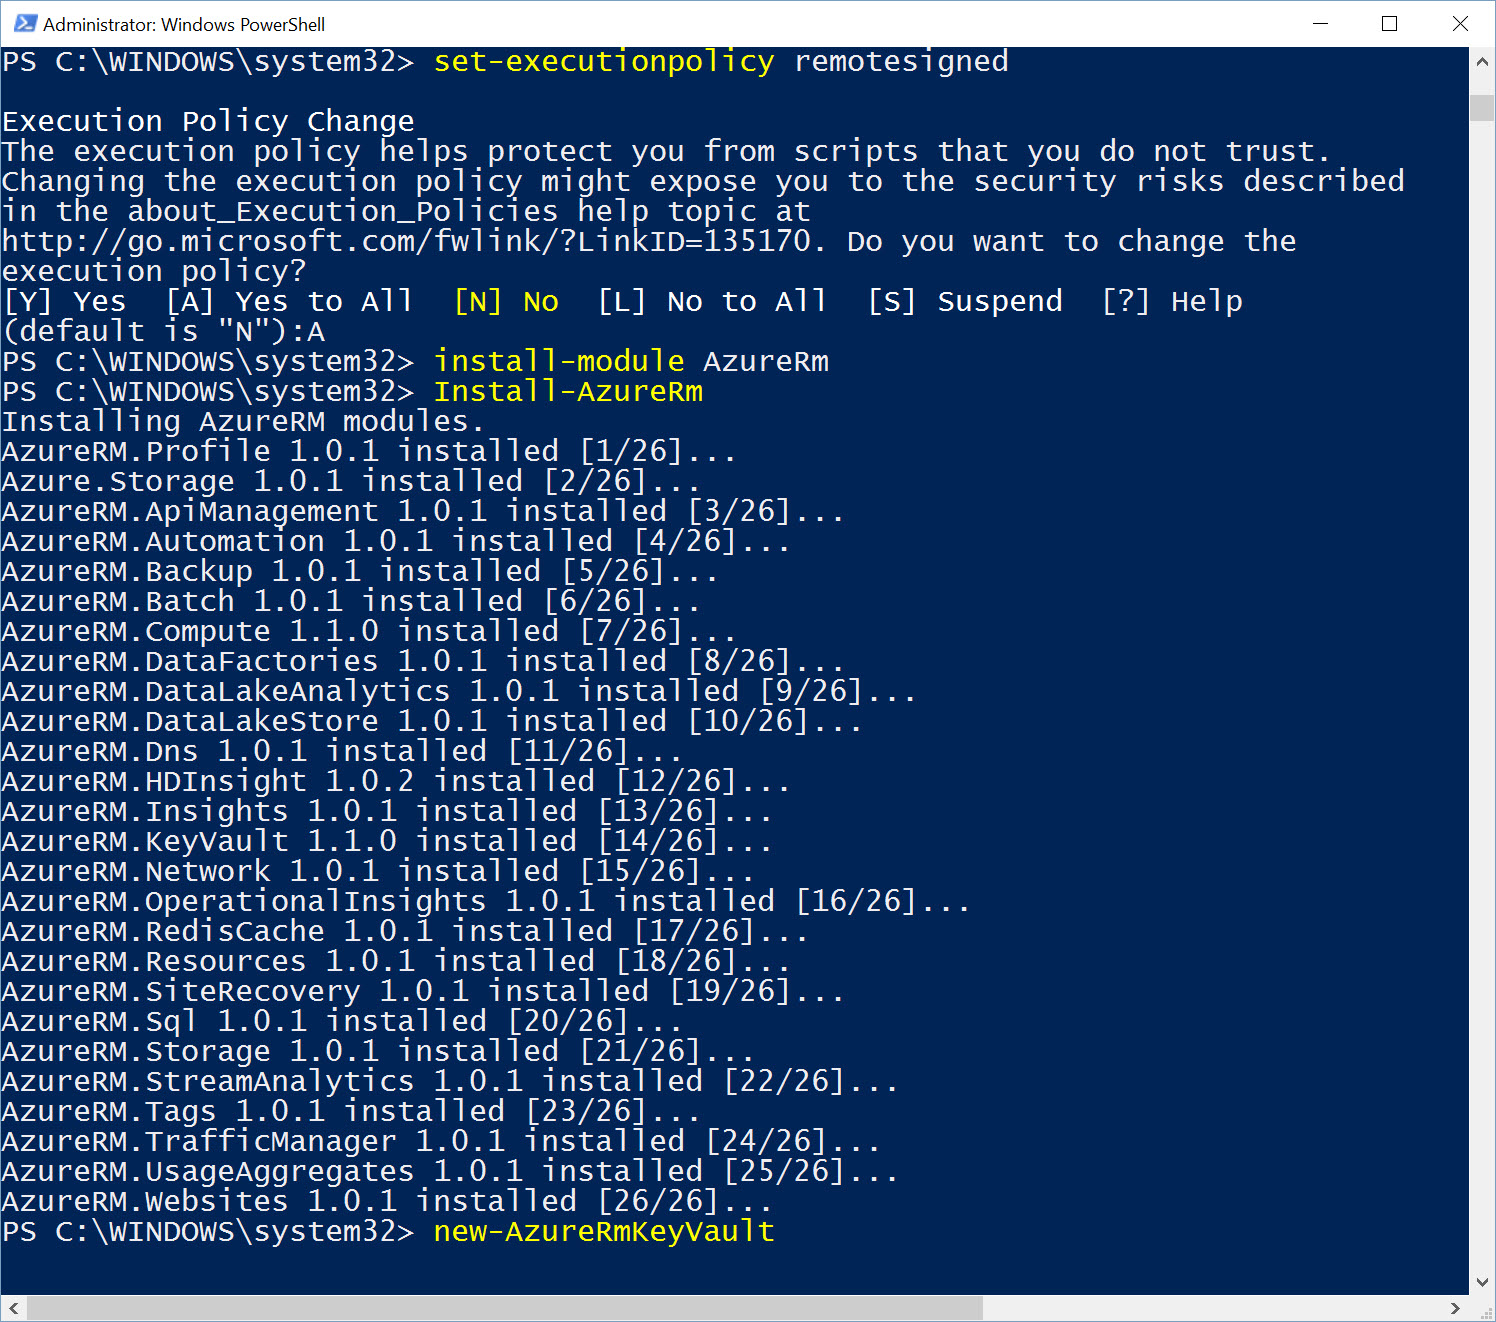
Enable the execution of remote scripts (allows you to download and install non-local scripts):
Set-ExecutionPolicy RemoteSigned -
Now we are ready to install the Azure Resource Manager module. In the PowerShell window, type:
Install-Module AzureRmIf you’re prompted to install NuGet (the .NET package manager) say “Yes”. You will need to rerun the above command once NuGet’s installed successfully. If you’re prompted to accept the download and installation say “Yes” -
Next, we need to install the new Azure PowerShell version. Type:
Install AzureRM
The current install process consists of 26 modules so it may take a while to download and install depending on your broadband speed. As a reference, mine took about 10 mins at 35Mbps download speed.
Importing the new modules
With the new version installed, we can now import the modules we need in order to work with Azure through Powershell.
If you want to import all the Resource Manager modules, just run the following command:
Import-AzureRM
Alternatively, to import a single AzureRM module run the following:
Import-Module AzureRM.Compute
Finally, to import the Azure Service Management modules, execute the following command:
Import-Module Azure
Azure Resource Manager vs Azure Service Management
These 2 terms may sound confusing and we all know that Microsoft loves messing with acronyms and renaming things. To remove any ambiguity, these two terms refer to 2 different REST APIs that enable access and management of Microsoft Azure cloud services. If you're wondering which API you should use the following should make it clear:
- Azure Service Management (ASM) – The “old” API
- Azure Resource Manager (ARM) – The “new” API
Each API has its pros and cons. The main problem is that for now there isn’t 100% cross-compatibility between them. In some cases, you may need to work with the ASM API but in most cases the ARM API should provide most of the functionality you need.