WinForms? In 2020? Why, yes I say. Because not everyone is fortunate enough to work on cutting edge technology or frameworks. But this shouldn't stop us, developers, from finding ways to modernize our solutions and adopt best practices. I know what you're gonna say: 'WinForms suck'. And I will agree to an extend. WinForms do come with a lot of bad rep and bad code by design - event handlers anyone? - but it also makes for a great, robust solution that can get you off the ground and with a fully running app in 2 days. Can you do it in 2 days? Absolutely, and this was the power of WinForms. Should you do it in two days? Most likely not as my guess is that you didn't follow the best advice for decoupling your code and making it it testable.
But we're not here to debate the virtues of WinForms. Instead, today I'm going to show you the step necessary to add modern authentication to your WinForms app using Azure Active Directory(AAD). There are many reasons that you may want to use AAD as your control plane for all your app security/auth even if you still authenticate against your ADFS. I will write a blog post at a later time on all the benefits of leveraging all the benefits of AAD in your apps.
In the meantime, if you don't have an AAD tenant, you can get a totally free following the instructions in my previous blog post on the subject :)
Below I describe the steps necessary to add AAD auth to you WinForms app
1. Register your app in Azure AD
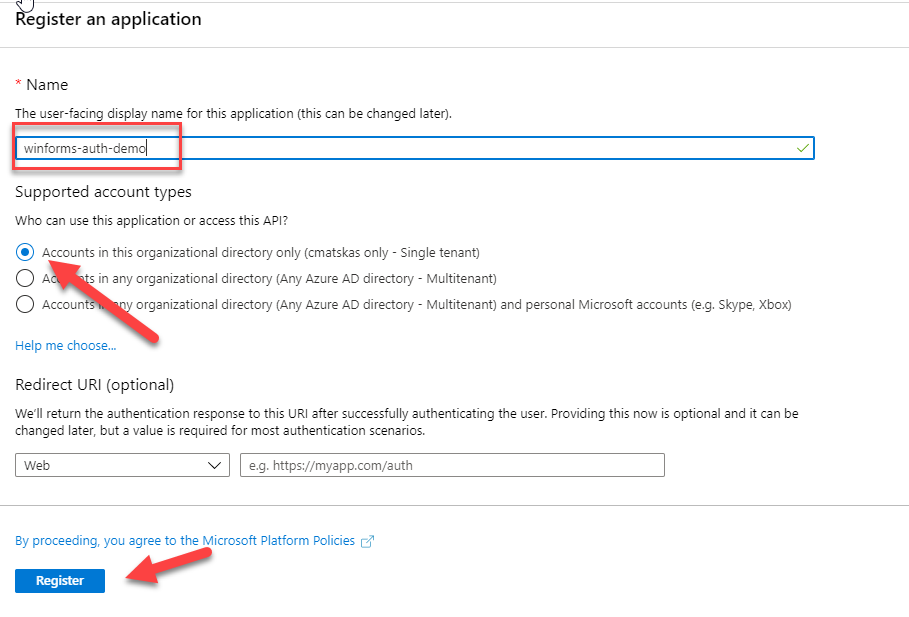
For our WinForms app to be able to authenticate users against Azure AD, we need to register the app in Azure AD. You can read all about Azure AD Apps in this doc, but the TL;DR version is:
Application objects describe the application to Azure AD and can be considered the definition of the application, allowing the service to know how to issue tokens to the application based on its settings.
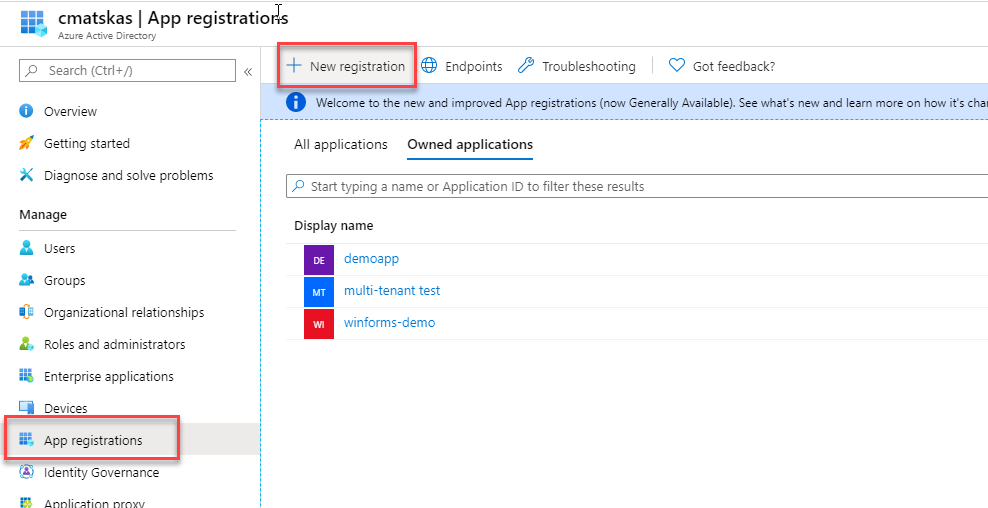
Log on to your Azure AD tenant in the Azure portal, open the Azure AD resource and head to the App Registrations to register a new app
Once you register you app, you need to configure the Authentication settings. In effect, we need to tell what kind of app we want to authenticate and provide a Redirect URI for our tokens.
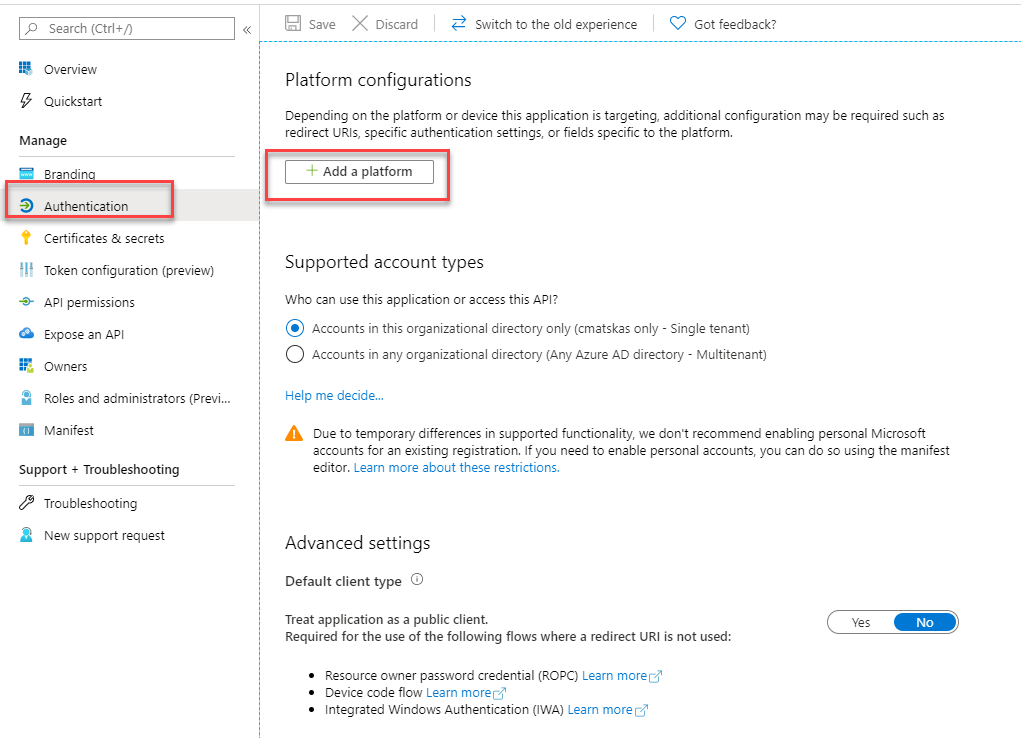
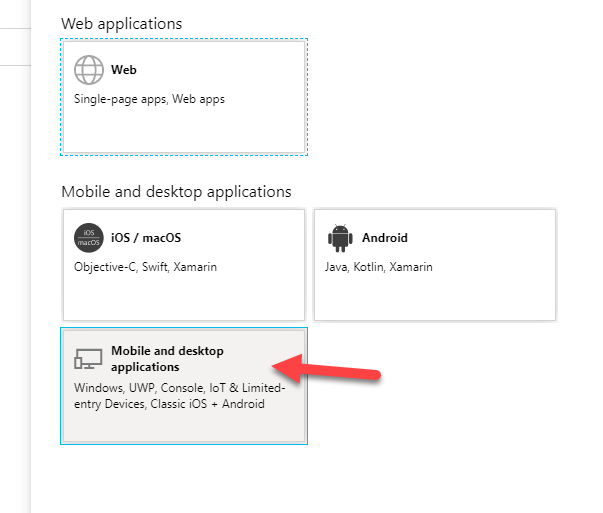
To make our lives easier, AAD already provides the default Redirect URI - lovely!
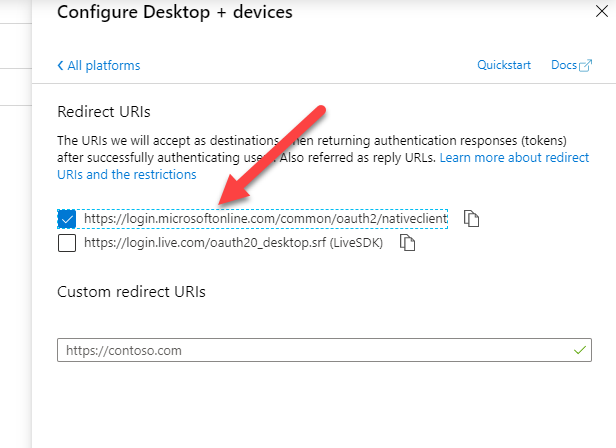
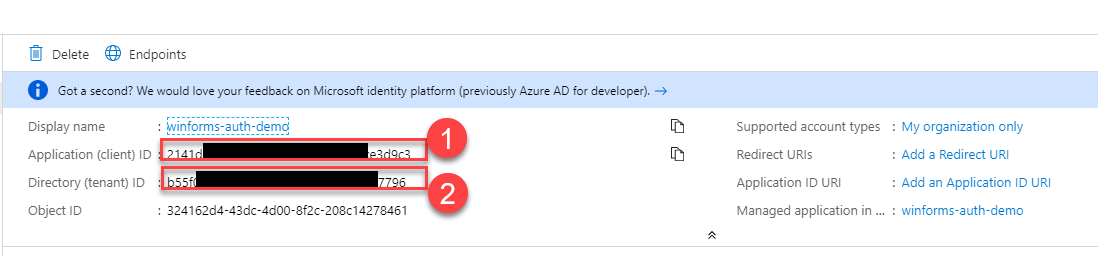
Make sure to press Save before going back to the Overview tab where you can grab the necessary details such as the App Id and Tenant which we will need to configure in our WinForms app.
This is all we need to configure in Azure AD. We are now ready to start the new authentication implementation
2. WinForms authentication with MSAL and AAD
The most common scenario is for WinForms apps to run in the context of the currently logged in user. There are many benefits with this as users don't need to log in separately. The normal workflow for most users is: log in to your desktop, fire up that beloved, battle-tested WinForms app and hey presto, you're now ready to go. Many enterprises however are moving to the cloud and love using AAD as the control plane. So you are now responsible for upgrading your existing apps to adopt the new reality. And you'll be pleasantly surprised to find that it takes a few lines of code - less than 50, including a local token cache to do this end-to-end! So, let's get started...
First, in Visual Studio, open up your NuGet Console and add the MSAL (Microsoft Authentication Library) package to your WinForms project with the following command:
Install-Package Microsoft.Identity.Client -IncludePrerelease
This will add the appropriate dll (library) to allow us to interact with AAD using C#. You could also achieve the exact same result using HTTP calls but why do this when there is a library ready to use?
Next, open the Program.cs file and add the following code:
I chose to put the auth bootstrap code in a separate method (lines 28-36) to keep it clean. You will also need to ensure that the ClientId and Tenant variables (lines 10,11) are set correctly based on your own settings. I stuck mine in environment variables to ensure that I didn't check them in source code by mistake.
It's very common for devs to accidentally leave sensitive info such as private keys and connection strings in GitHub or Azure DevOps by mistake. Make sure that security is part of your DevOps (SDLC) and code review process.
You also need to add the necessary references, in this case using Microsoft.Identity.Client;. At this point everything should resolve fine apart from the 'TokenCacheHelper'. That's a special class that we will use to cache our token info locally and avoid prompting the user to login every time!
In your WinForms project, create a new class called TokenCacheHelper.cs and copy paste the following code:
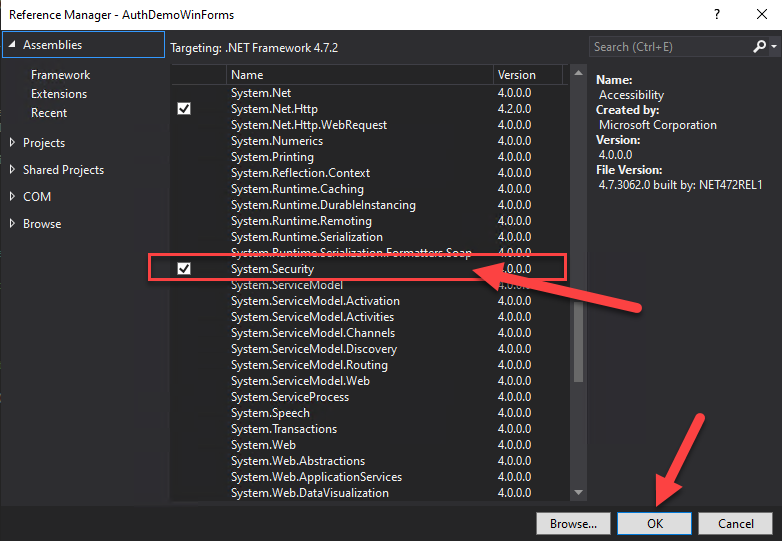
The ProtectedData API is in the System.Security.Cryptography; namespace which you will need to add manually. Go to your Solution Explorer --> References and right-click to add a Reference to System.Security
This code does 3 main things:
- Defines a location in the file system to store the cached data
- Adds an event handler to handle the storing of the access token
- Adds an event handler to deal with the retrieval of the access token
This cache will save us from unnecessary round trips to AAD, will make our application more user friendly and will keep our user sane as they won't have to enter their credentials every time they start the app :)
Upon a successful login, the following file should appear in the bin directory:
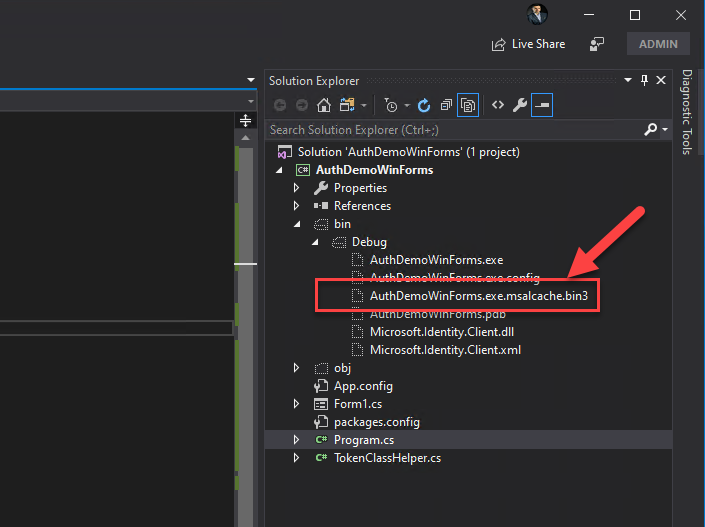
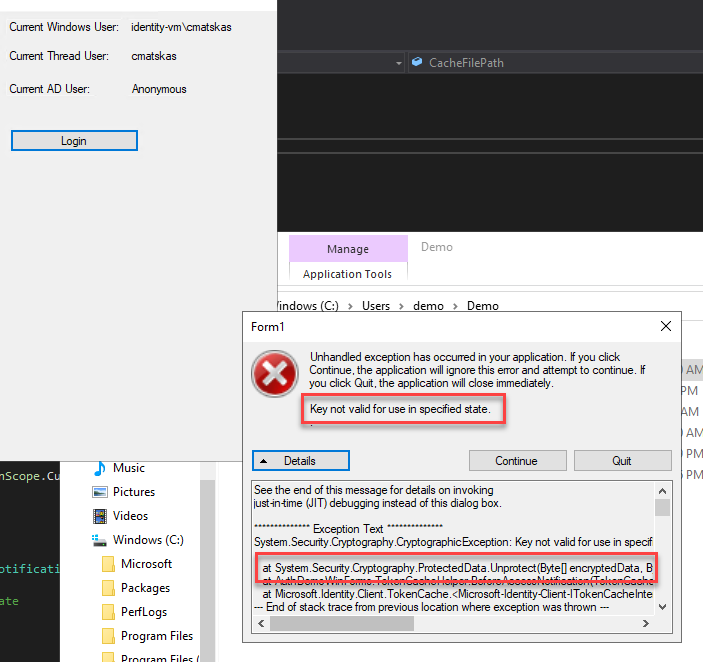
The file is encrypted (ProtectedData.Protect) and it's only accessible by the currently logged in user. As a test, I created a demo user, copied the files from the bin file into the demo user's workspace, i.e Users\demo and tried to run the app. The result was this glorious error message which goes to show that the cached data is protected and accessible only by the valid logged in user.
This was all the bootstrap code we needed. Next, we need to actually implement the authentication. My sample app is not particularly sophisticated, unlike regular line-of-business (LOB) apps, but I kept things simple to focus on the auth functionality above all.
On my main form, Form1.cs I added a button to handle the login/logout process. Event handlers FTW! In my code, I added two methods with async Task signature, one for Login() and one for the Logout().
For the sake of history, I also kept the 'old' code used to pull user info and append it to a label for reference:
WindowsIdentity current = WindowsIdentity.GetCurrent();
WindowsPrincipal windowsPrincipal = new WindowsPrincipal(current);
label1.Text = windowsPrincipal.Identity.Name;
To login against AAD, we have to use the following code:
Let's break it down...
First we attempt to retrieve the user info from the cache . If this is the first time we're using the app or we previously logged off, this will throw and exception and take us into the catch portion of the code. We then log a diagnostic message for good measure (not necessary) and kick off the interactive login to Azure AD. If all goes as planned, the method returns a AuthenticationResult which can be passed back to the calling code. At this point, the authentication flow is complete and we can decide what to do with the returned data. For example, I just append the information into a label like this (nothing sophisticated):
var authResult = await Login();
label4.Text = authResult.Account.Username;
The logout code is even simpler
We retrieve the accounts from the cache and then we call the RemoveAsync(accounts.FirstOrDefault()); to delete the cached token and log out the user. This doesn't make a call to Azure AD.
Summary
As you can see, in less than 50 lines of code, we were able to take a not-so-heapster-cool-app written with WinForms and C# and add modern authentication with Azure AD and MSAL. And this is only the beginning. Azure AD auth open a whole new space with MS Graph integration and access to a whole new world of data that can enrich the user experience.
If you only want to see the code in action and run it on your end, feel free to fork/clone the sample project from GitHub. You'll still need to register an app in AAD.
If you're interested, I plan to dive deeper into this and create more samples in subsequent posts but for now I hope you enjoyed this. Feel free to let me know if you have any issues or suggestions in the the comments below.