These days I spend a lot of time working with Azure. I also make a conscious effort to use all the tools available when managing my Azure resources. This helps me get a better understanding of the platform and allows me to move freely between devices. So what are these tools? Let's break it down:
- Visual Studio
- Azure CLI
- The portal
- PowerShell
Add Azure Resource Management (ARM) templates on top of these and you can see how provisioning and managing resources is now a much better experience. In addition, ARM templates allow us to take full advantage of CI/CD processes for our infrastructure.
ARM templates are JSON files that describe a resource and related dependencies. These files can sometimes be large and complicated so tooling support is important. Whenever I want to create resources quickly I have 2 options:
- Visual Studio 2015
- https://resources.azure.com (web only)
These options are great but somewhat limited. VS is Windows only and the portal is web-based and requires Internet connectivity. Today, I found out that VS Code, the new, light-weight, open-source, cross-platform code editor from Microsoft has added support for creating and editing ARM templates through a new [extension](https://marketplace.visualstudio.com/items?itemName=msazurermtools.azurerm-vscode-tools" target="_blank). This is excellent news!
This had me really excited because VSCode runs everywhere and doesn’t require Internet access unless you also want to deploy your ARM templates. Next, we'll see what’s required to install and start using the template.
Install VS Code
I will assume that you already have VS Code installed. If not, you can download it quickly for your OS from here:
https://code.visualstudio.com/
Install the VSCode extension
To be able to work with the JSON templates, we need to first install the extension by following these steps:
- Launch VS Code
- Open Quick Open (Ctrl+P)
- Paste the following command, and type enter
ext install azurerm-vscode-tools
This will download and install the language support for ARM JSON templates. Job done!
Setup VS Code to use the extension
The previous step installed the tooling support but now we need to configure VS Code to use the JSON templates by following the steps below:
- Copy the contents of the file from the azure-xplat-arm-tooling repo to your clipboard
https://github.com/Azure/azure-xplat-arm-tooling/blob/master/VSCode/armsnippets.json - Launch VS Code
- In VS Code, navigate to File -> Preferences -> User Snippets -> JSON
- Paste the contents of the file on step 1 into your user snippets file before the final "}"
- Make sure the JSON looks OK and there are no squiggles anywhere
- Save and close the user snippets file
That's all that's needed to start using the ARM specific snippets. Next, we’ll put this setup to the test.
Playing with ARM templates in VSnCode
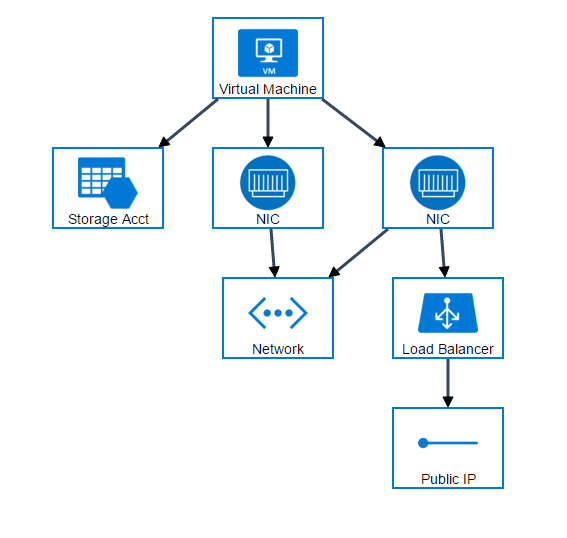
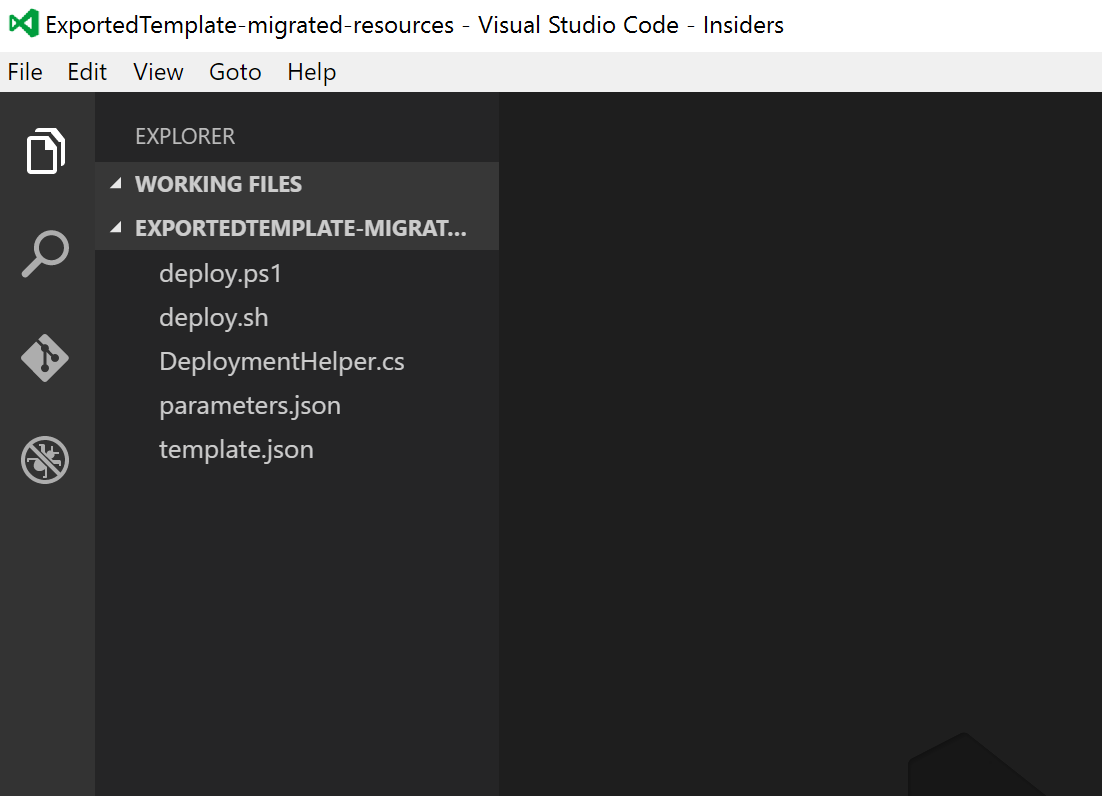
The easiest way to test this is to grab one of the Quick Start Templates available on [Github](https://github.com/Azure/azure-quickstart-templates" target="_blank) or use one of your own. You can easily export a template for any of your v2 resources of the portal. For the purpose of this post, I exported the template of one of my sample SQL Services (SQL PaaS). Once you have the unzipped folder available on your local drive, open it in VS Code. This is how mine folder looks in VS Code
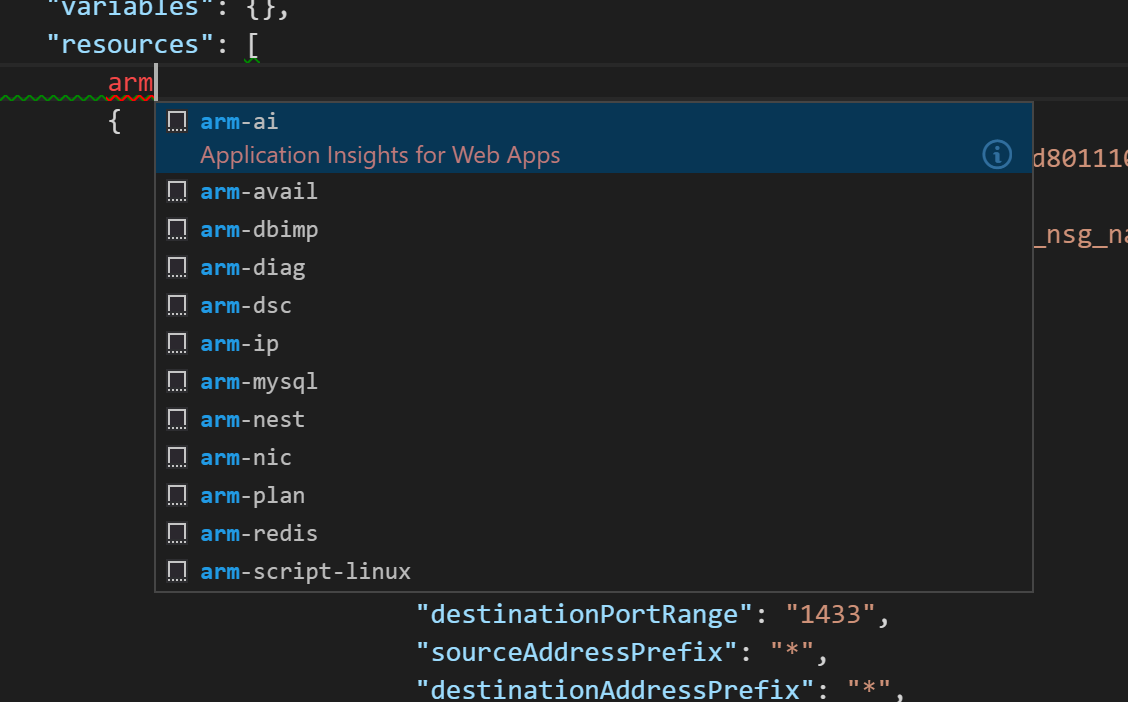
Next, we need to open the template.json file so that we can edit the template and add some additional resources. After the "resources": [ press enter to start a new line. If you type arm you’ll be presented with a whole list of options. These are the available ARM template snippets you can use. It should look like this:
If you’re not presented with the options, go back and repeat the setup steps.
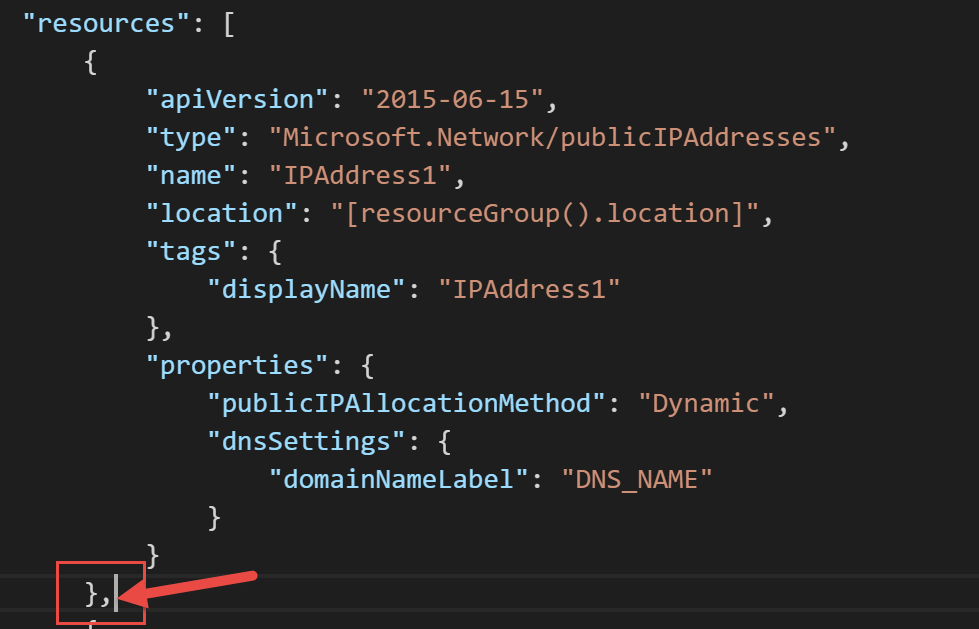
Now you can go ahead and choose the snippet you wish. I chose arm-ip to create a new public IP address. Ensure that you put a comma after the closing bracket "}" of the newly created resource or your template will be broken.
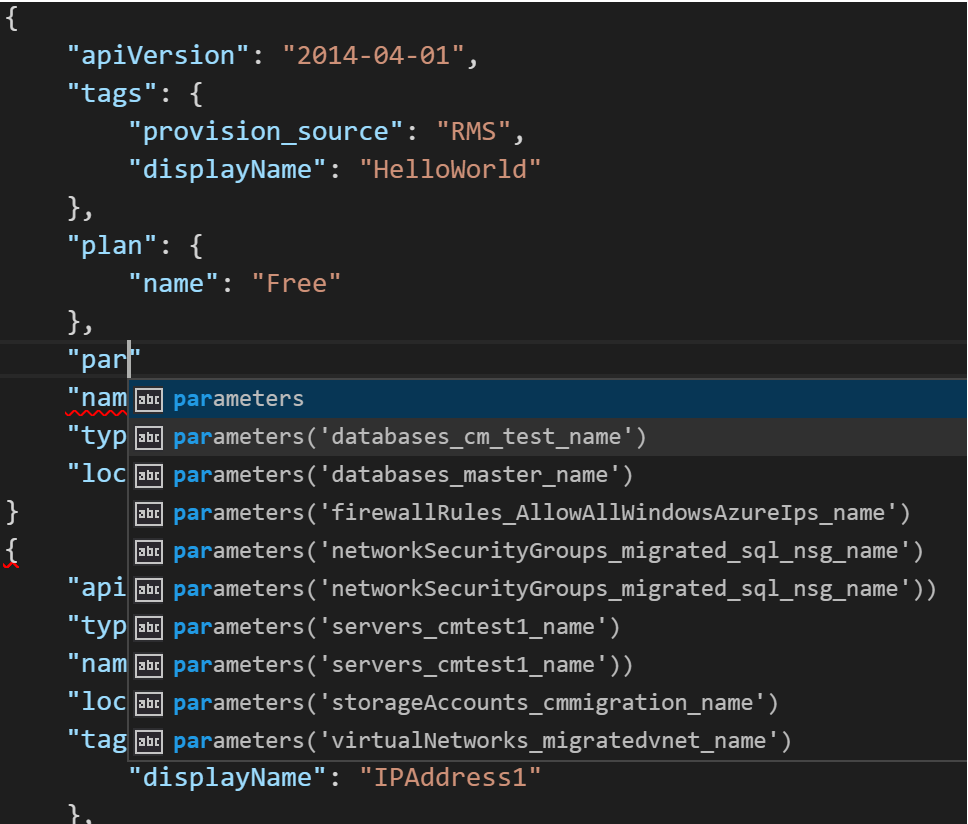
You’ll notice that newly created snippets have tokens which you can type in values for. You can also tab through the different tokens. One thing I really like in the editor is the built-in IntelliSense. As you edit your templates dropdowns appear with suggestions about the available values. Once you’ve selected a value you can hit Ctrl+Space to see the list of options. To get this to work, you’ll need to:
- Open a double bracket
" - Press Ctrl+Space
- Select an option from the dropdown
- For the value, open a double bracket
" - Press Ctrl+Space
- Select an option from the dropdown
Your IntelliSense options should look like this:
Descriptions for properties are displayed as you edit the property or mouse over them.
Caveat: this will only work if a description is defined in the schema.
If you have any schema validation issues in your template, you'll see the familiar squiggles in the editor. You can view the list of errors and warnings by hitting Ctrl+Shift+M or clicking the glyphs in the lower left status bar.
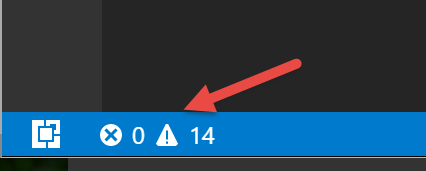
By now you may have noticed some squiggles in the example template in this post. Surprisingly, even though I exported this template from the portal, there are errors! And VS Code is kind enough to tell me how to fix them, all 14 of them!
Deploying our new resources
Once you fix all the errors, you can deploy the new resources following the instructions below:
Windows
- Open a PowerShell command prompt
- To login type:
Login-AzureRmAccount - For multiple subscriptions get a list by typing:
Get-AzureRmSubscriptionto list all your subs - Now select :
Select-AzureRmSubscription -SubscriptionId <Subscription Id> - Update the parameters in your parameters.json file
- Run the Deploy.ps1 to deploy your template on Azure
OSX/Linux
- Open a terminal window
- To login type
azure login - Use the
azure account set <subscriptionNameOrId>to select the right subscription - Update the parameters in the parameters.json file.
- Run
azure group deployment create -f <PathToTemplate>to deploy the template
Isn’t Open Source awesome? Another tool for your tool belt. And make sure you fire up a comment below if you have any questions.